A Guide to Finished Basements Cost in Vancouver
December 29, 2025

So, what does it actually cost to finish a basement in Vancouver? The number can swing pretty wildly, but you're generally looking at a range between $50 to over $200 per square foot.
For a typical 800-square-foot basement, that means your total investment could be anywhere from $40,000 for a simple, clean finish to well over $150,000 for a high-end conversion with all the bells and whistles. It really comes down to the vision you have for the space.
Your Vancouver Finished Basement Cost at a Glance
Before we get into the nitty-gritty of permits and line-item costs, let's get a ballpark idea of what you might spend. Think of your unfinished basement as a blank canvas—every choice you make, from the layout to the light fixtures, will influence the final price tag.
Are you picturing a simple, open-concept rec room for the kids? Or are you planning a fully loaded, legal rental suite to generate income? Adding a bathroom, a small kitchen, or needing to move plumbing and ductwork are the kinds of decisions that significantly move the needle on cost. A basic open space with standard flooring and drywall will land on the lower end, while custom millwork, a full bathroom with heated floors, and cutting in a new egress window will push you toward that higher figure.
Estimated Cost Ranges by Finish Level
To give you a clearer starting point, we've broken down the typical costs you'll see across Vancouver and its surrounding communities. These are just estimates, of course. The only way to get a firm number is to get a detailed quote from a reputable contractor.
Still, this table should give you a solid idea of what to budget.
Estimated Finished Basement Costs in Vancouver and the GVA
This table provides a quick look at typical cost ranges per square foot and total project estimates, depending on the level of finish and complexity you choose.
| Finish Level | Cost per Square Foot (Estimate) | Average 800 sq ft Project (Estimate) |
|---|---|---|
| Basic Finish | $50 – $85 | $40,000 – $68,000 |
| Mid-Range Finish | $90 – $150 | $72,000 – $120,000 |
| High-End/Custom Finish | $160+ | $128,000+ |
Think of this table as your starting point. It helps you set a realistic budget framework before you dive deeper into planning your renovation. It's the first step toward turning that underused space into a valuable part of your home.
Breaking Down Your Basement Renovation Budget
Seeing a total cost for a finished basement is one thing, but knowing exactly where your money goes is what gives you control. A basement reno budget isn't just one big, intimidating number; it’s a series of smaller costs, each tied to a specific part of the job. Once you understand this breakdown, you can plan your project without those dreaded, costly surprises.
Think of it like building a custom car. First, you need a rock-solid chassis and a dependable engine—that’s your structural work and essential systems. Then you get to the fun stuff: the paint, the interior, the custom wheels. Those are your finishes. Both parts are critical, but they have very different roles and, of course, different price tags.
The Three Pillars of Basement Finishing Costs
Every basement project, whether it's in West Vancouver, Port Moody, or Port Coquitlam, really comes down to three core spending categories. Seeing how your budget gets split across these areas helps you grasp the full scope of your investment.
- Structural and Preparatory Work (15-25% of Budget): This is the literal foundation of your project. It covers everything from demolition and framing new walls to, most importantly, making sure the space is bone-dry and secure.
- Mechanical, Electrical, and Plumbing (MEP) Systems (20-30% of Budget): This is the "behind-the-scenes" work that makes a basement truly liveable. We're talking about running new wiring, installing plumbing for a bathroom or wet bar, and hooking up the HVAC for proper airflow.
- Finishes and Fixtures (45-65% of Budget): This is the part you'll see and touch every day, where your personal style shines through. It includes drywall, paint, flooring, lighting, cabinetry, and all the final details that make the space yours.
The chart below shows how different levels of finishes can dramatically affect the overall cost per square foot.
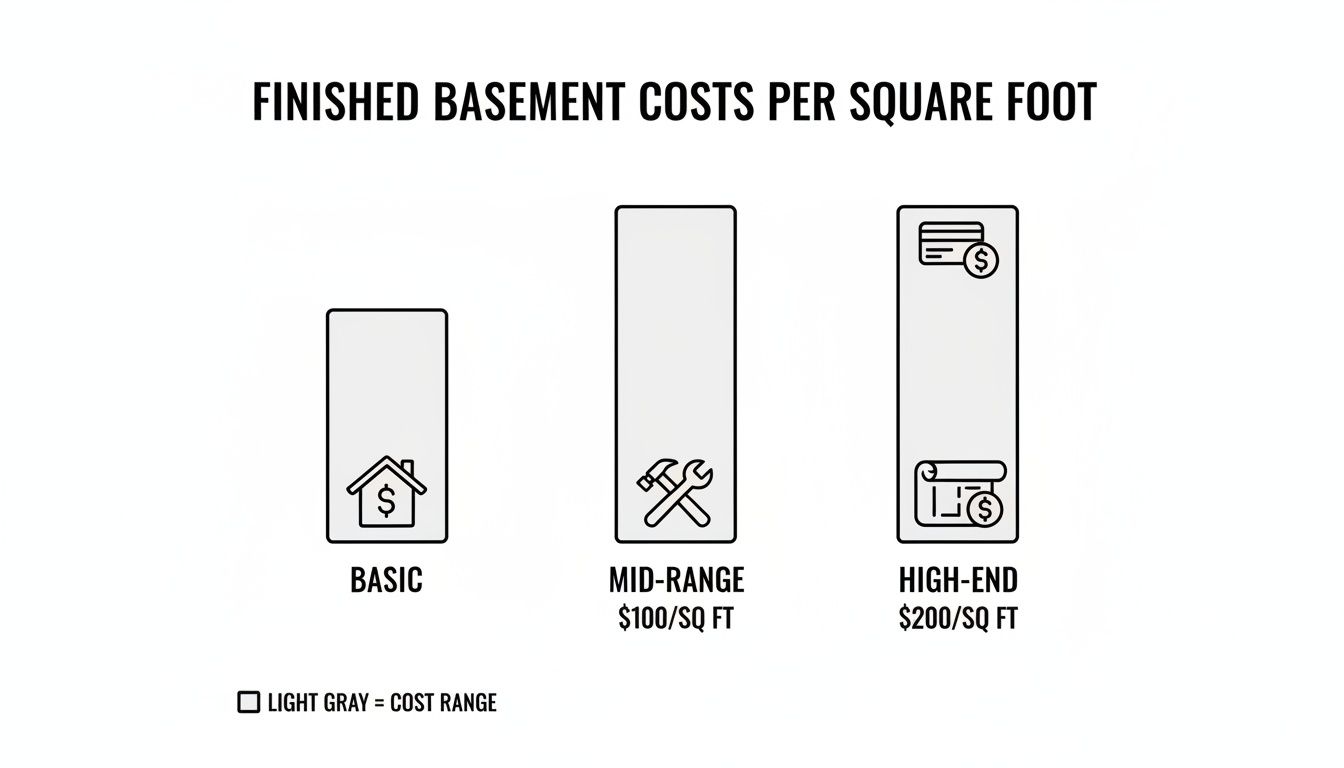
As you can see, the jump from a basic finish to a high-end, custom job is significant. That difference almost always comes down to the quality and complexity of the materials and fixtures you choose in that final stage.
To give you a clearer, real-world picture, here’s how the numbers might look for a typical mid-range project in Vancouver.
Sample Line-Item Budget for a Mid-Range Vancouver Basement
This table breaks down a hypothetical budget for an 800-square-foot basement. It shows how the total cost is distributed across the different phases of the renovation.
| Project Phase | Percentage of Total Budget | Estimated Cost Range (for 800 sq ft) |
|---|---|---|
| Design, Permits, & Engineering | 5% – 10% | $4,000 – $8,000 |
| Demolition & Site Prep | 3% – 5% | $2,400 – $4,000 |
| Concrete & Waterproofing | 5% – 10% | $4,000 – $8,000 |
| Framing | 7% – 12% | $5,600 – $9,600 |
| HVAC & Mechanical | 8% – 12% | $6,400 – $9,600 |
| Plumbing | 10% – 15% | $8,000 – $12,000 |
| Electrical | 8% – 12% | $6,400 – $9,600 |
| Insulation & Drywall | 10% – 15% | $8,000 – $12,000 |
| Finishes (Flooring, Paint, Trim) | 20% – 25% | $16,000 – $20,000 |
| Fixtures & Cabinetry | 10% – 15% | $8,000 – $12,000 |
Remember, these are estimates. Your final costs will depend on the unique conditions of your home and the specific materials you select with your contractor.
Pillar 1: Foundational Prep Work
Before a single new wall goes up, the existing space has to be prepped. This stage is non-negotiable if you want a quality result that lasts. It usually kicks off with demolition to clear out any old, non-structural partitions and give us a clean slate.
During this phase, we tackle the single biggest enemy of any below-grade space in Vancouver's climate: water. Proper waterproofing is absolutely essential to prevent mould, rot, and headaches down the road. This could mean sealing foundation cracks, installing a sump pump, or putting in an interior drainage system. It's not the most glamorous part of the job, but spending money here will save you thousands in future repairs.
For instance, the initial demolition—costing between $3.00 and $11.00 per square foot—often uncovers hidden water issues. Fixing these problems with proper waterproofing can range from $1,900 to $6,500 before any real building can even start. You can find more insights about basement remodeling costs and how to budget for them.
Key Takeaway: Whatever you do, don't cut corners on prep work. A dry, properly prepared basement is the most important factor in a successful renovation. A thorough inspection before demolition can save homeowners an average of 18% on unexpected repair costs.
Pillar 2: Essential Systems
Once the foundation is secure, it's time to install the systems that bring your basement to life. This is the "engine" of your new space—all the electrical, plumbing, and HVAC work. These systems have to be installed to meet the BC Building Code, not just for compliance, but for your family's safety and comfort.
- Electrical: This involves running new circuits for outlets and lights, potentially adding a sub-panel (a must for a legal suite), and wiring for special features like a home theatre or heated floors.
- Plumbing: If you're adding a bathroom, kitchenette, or laundry, we need to run new lines for hot and cold water as well as drainage. This can be a major cost, especially if we have to break up concrete to do it.
- HVAC: You can't have a comfortable space without proper heating and ventilation. This usually means extending your existing ductwork or adding new heat sources like baseboard heaters to keep the space warm and ensure the air is circulating properly.
Pillar 3: The Finishing Touches
This is the final phase, where your vision becomes a reality. It's also where the biggest chunk of your budget goes. Your choices here have the most direct impact on the final cost of your finished basement, as this is where you decide between standard-grade materials and high-end upgrades.
Key elements at this stage include:
- Insulation and Vapour Barrier: Crucial for energy efficiency and moisture control in our damp Vancouver climate.
- Drywall, Taping, and Mudding: This is what creates those smooth, seamless walls and ceilings ready for paint.
- Flooring: Your options are wide open, from budget-friendly vinyl plank to engineered hardwood or cozy, plush carpeting.
- Painting and Trim: The final coat of paint, along with baseboards and door casings, really ties the whole room together.
- Fixtures and Cabinetry: This is where we install light fixtures, bathroom vanities, custom built-ins, or kitchenette cabinets.
By understanding how your budget is split across these three pillars, you can have a much more productive conversation with your contractor, making smart choices that align with your goals and deliver a space that’s not just beautiful, but built right.
Getting It Right: Permits and Legal Suite Rules
Here in Metro Vancouver, finishing a basement is often about more than just a home theatre or a playroom. For many homeowners, it's a savvy move to create a legal rental suite. But it's crucial to understand that there's a massive gap between a simple finished space and a fully compliant, income-generating apartment. The path you choose right at the beginning will dramatically shape your project's scope, timeline, and ultimately, your finished basement cost.
Finishing your basement for your own family's use is one thing. But creating a secondary suite is a whole other ball game. That term means you're building a separate, self-contained home inside your own, which kicks in a much stricter set of rules from the BC Building Code and local bylaws in Vancouver, Burnaby, Richmond, and beyond. These aren't just suggestions—they're iron-clad requirements to keep future tenants safe.
The Legal Suite Non-Negotiables
Turning that basement into a proper legal suite means hitting a number of specific, non-negotiable building and safety standards. Honestly, these requirements are the single biggest factors that drive up the cost and complexity beyond a basic reno. Getting them right from the get-go is the only way to avoid headaches, expensive rework, or legal trouble down the road.
Here are the key things that almost every municipality from the City of North Vancouver to New Westminster will insist on:
- A Separate Entrance: Your tenants need their own door to the outside, completely independent of your main entrance.
- Egress Windows: Every bedroom needs a window that’s big and low enough for someone to climb out of in an emergency. This often means cutting a new, larger opening in your concrete foundation, which is a major job.
- Minimum Ceiling Height: To be considered a livable space, you'll need to meet a minimum ceiling height, which is usually around 6'8" (2.0 metres).
- Fire Separation: This is a big one. The suite must be sealed off from the rest of the house with special fire-rated drywall on the walls and ceiling, plus a solid-core door that closes automatically to slow a fire's spread.
- Independent Heating & Ventilation: The suite can't just share your furnace. It needs its own heating controls and a separate ventilation system to maintain air quality and comfort.
A huge mistake we see people make is thinking they can just add a stove to a wet bar and call it a day. The moment you install cooking appliances, you've officially created a "dwelling unit" in the eyes of the city. That single act triggers all the most stringent safety rules, and can easily add tens of thousands to your project for things like upgraded electrical, proper ventilation, and fire suppression.
The Permit Process and What It Costs
Diving into a project without the right permits is a recipe for disaster. The city can issue stop-work orders, slap you with fines, or even force you to rip out perfectly good work. Even worse, unpermitted renovations can void your home insurance, leaving you dangerously exposed.
The good news is that the permit fees themselves are a fairly small slice of your overall budget. These fees go straight to your municipality—whether it's Coquitlam or the District of North Vancouver—to cover the cost of plan reviews and inspections.
Typically, You'll Need These Permits:
- Building Permit: The main one, covering framing, insulation, drywall, and all the structural stuff.
- Electrical Permit: A must-have for any new wiring, outlets, lights, or if you need to upgrade your main panel.
- Plumbing Permit: Required for adding any new bathrooms, a kitchen sink, or laundry hookups.
As a rule of thumb, you should budget about 1-2% of your total project cost for the city's permit fees. For a typical legal suite, that works out to somewhere between $1,000 and $4,000. Just remember, that number doesn't include the cost of having architectural plans drawn up or getting any engineering reports, which are often required to even submit your application.
For homeowners planning a full suite with a kitchen, a pro's guidance is worth its weight in gold; our guide on kitchen renovations in Vancouver can give you a better sense of what that specific piece involves.
Ultimately, compliance isn't optional. For a great overview, you can read more about navigating regulations and permits and why it's so important. Your absolute best bet is to partner with an experienced contractor who lives and breathes the specific bylaws in your city. It's the surest way to keep your project on track and on budget.
Understanding Key Cost Drivers and Budget Variables
Ever wonder why a finished basement in Burnaby might cost $60,000, while a similar-sized project just over the bridge in North Vancouver can easily top $140,000? It’s not just about location; it all comes down to the choices you make. The final price tag on your basement renovation isn't a fixed number. It’s a dynamic total shaped by dozens of decisions, from major structural changes right down to the style of light fixtures you pick.
Think of your budget as a set of levers. If you push one lever up—say, for a luxurious, spa-like bathroom—you'll likely need to pull another one down, maybe by choosing a more practical flooring option. Understanding these cost drivers gives you control. It allows you to make smart trade-offs and ensures your new space perfectly matches your vision and your financial comfort zone.

Project Scope and Complexity
The biggest thing that moves the needle on your budget is the sheer scope of the work. What you actually plan to do down there dictates almost everything that follows. A simple, open-concept family room is a world away from building a multi-room guest suite complete with a bedroom and a full bathroom.
- Bathrooms and Kitchenettes: Let’s be clear: adding plumbing is one of the most significant costs in any basement project. A simple two-piece powder room is a manageable expense. But a full bathroom with a custom-tiled, walk-in shower? That alone can add $20,000 – $35,000+ to your project. The same goes for a kitchenette; a basic wet bar is one thing, but a proper food prep area needing dedicated circuits, plumbing, and ventilation is a much bigger investment.
- Layout Changes: Need to get rid of those awkward support posts to create that open feel you're dreaming of? That's not just a weekend job. It requires engineering sign-offs and serious structural work, adding thousands to the bottom line. Even just framing new rooms adds up in labour and materials for studs and drywall.
- Specialty Rooms: If you’re thinking about a soundproofed home theatre, a climate-controlled wine cellar, or a home gym with a reinforced floor, get ready for a higher price tag. These custom spaces all come with very specific—and more expensive—requirements.
Material Quality and Finishes
Right after the scope, the quality of your materials and finishes has the biggest impact on your budget. This is where you have the most control to dial the cost up or down. You can really make the project your own by making strategic choices between standard, high-value options and high-end luxury.
Flooring is a perfect example. You could go with luxury vinyl plank (a fantastic, durable choice for basements) for around $5 per square foot, or you could opt for a high-end engineered hardwood that runs over $20 per square foot. For an 800-square-foot space, that's a difference of $12,000 or more on a single line item. The same logic applies to insulation; it pays to understand your options. For a great breakdown, check out this resource comparing spray foam vs. blown-in insulation.
The Trade-Off Principle: Upgrading one feature often means simplifying another. If you've fallen in love with premium quartz countertops for your wet bar, you can balance the budget by choosing standard, off-the-shelf cabinetry instead of fully custom millwork.
Structural and Unforeseen Issues
The age and condition of your house, especially in older neighbourhoods across New Westminster, Vancouver, or Burnaby, play a huge role. Once we open up the walls, we might find some surprises that have to be dealt with to meet modern building codes and protect your investment.
These "unforeseen" costs aren't uncommon and can include:
- Foundation Repairs: Dealing with cracks or any signs of water seepage is non-negotiable before any finishing work begins.
- Asbestos or Mould Remediation: A common issue in older homes that requires certified professionals for safe removal.
- Outdated Electrical or Plumbing: Bringing old systems up to today's code is a must-do for safety.
This is exactly why getting an experienced contractor in to look at the space early on is so valuable. We can often spot potential red flags before they become major budget-busters. You can read more about why this is so important here: the importance of getting a contractor to assess a property’s potential before purchase. As a rule of thumb, always build a 5-10% contingency fund into your budget. It’s the smartest way to handle surprises without derailing your project.
How Long Will It Take and What’s My Return?
A basement renovation is a big undertaking, both in time and money. It's smart to go in with your eyes open. Knowing the timeline helps you plan your life around the disruption, and understanding the return on investment (ROI) helps you see the project for what it is: a serious upgrade to your home's value.
A Realistic Project Timeline
Every project has its own quirks, but a full basement renovation, whether in Coquitlam, Port Coquitlam, or the North Shore, tends to follow a well-trodden path. Trying to rush these steps is a classic mistake that almost always leads to costly do-overs. Patience really is a virtue here.
For a standard 800-square-foot basement conversion, you should budget for 10 to 16 weeks of actual construction time. Keep in mind, this clock doesn't start ticking until after the design and permitting phase is complete, which can easily add another 4 to 12 weeks depending on how busy your local municipality is.
Here’s how that time generally breaks down:
- Phase 1: Design & Permitting (4–12 weeks): This is the homework stage. We're drawing up detailed plans, you're picking out materials, and we're submitting the whole package to city hall for the official green light.
- Phase 2: Demolition & Prep (1–2 weeks): Out with the old. We'll clear the space, tackle any hidden moisture or foundation issues, and get the bare-bones structure ready.
- Phase 3: Framing & Rough-Ins (2–4 weeks): This is when it starts to look like a real space. Walls go up, and the electricians and plumbers lay all the vital groundwork of wires and pipes. This phase always ends with crucial city inspections.
- Phase 4: Insulation & Drywall (2–3 weeks): Once the inspectors sign off, we insulate for warmth and sound, then hang, tape, and mud the drywall until the walls are perfectly smooth.
- Phase 5: Finishing (3–5 weeks): The fun part! This is where the vision comes to life. Flooring goes down, paint goes on, and all the final touches like trim, light fixtures, cabinetry, and doors get installed.
Making the Investment Pay Off
In the hot Metro Vancouver real estate market, a professionally finished basement isn't just a bonus—it's a massive selling feature. It adds functional living space for your family and can seriously bump up your home's resale value, letting you get back a huge chunk of what you spent.
Industry data consistently shows that a basement remodel delivers an ROI between 50% and 75%. In a market as competitive as ours, a beautifully finished legal suite can push that return even higher, making it one of the smartest financial moves a homeowner can make.
If you’re in Burnaby, Richmond, or Port Moody and you're adding a legal secondary suite, the numbers get even better. Your basement transforms from a simple value-add to a cash-flow machine.
Curious about how long it would take to pay for itself? Here's a quick way to run the numbers:
- Calculate Annual Gross Income: (Your Projected Monthly Rent) x 12
- Estimate Annual Expenses: Factor in a bit extra for utilities, insurance, and property taxes (budget around 15-20% of your gross rent).
- Find Your Net Income: (Annual Gross Income) – (Annual Expenses)
- Calculate Your Break-Even Point: (Total Renovation Cost) / (Annual Net Income) = Years to Recoup Your Investment
Suddenly, that renovation cost doesn't look like an expense. It looks like an asset that starts paying you back from day one.
Choosing the Right Vancouver Renovation Partner
You’ve got your budget dialled in and a clear vision for what you want. Now comes the most important decision you'll make for the entire project: choosing the right team to build it. This step is far more critical than picking out tile or paint colours. A great contractor is your project's quarterback, guiding you through the complexities, while the wrong one can quickly turn a dream project into a nightmare.
In a hot market like Vancouver and its surrounding cities, finding a top-notch renovation partner requires some legwork. It’s never about just grabbing the lowest quote. You're looking for a qualified, insured, and transparent professional who will protect your investment and keep the project on track from the first swing of a hammer to the final walkthrough.
Your Contractor Vetting Checklist
Before you even think about signing a contract, you need to do a bit of due diligence. This isn't being difficult; it's being smart. These simple checks are your best defence against headaches down the road.
- Verify Licenses and Insurance: Make sure they have a current business license for your city, whether that's Vancouver, Burnaby, or New Westminster. Even more importantly, ask for proof of liability insurance (to cover accidental damage to your property) and confirm they have active WorkSafeBC coverage for every single person on site. Don't take their word for it—ask for the paperwork.
- Review Relevant Portfolios: You want to see basements they've actually finished. A contractor might be a wizard at kitchens, but that doesn't mean they understand the nuances of sub-grade waterproofing or the specific building codes for a legal secondary suite. Look for proof they’ve nailed projects just like yours.
- Check References: This is huge. Actually call their past clients and ask real questions. How was the communication? What happened when an unexpected problem popped up? Did they finish on time and on budget? This is where you get the real story.
The Hallmarks of a Professional Partnership
Paperwork aside, you can spot a true professional by how they operate. From day one, you should see clear communication and meticulous documentation—these are the tell-tale signs of a well-run company.
A detailed, written contract isn't just a formality—it's the foundation of your entire project. It should clearly outline the full scope of work, a specific payment schedule tied to project milestones, and the exact materials to be used. Ambiguity in a contract is a major red flag.
Look for a team that makes you feel like a partner, not just a client. A reliable contractor provides a transparent payment schedule and keeps you in the loop with regular updates, so you’re never left guessing. To get a better sense of what this relationship should look like, check out this guide on the role of a general contractor in Vancouver.
Ultimately, this partnership is what transforms your vision into a finished space you'll love—on time and on budget.
A Few Common Questions We Hear
When you're thinking about a project this big, you're going to have questions. It's only natural. Let's walk through some of the most common ones we get from homeowners across Vancouver, Burnaby, Richmond, and the North Shore.
Do I Really Need a Permit to Finish My Basement?
In short, yes. Almost any basement project in Metro Vancouver requires a permit. If you're touching anything structural, running new plumbing, or adding electrical circuits, you absolutely need to go through your local city hall, whether that's in Richmond, Port Moody, or Coquitlam.
Even if you think it's just a cosmetic update, it pays to check first. Trust me, trying to finish a basement without the right paperwork can lead to stop-work orders, hefty fines, and a massive headache when you try to sell your home down the road. Any reputable contractor will handle the entire permit process, making sure every last detail is up to the current BC Building Code.
How Much Value Does a Legal Basement Suite Actually Add?
This is the big one. Adding a legal secondary suite is consistently one of the best renovation investments you can make in the Vancouver area. You're not just finishing a basement; you're creating a powerful financial asset.
A properly permitted suite doesn't just bump up your property's resale value—it creates a steady stream of rental income. In a market like ours, that income can make a serious dent in your mortgage payments and dramatically improve your monthly cash flow.
The Bottom Line: A standard basement reno might get you back 50-75% of what you put in when you sell. But a legal suite? Its value is supercharged by the income it generates. A huge number of buyers in this city are specifically looking for a home with a "mortgage helper," which puts your property at the top of their list.
Can I Save a Few Bucks by Being My Own General Contractor?
It’s tempting, I get it. On paper, cutting out the general contractor looks like an easy way to save money. In reality, it often backfires spectacularly.
Playing GC yourself can lead to expensive mistakes, frustrating delays, and a level of stress you just don't need. Juggling different trades, making sure materials show up on time, and passing all the required inspections is a full-time job that requires a ton of experience. An experienced contractor brings a network of trusted pros and a deep understanding of local codes that will almost certainly save you money, time, and sanity in the long run.
What's the Biggest "Surprise" Cost I Should Look Out For?
Water. Hands down, the most common and costly surprise is discovering and dealing with moisture. Many older homes across Vancouver, Burnaby, and New Westminster have tiny foundation cracks or poor drainage that you’d never know about until you open up the walls.
Fixing this properly—whether it's with professional waterproofing, a new sump pump, or an interior drainage system—is a non-negotiable upfront cost. It might not be the most exciting part of the budget, but it's a critical investment to prevent much bigger problems like mould, rot, and serious structural damage later on.
Ready to turn that underused space into something special? The team at Domicile Construction Inc. knows how to navigate these projects from start to finish, making sure your new basement is done right, on time, and on budget. Start the conversation about your Vancouver renovation project today.