A Homeowner’s Guide to Outdoor Lights for Steps
January 31, 2026

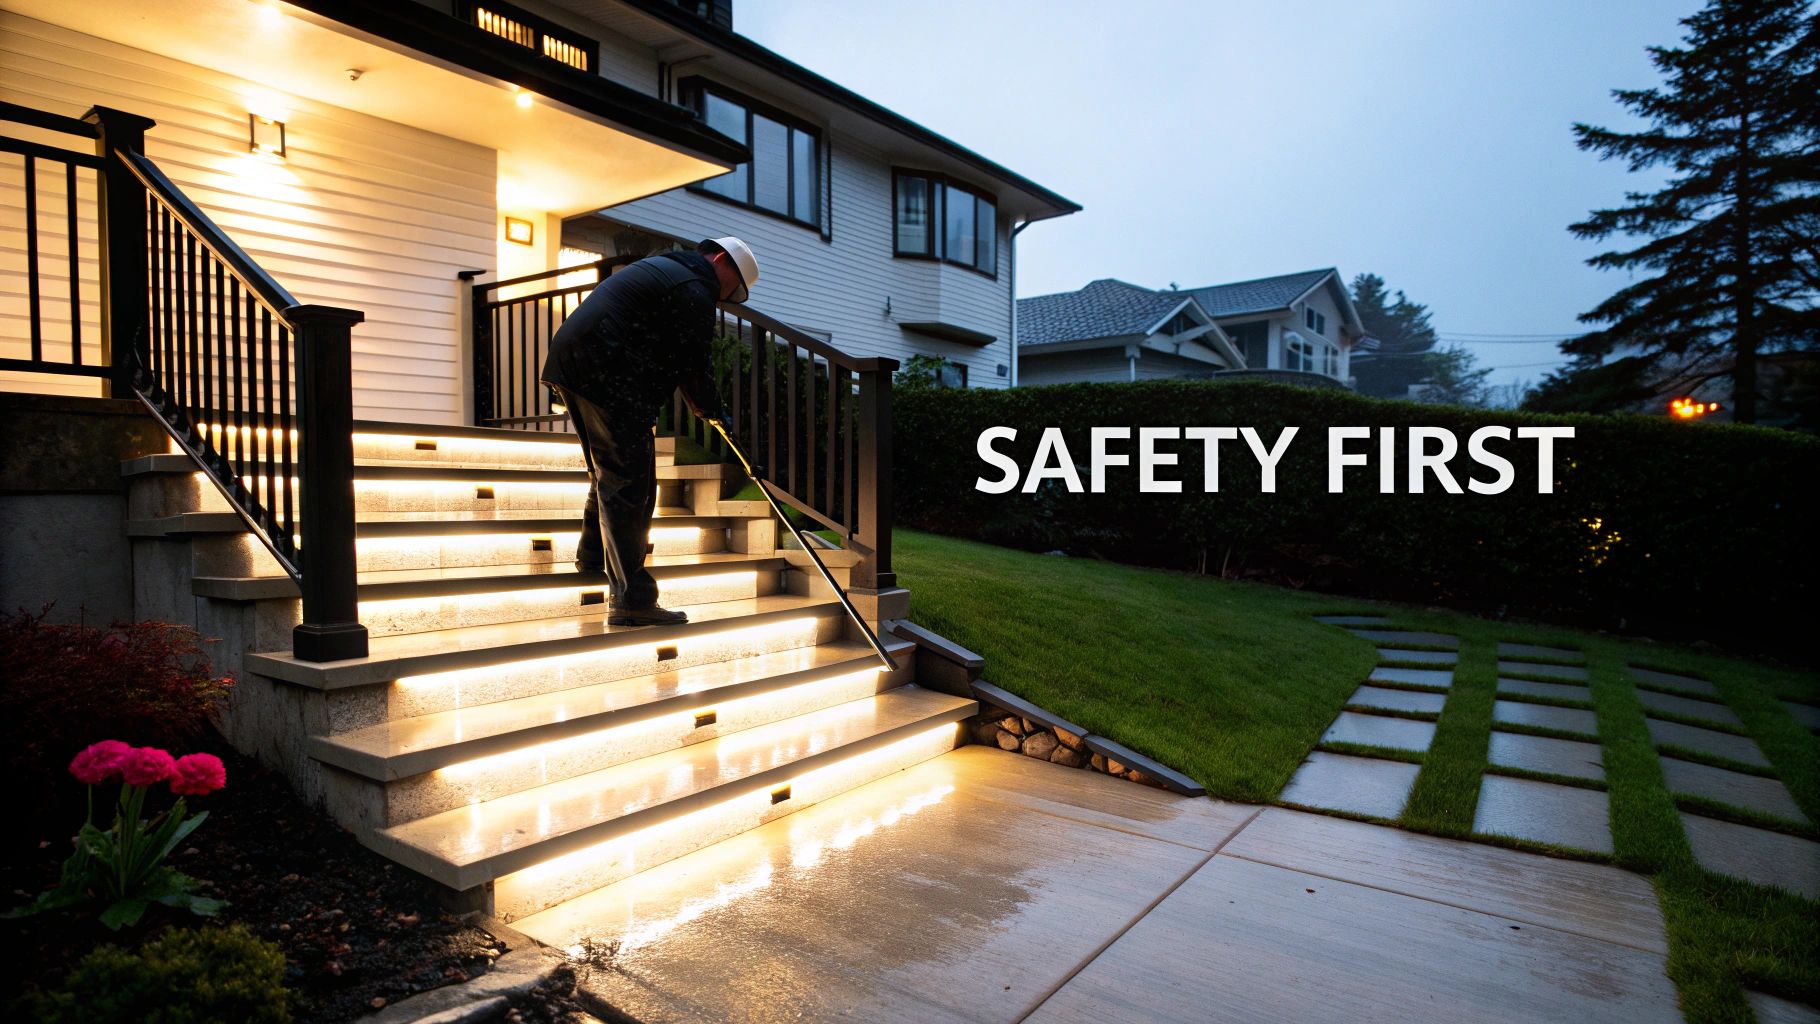
For homeowners here in Vancouver, choosing the right outdoor lights for steps isn't just about looks—it's a critical safety feature, especially with our long, dark, and often wet winters. Good lighting can turn a slick, treacherous staircase into a safe and welcoming path to your home.
Why Step Lighting Is a Vancouver Home Essential
Here in Metro Vancouver, we know the challenges our properties can present. From the steep driveways in North Vancouver to the charming heritage homes in New Westminster, outdoor steps are a constant. Unfortunately, our climate makes them a potential hazard for a good chunk of the year.
Think about it: early sunsets mixed with that persistent drizzle create slick surfaces on just about everything—wood, concrete, you name it. Without proper lighting, those stairs become a hotspot for slips and falls. That’s a real risk for your family, guests, and especially for kids and seniors.
More Than Just a Safety Feature
Of course, preventing a nasty fall is reason enough, but the benefits of well-designed step lighting go so much further. A thoughtful installation can really elevate your home's functionality and overall value.
Here’s what I mean:
- Boosts Curb Appeal: The right lights create a warm, inviting glow that can highlight your home’s best features, whether it’s a modern build in Coquitlam or a classic craftsman in Burnaby.
- Increases Property Value: Professional outdoor lighting is a feature buyers notice. It makes a great first impression and adds tangible value to your home.
- Extends Your Living Space: When your steps and pathways are properly lit, you can actually use your deck, patio, or garden long after the sun goes down.
- Improves Security: A well-lit entryway is a simple but effective deterrent for intruders, as it eliminates dark corners and hiding spots near your doors.
A Smart Investment Tailored to Your Home
The style of your home really matters here. Take a classic heritage house in Port Moody or West Vancouver, for instance. Blasting it with harsh, modern lights would completely ruin its character. On the other hand, a sleek, contemporary home in Richmond looks fantastic with minimalist fixtures that blend right in. If you want to dive deeper into the year-round benefits, this guide on all-year outdoor lighting installation is a great resource.
When you treat outdoor lights for steps as a core part of your home’s design—not just an add-on—you get a layered, cohesive look that’s both beautiful and perfectly suited to our Pacific Northwest lifestyle.
Ultimately, putting money into quality step lighting is an investment in your family's safety, your property's appeal, and your own peace of mind. It’s a practical upgrade that proves its worth every single time you come home on a dark, rainy night.
How to Figure Out Your Home's Step Lighting Needs
Before you start picking out fixtures, it's crucial to step back and look at the bigger picture. A really great lighting plan isn't just about the lights themselves; it's about understanding your home, your property, and how you live in it. This initial assessment is what makes the difference between a functional, beautiful result and a project that misses the mark.
Here in the Lower Mainland, we have everything from historic homes in New Westminster to modern new builds in Port Coquitlam, all dealing with our famously wet climate. The goal is to create a lighting system that feels like it truly belongs to your home, not just something tacked on at the end.
Start With a Walk-Around at Dusk
This is the simplest but most important thing you can do. Grab a notepad or just your phone and take a walk around your property as the sun goes down, and then again when it's fully dark. See how you actually move through the space.
As you walk, ask yourself a few questions:
- Where are the real hazards? Pinpoint the exact spots that feel treacherous—a single unexpected step, a steep flight of stairs, or a patch of uneven ground near the bottom landing.
- What are these stairs for? Is this the main entrance you use every day with armfuls of groceries? Or is it the deck stairs where you entertain friends on a summer evening? The function dictates the lighting.
- What's my home's style? The clean lines of a West Vancouver contemporary home call for a different lighting solution than a classic Burnaby bungalow.
- What are the steps made of? The way light plays off dark wood is completely different from how it reflects on light-coloured concrete or stone pavers.
This little exercise gives you a practical map of what you need, moving you from guesswork to a solid plan. It’s the same foundational thinking that goes into getting a contractor to assess a property's potential before you even purchase it—you have to understand the canvas before you can paint.
Set Your Lighting Goals: Safety Meets Style
With your trouble spots identified, you can now clarify what you want the lighting to accomplish. For step lighting, it almost always comes down to two things: safety and ambiance.
Safety is the non-negotiable part. You need clear, consistent light to prevent anyone from tripping or falling, especially on main stairways. Ambiance is the fun part—it's about creating a mood. This is the soft, inviting glow that makes your home look welcoming from the street and highlights its best architectural features.
A well-designed lighting scheme never makes you choose between safety and style. It blends them together, using layers of light to guide you safely while creating a warm, beautiful atmosphere.
Think about it this way: a heritage home on the North Shore might use small, warm-toned lights tucked away under the stair treads to maintain its character while making the entry safe. A sleek new build, on the other hand, could go for a bolder look with linear LED strips that provide fantastic visibility and a strong modern aesthetic.
Getting the Light Right: Lumens and Colour
Getting into the technical side of things is key to avoiding common mistakes, like creating a glare that’s blinding or an effect that looks more like an airport runway than a home. The two terms you absolutely need to know are lumens and Kelvin.
- Lumens (lm): This is all about brightness. For steps, more is not better. You’re looking for enough light to see, not to perform surgery. A range of 100-200 lumens per light is usually the sweet spot to illuminate the treads without creating harsh, uncomfortable glare.
- Kelvin (K): This is the colour of the light. For a home, you almost always want a warm, soft white light, which is in the 2700K to 3000K range. This creates that cozy, inviting glow we associate with home, unlike the cool, blue-ish light you see in commercial spaces.
Remember, these lights will be on for hours every night. Studies have shown that outdoor lights are used heavily, averaging around 3.9 hours daily in coastal climates like ours. Choosing energy-efficient bulbs is smart, because inefficient ones will drive up your energy bills, and fixtures in our wet environment tend to wear out faster. You can dig into the data by reading the full study on residential lighting usage to see just how much outdoor conditions matter.
Choosing the Right Fixtures for the Vancouver Climate
Once you have a plan, it's time for the fun part: picking the actual lights. This is more than just choosing a style you like; it's about finding fixtures that can stand up to the unique challenges of a Vancouver climate. Think about it—the constant rain and, for coastal areas like West Vancouver or Richmond, the salty air, can be brutal on outdoor hardware.
The best outdoor lights for steps need to be tough. They have to look good, of course, but they also need to be built to last through years of wet weather. This means looking past the surface and really considering what they're made of.
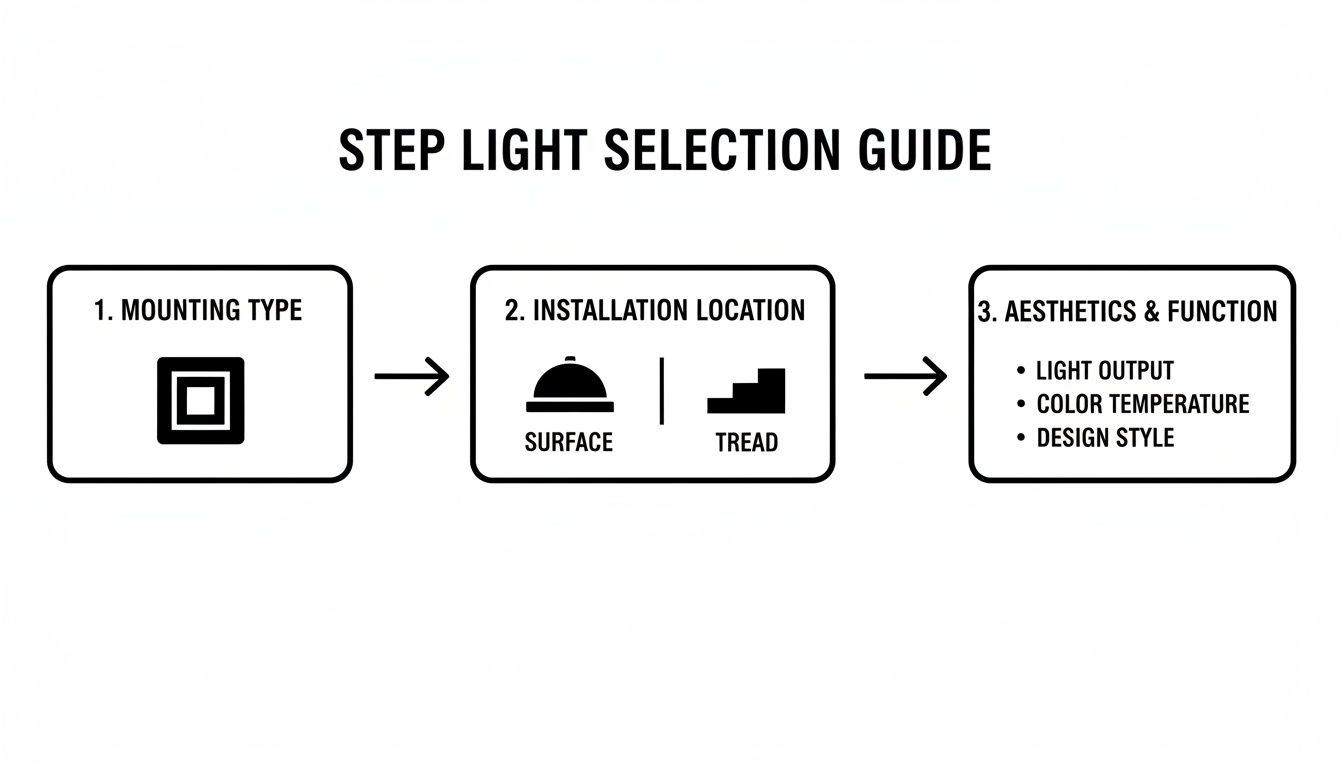
Finding the Perfect Fit: Your Fixture Type
Outdoor step lights come in a few common styles, and the right one for you really depends on what your stairs are made of, the look you’re going for, and whether this is a new build or a renovation.
Recessed Lights: These are set right into the stair riser (the vertical face of the step), so they sit flush with the surface. The result is a clean, modern, and unobtrusive glow. They're a fantastic choice for new construction or a major reno in places like Coquitlam or the District of North Vancouver, where you can plan the cutouts from the start.
Surface-Mounted Lights: Just like the name implies, these fixtures attach right onto the surface of the riser or a side wall. Because you don't need to cut into the stairs, they are the perfect solution for retrofitting an existing staircase. It makes them a popular and practical choice for many homeowners.
Tread Lights: These lights are all about subtlety. They tuck neatly under the lip of each step, casting light directly down onto the tread you walk on. This approach gives you all the safety you need without any distracting glare. It's a great way to add modern safety to an older home, which is a crucial detail when you're renovating a heritage home and want to preserve its character.
Remember, the goal is to light the path, not the person. Well-designed step lighting directs light downwards, keeping the focus on safety and ambiance while eliminating that harsh, unpleasant glare in your eyes.
Choosing the right fixture often comes down to a side-by-side comparison. Here’s a quick breakdown to help you decide what works best for your home.
Outdoor Step Light Fixture Comparison
| Fixture Type | Best For | Pros | Cons | Ideal Home Style |
|---|---|---|---|---|
| Recessed | New construction, major renovations, concrete or wood stairs | Sleek, modern, and unobtrusive. Excellent downward light distribution. | Requires cutting into stair risers; difficult to retrofit. | Contemporary, Minimalist, Modern West Coast |
| Surface-Mounted | Retrofitting existing stairs, brick or stone walls | Easy to install without major demolition. Wide variety of styles. | Can be more visible; may be prone to damage if not placed carefully. | Craftsman, Traditional, Transitional |
| Tread Lights | Creating a subtle, hidden lighting effect | Completely glare-free. Hides the light source for a seamless look. | Installation can be more complex; may not provide as much ambient light. | Heritage, Modern, Architectural |
Ultimately, the best fixture is one that blends seamlessly with your home’s architecture while providing safe, reliable light exactly where you need it.
Materials That Can Handle Our Climate
Here in the Pacific Northwest, material choice is everything. That constant dampness will quickly ruin cheap fixtures, leading to rust, corrosion, and failure. Whether your home is in Port Moody or on the North Shore, you need materials that are built to last.
From my experience, these are the top contenders:
- Marine-Grade Bronze: This is the gold standard, especially for homes near the water. Bronze won't rust; instead, it develops a beautiful, rich patina over time that adds character. It's an investment, but it will last a lifetime.
- Stainless Steel: For a sharp, modern look, stainless steel is a great option. The key is to get a high-quality grade—look for 316 stainless steel, which has much better corrosion resistance than cheaper alloys that can develop rust spots.
- Powder-Coated Aluminum: This is a solid, cost-effective choice. The powder coating creates a durable, protective finish that resists moisture and scratches. Plus, it comes in plenty of colours to match your home's trim.
Steer clear of basic plastics or cheap steel. They just don't have what it takes to survive a few Vancouver winters. A little extra investment upfront in quality materials will save you a lot of headaches and replacement costs later on.
Why Low-Voltage LED Is the Smart Choice
When it comes to powering your step lights, there's really only one way to go for homes: low-voltage (12V) LED systems. They outperform old-school line-voltage systems in every important way—safety, efficiency, and durability.
LEDs use a tiny amount of power compared to old incandescent bulbs, which you'll notice on your hydro bill, especially with lights that run every night. They also have an incredibly long lifespan, often lasting for 25,000 hours or more, so you won't be climbing around changing bulbs. Most importantly, running on low voltage makes them inherently safer for installation and operation in our wet outdoor environment.
Adding Smart Controls for Security and Savings
To really elevate your lighting system, think about adding some simple automation. Smart controls make your life easier and can even improve your home's security.
- Photocells (Dusk-to-Dawn Sensors): This is the classic "set it and forget it" solution. A small sensor detects ambient light, automatically turning your lights on at sunset and off at sunrise. Simple and effective.
- Motion Sensors: Ideal for side paths or areas that don't need to be lit all night. The lights pop on when someone approaches, lighting their way safely and also acting as a surprisingly effective deterrent for anyone lurking around.
- Timers and Smart Systems: For ultimate control, you can use digital timers or integrate your lights into a smart home system. This lets you set custom schedules, which is great for saving energy or making it look like someone's home when you're on vacation.
Navigating Installation, Permits, and Professional Help
Once you've got a vision for the fixtures and materials that will suit your Vancouver home, it's time to get practical. This is where we talk installation—a stage where a great lighting plan can either come to life beautifully or hit a major snag. You'll need to think about local rules, electrical codes, and the big question: should you tackle this yourself or call in a pro? Getting this part right is what makes your outdoor lights for steps not just stunning, but safe and legal too.
The first thing to wrap your head around is the difference between low-voltage and line-voltage systems. For nearly all residential step lighting projects, we strongly recommend a low-voltage (12V) system. It’s significantly safer to work with and often something a handy homeowner or a landscaper can manage.
Line-voltage (120V) systems are a completely different story. They carry the same power as the outlets inside your house. Here in British Columbia, any work on these systems absolutely must be done by a licensed and ticketed electrician. There are no grey areas here—it's a matter of safety and being compliant with the code.
DIY vs. Hiring a Professional Contractor
Deciding whether to do it yourself or hire a team usually comes down to the project's complexity and your own comfort level with electrical work, even the low-voltage kind.
Sure, installing a simple, surface-mounted low-voltage kit on your existing deck in Burnaby could be a great weekend project. But if you’re planning to install recessed lights into a brand-new concrete staircase at a home in West Vancouver, that's a job for a professional contractor. No question.
Here’s a quick way to think about it:
DIY might be for you if:
- You're using a simple, all-in-one low-voltage kit.
- The lights are surface-mounted, with no complex wiring runs needed.
- You understand basic electrical concepts and have the right tools for the job.
You need to hire a professional when:
- The project involves any line-voltage (120V) wiring at all.
- You need to cut into stairs or masonry for recessed lights.
- The lighting is part of a bigger renovation or new build.
- Wiring needs to be run through walls, under pathways, or across long distances.
A professional contractor, like our team here at Domicile Construction, takes care of the entire process. We line up the electricians, masons, and carpenters to make sure the lighting is integrated perfectly into the bigger picture. To get a better feel for how all the pieces fit together, you can see the full scope of our home renovation services in Vancouver.
Understanding Local Permits in Greater Vancouver
So, what about permits? The good news is that for a standard low-voltage step lighting installation, you generally won't need a specific permit from municipalities like the City of Vancouver, Burnaby, or the District of North Vancouver.
However, that changes if your lighting is part of a larger project. If you're building a new deck, putting on an addition, or doing a major landscape overhaul that already requires building or electrical permits, your step lighting plan has to be included in those documents.
A good contractor will handle all the necessary permits as part of their service. This is your peace of mind, ensuring every part of the project—lighting included—is up to local building and electrical codes.
Permit requirements can differ slightly from one municipality to the next, whether you're in Richmond or Port Moody. This is where an experienced pro who knows the local landscape is worth their weight in gold. They make sure everything is documented correctly from the start, saving you from headaches and costly delays down the road. It’s a reminder that building codes are there for a reason, a fact underscored by standards like the handrail height stairs UK regulations, which show how important these safety details are globally.
As this guide shows, your choices flow from recessed to surface and tread lights. You can see how the complexity of the installation often lines up with the look you're going for, from seamlessly integrated to purely practical.
Strategic Placement for Safety and Ambiance
Where you place the lights is just as important as which lights you choose. The goal is simple: cast an even, glare-free glow across every single step. A solid rule of thumb is to install one light every two to three steps. Staggering them on opposite sides of the staircase as you go up is a great technique for achieving balanced, consistent coverage.
Got a wider staircase, like you might find on a grander home in Port Coquitlam or New Westminster? You’ll likely need two fixtures per step to make sure you don't have any dangerous dark spots in the middle. The key is to always angle the light down onto the walking surface, not out into the eyes of someone walking up the stairs.
Energy efficiency is another big piece of the puzzle, especially with modern building codes. For example, California's Title 24 Energy Code now requires residential outdoor step lights to use no more than 4 watts or meet very strict efficacy standards. This has a direct influence on renovations here in rainy Greater Vancouver, where the risk of slips and falls can jump by 30% in low light. For anyone renovating a heritage home with steep outdoor stairs, this means upgrading to compliant LEDs during an addition isn't just a good idea—it's a must. It's how we blend modern safety with timeless character.
Maintaining Your Step Lights Through the Seasons
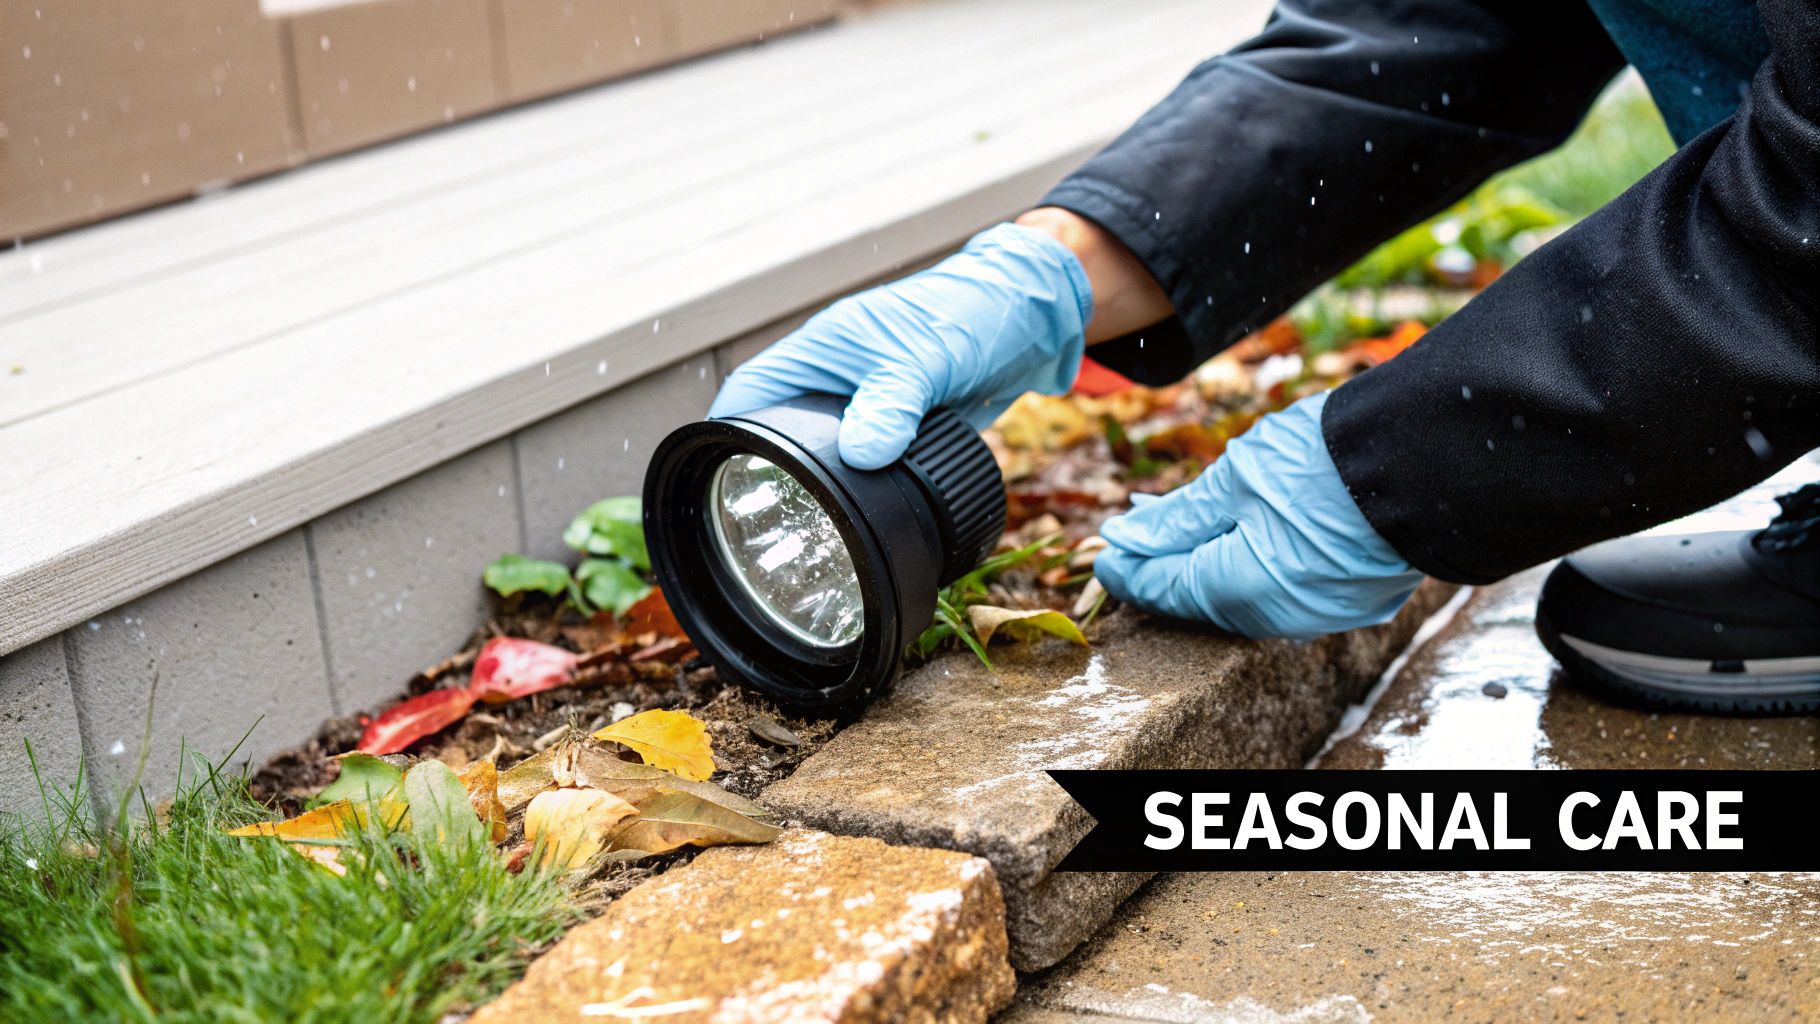
You’ve made a smart investment in high-quality outdoor lights for steps for your Vancouver home. Now, let’s talk about protecting that investment. A little bit of seasonal care is all it takes to make sure your lights perform beautifully for years, and it's especially important in our damp Pacific Northwest climate, whether you're in Burnaby or West Vancouver.
This isn't about adding a big chore to your list. A simple maintenance routine stops small issues from turning into expensive headaches. By keeping on top of debris and moisture, you’ll get reliable performance through every rainy winter and sunny summer.
A Seasonal Checklist for Vancouver Homeowners
Think of this as a quick walk-around you can do a few times a year. It's surprisingly easy and makes a massive difference in the longevity and brightness of your entire step lighting system.
Autumn (Pre-Rainy Season): This is your most critical check-in. Before the classic Vancouver downpours start, sweep away all the fallen leaves, pine needles, and other garden gunk from around your fixtures. This simple act prevents moisture from getting trapped against the lights, which is a fast track to corrosion.
Winter (Mid-Season Check): After a big storm blows through Port Moody or the North Shore, it’s worth a quick peek. Look for any water pooling around the bases or, more importantly, inside the lenses. A properly installed system should be completely sealed, but it never hurts to double-check for any signs of water getting in.
Spring (Post-Winter Cleanup): Once the worst of the weather is behind us, it's time for a proper clean. Take a soft, damp cloth and gently wipe down the lenses. You'll be amazed at how much dirt and grime builds up over the winter, and cleaning it off can dramatically restore the lights' brightness.
Proactive maintenance is more than just cleaning; it’s about safeguarding your home's safety and curb appeal. A few minutes each season ensures your step lights do their job when you need them most, especially during our darkest months.
Troubleshooting Common Lighting Issues
Even the most robust systems can have the odd hiccup. The good news? Most common problems with modern low-voltage LED lighting are surprisingly simple to figure out and fix.
If a single light is out or flickering, it’s almost always a loose connection or just a bulb that's finally given up. High-quality LEDs can last for 25,000 hours or more, but they don’t last forever.
What if an entire section of lights goes dark at once? The issue is likely further up the line. It's probably a problem with the wiring connection that feeds that specific group or an issue at the transformer itself. Before you panic, check for any visible damage to the wire—sometimes a stray shovel from a bit of enthusiastic gardening is the culprit. A reliable system is all about secure, waterproof connections.
Common Questions About Step Lighting
When you're planning a renovation here in Greater Vancouver, adding lights to your outdoor steps always brings up a few practical questions. It makes sense. Homeowners from Burnaby to West Vancouver want to make smart, lasting choices, and I get asked about this stuff all the time. Let’s tackle some of the most common queries I hear.
What’s the Real Cost for Outdoor Step Lights in Vancouver?
The price tag for installing outdoor step lighting can really swing depending on what you’re after. If you're tackling a simple DIY project with a low-voltage kit from a big box store, you might get away with spending a few hundred dollars. It's a decent starting point for folks in places like Port Coquitlam who just need a quick safety boost.
But for a professional job, you're looking at a different kind of investment. A proper install means high-quality, weather-resistant fixtures, a robust low-voltage transformer, and the expertise of a contractor who knows our rainy climate. For a typical staircase, you can expect the cost to land somewhere between $1,500 and $5,000, and sometimes more.
What drives that price? A few key things:
- Fixture Quality and Material: Marine-grade bronze or 316 stainless steel fixtures cost more upfront, but they'll outlast powder-coated aluminum every time in our damp weather. It’s a worthwhile upgrade.
- The Job's Complexity: It’s a whole lot more work to recess lights into existing concrete stairs than it is to mount them onto a wooden deck.
- How Many Lights You Need: A long, sweeping staircase on a North Vancouver home will naturally need more fixtures and wiring than a simple three-step entrance.
- System Controls: Want to add smart timers, dimmers, or motion sensors? They'll add to the total cost but bring a ton of convenience and help you save on energy.
Are LED Step Lights Really Worth Paying Extra For?
Absolutely, one hundred percent. The initial price for LED fixtures might be a little higher than old-school halogen bulbs, but the long-term savings and performance are a no-brainer. Think of it as investing a little more now to save a lot down the road.
LEDs are incredibly efficient, using up to 80% less electricity than their incandescent cousins. On a system that's running every single night, you will absolutely see the difference on your BC Hydro bill.
And then there's the lifespan. A quality LED bulb is often rated for 25,000 to 50,000 hours of use. That means you won't be climbing a ladder to replace burnt-out bulbs on your steps for a decade or more. It’s a true "set it and forget it" solution.
What’s the Best Colour Temperature for Step Lighting?
For your home, the goal is to create a welcoming and safe vibe, not a harsh, clinical one. That’s why I almost always recommend a warm white light for steps.
You'll want to look for a colour temperature in the 2700K to 3000K range. This is what gives you that soft, inviting glow we all associate with a cozy home. If you go any higher, like 4000K or above, the light starts to look cool and bluish. That can feel really harsh and out of place, whether you have a heritage home in New Westminster or a modern build in Richmond.
A warm light colour doesn't just look better on natural materials like wood and stone; it's also easier on the eyes, which is a huge part of safety. It lights up the path without creating a blinding glare.
Will I Need a Permit to Install Step Lights in Vancouver?
This is a great question, and an important one. The good news is that for most low-voltage (12V) step lighting setups, you will not need a separate permit from your local municipality, whether that's the City of Vancouver, Coquitlam, or anywhere else in the region.
However, there are two big exceptions:
- If the system is line-voltage (120V): Anything involving 120V power legally requires a licensed electrician to do the work, and that work requires an electrical permit. No shortcuts here.
- If it’s part of a bigger project: If your step lights are being installed as part of a new deck, an addition, or a major landscape project that already requires permits, the lighting plan has to be included in that overall submission.
Any professional contractor will handle the permitting for you, making sure your project is safe, up to code, and signed off properly.
How Do I Make Sure My Step Lights Are Safe for My Family?
Safety is the whole point of step lighting, so the system itself has to be absolutely safe. The best way to guarantee this is to use a low-voltage system. Running at just 12 volts, the risk of electric shock is incredibly low, making it the perfect choice for areas that get drenched in rain.
A proper installation is just as crucial. Every wire connection needs to be sealed with waterproof connectors to keep moisture out, which prevents shorts and corrosion. It’s also vital to bury the low-voltage wires at the right depth so they don’t get nicked by a shovel or an aerator down the line.
The demand for better outdoor lighting isn't just a feeling; it's backed by data. A 2024 study of residents in dense housing areas, much like we have across Greater Vancouver, found that over 60% wanted 'much more light' on exterior steps and paths to feel safe. This highlights something we see in the field all the time: poor lighting is directly linked to an increase in nighttime injuries. This makes a well-designed, reliable system a true necessity. You can discover more insights about these lighting needs and see why we always prioritize safety-focused installations.
Ready to transform your home’s entrance with safe, beautiful, and professionally installed step lighting? At Domicile Construction Inc., we specialize in integrating thoughtful lighting solutions into renovations across Vancouver, Burnaby, Richmond, North Vancouver, West Vancouver, New Westminster, Coquitlam, Port Coquitlam, and Port Moody. We handle everything from design to final inspection, ensuring your project is built to last.