Projector on the Ceiling: A Vancouver Homeowner’s Guide
April 14, 2026

You’re probably looking at a room right now and thinking the same thing most homeowners in Greater Vancouver think. The screen wall seems obvious, but the projector location doesn’t. Maybe the room has a bank of windows in Coquitlam, a concrete slab ceiling in Burnaby, or old plaster and crown moulding in West Vancouver that you don’t want to disturb.
A projector on the ceiling can be the cleanest way to build a home theatre without letting a big television dominate the room. It can also go wrong fast. I’ve seen mounts fixed to the wrong substrate, HDMI runs treated like an afterthought, and heritage ceilings damaged by hardware that never should have touched them.
The difference between a projector setup that feels polished and one that feels improvised comes down to planning, structure, and restraint. You need the right projector for the room, the right mount for the ceiling, and a cable plan that doesn’t leave you staring at dangling wires every time the lights come on.
The Blueprint Planning Your Ceiling Projector Setup
Most ceiling projector problems start before the mount goes up. The room tells you what will work. If you ignore the room and buy around a spec sheet, you end up fighting glare, bad sightlines, awkward screen placement, or a projector that doesn’t belong on that ceiling.
Start with the wall or screen location first. Then work backward to the projector.
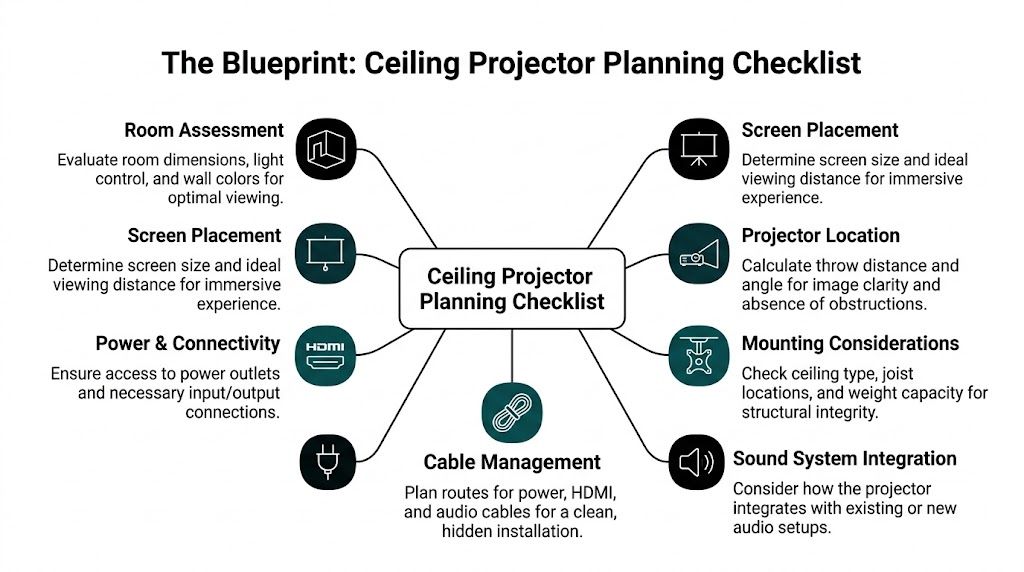
Read the room before you shop
A living room in Richmond with large windows needs a different approach than a basement media room in Port Moody. Daylight control changes everything.
Here’s what I assess first:
- Light control: If the room has broad glazing or light-coloured finishes, a projector has to work harder. In brighter spaces, a screen choice matters more, and sometimes a TV is the smarter call.
- Ceiling type: Drywall under wood joists is straightforward. Concrete condo ceilings are not. Lath and plaster needs patience and careful drilling.
- Viewing habits: Movie nights in a dark room are one thing. Casual daytime sports in an open-plan family room are another.
- Seating layout: The screen has to work with where people sit, not where the furniture “should” go on paper.
If a homeowner says they want a projector mostly because they don’t want a television on display, that’s a valid reason. But it still has to perform when the room is in use.
Choose the projector type that matches the room
There’s no single best projector. There’s only the right one for the geometry you have.
A simple comparison helps:
| Projector type | Where it fits best | Main trade-off |
|---|---|---|
| Long-throw | Dedicated media rooms, larger living rooms, straightforward centreline mounting | Needs more throw distance and careful placement |
| Short-throw | Rooms where depth is limited but a ceiling install is still practical | Placement gets less forgiving |
| UST | Tight rooms, accessibility-focused setups, spaces where maintenance access matters | Ceiling installation is more exacting and less tolerant of bad measurements |
For ultra-short throw, placement is especially precise. Manufacturer charts typically place the lens 12-18 inches from the screen edge and calibration often involves vertical offset of 10-20% of screen height, according to the ceiling mounting guidance referenced by XGIMI’s installation article at https://global.xgimi.com/blogs/tips-tutorials/how-to-mount-projector-to-ceiling.
Practical rule: Buy the projector after you’ve confirmed screen size, seating, and mounting zone. Don’t buy it because the sale ends this weekend.
Get the geometry right
Throw distance is the first number that matters. In practical terms, screen width = throw distance / throw ratio, which is the baseline formula used in ceiling projector planning and mounting guidance at https://www.taskrabbit.com/blog/how-to-mount-a-ceiling-projector/.
That formula sounds simple, but real rooms complicate it. Bulkheads, beams, pot lights, smoke alarms, and ceiling fans all compete for the same airspace.
I use a laser level early because it reveals problems before the ceiling gets opened. On paper, the projector may centre perfectly with the screen. In the room, a joist bay, duct, or beam may force the mount slightly off line. That’s where lens shift earns its keep.
Plan for maintenance, not just installation day
A projector on the ceiling is never “install and forget,” especially in the Lower Mainland. BC Stats reports that 22% of Greater Vancouver households include seniors 65+, and many are making accessibility-minded renovation choices. The same source notes that humid Vancouver conditions average 80% relative humidity, which can contribute to dust buildup on high-mounted units, making maintenance harder and potentially less safe for people who shouldn’t be climbing ladders. In those homes, low-maintenance layouts or more accessible UST options are often the better choice, as discussed in this angle-focused overview from Valerion: https://www.valerion.com/blog/can-projectors-work-at-an-angle
That matters even if you’re not planning for accessibility right now. Good renovation decisions age well.
A few planning choices pay off later:
- Leave service access: Don’t bury the projector where a lamp change, filter clean, or lens wipe becomes a balancing act.
- Think about ladder position: Vaulted stair-adjacent ceilings can make routine access awkward fast.
- Respect fan noise: Closer to the sofa isn’t always better.
- Keep future upgrades in mind: A conduit path gives you options when cabling standards change.
What works in local homes
In a modern condo, the best answer is often minimalism. Keep the projector position clean, avoid overcomplicated drop poles, and confirm building limitations before you promise hidden cabling.
In an older Vancouver or New Westminster character house, the best answer is often patience. Measure twice, inspect what’s above the finish surface, and assume the ceiling may not be perfectly level even if it looks that way from the floor.
If the room is hard to darken, don’t force a cinema-style setup where it doesn’t belong. If the room is excellent for projection, commit to the geometry and make it look intentional.
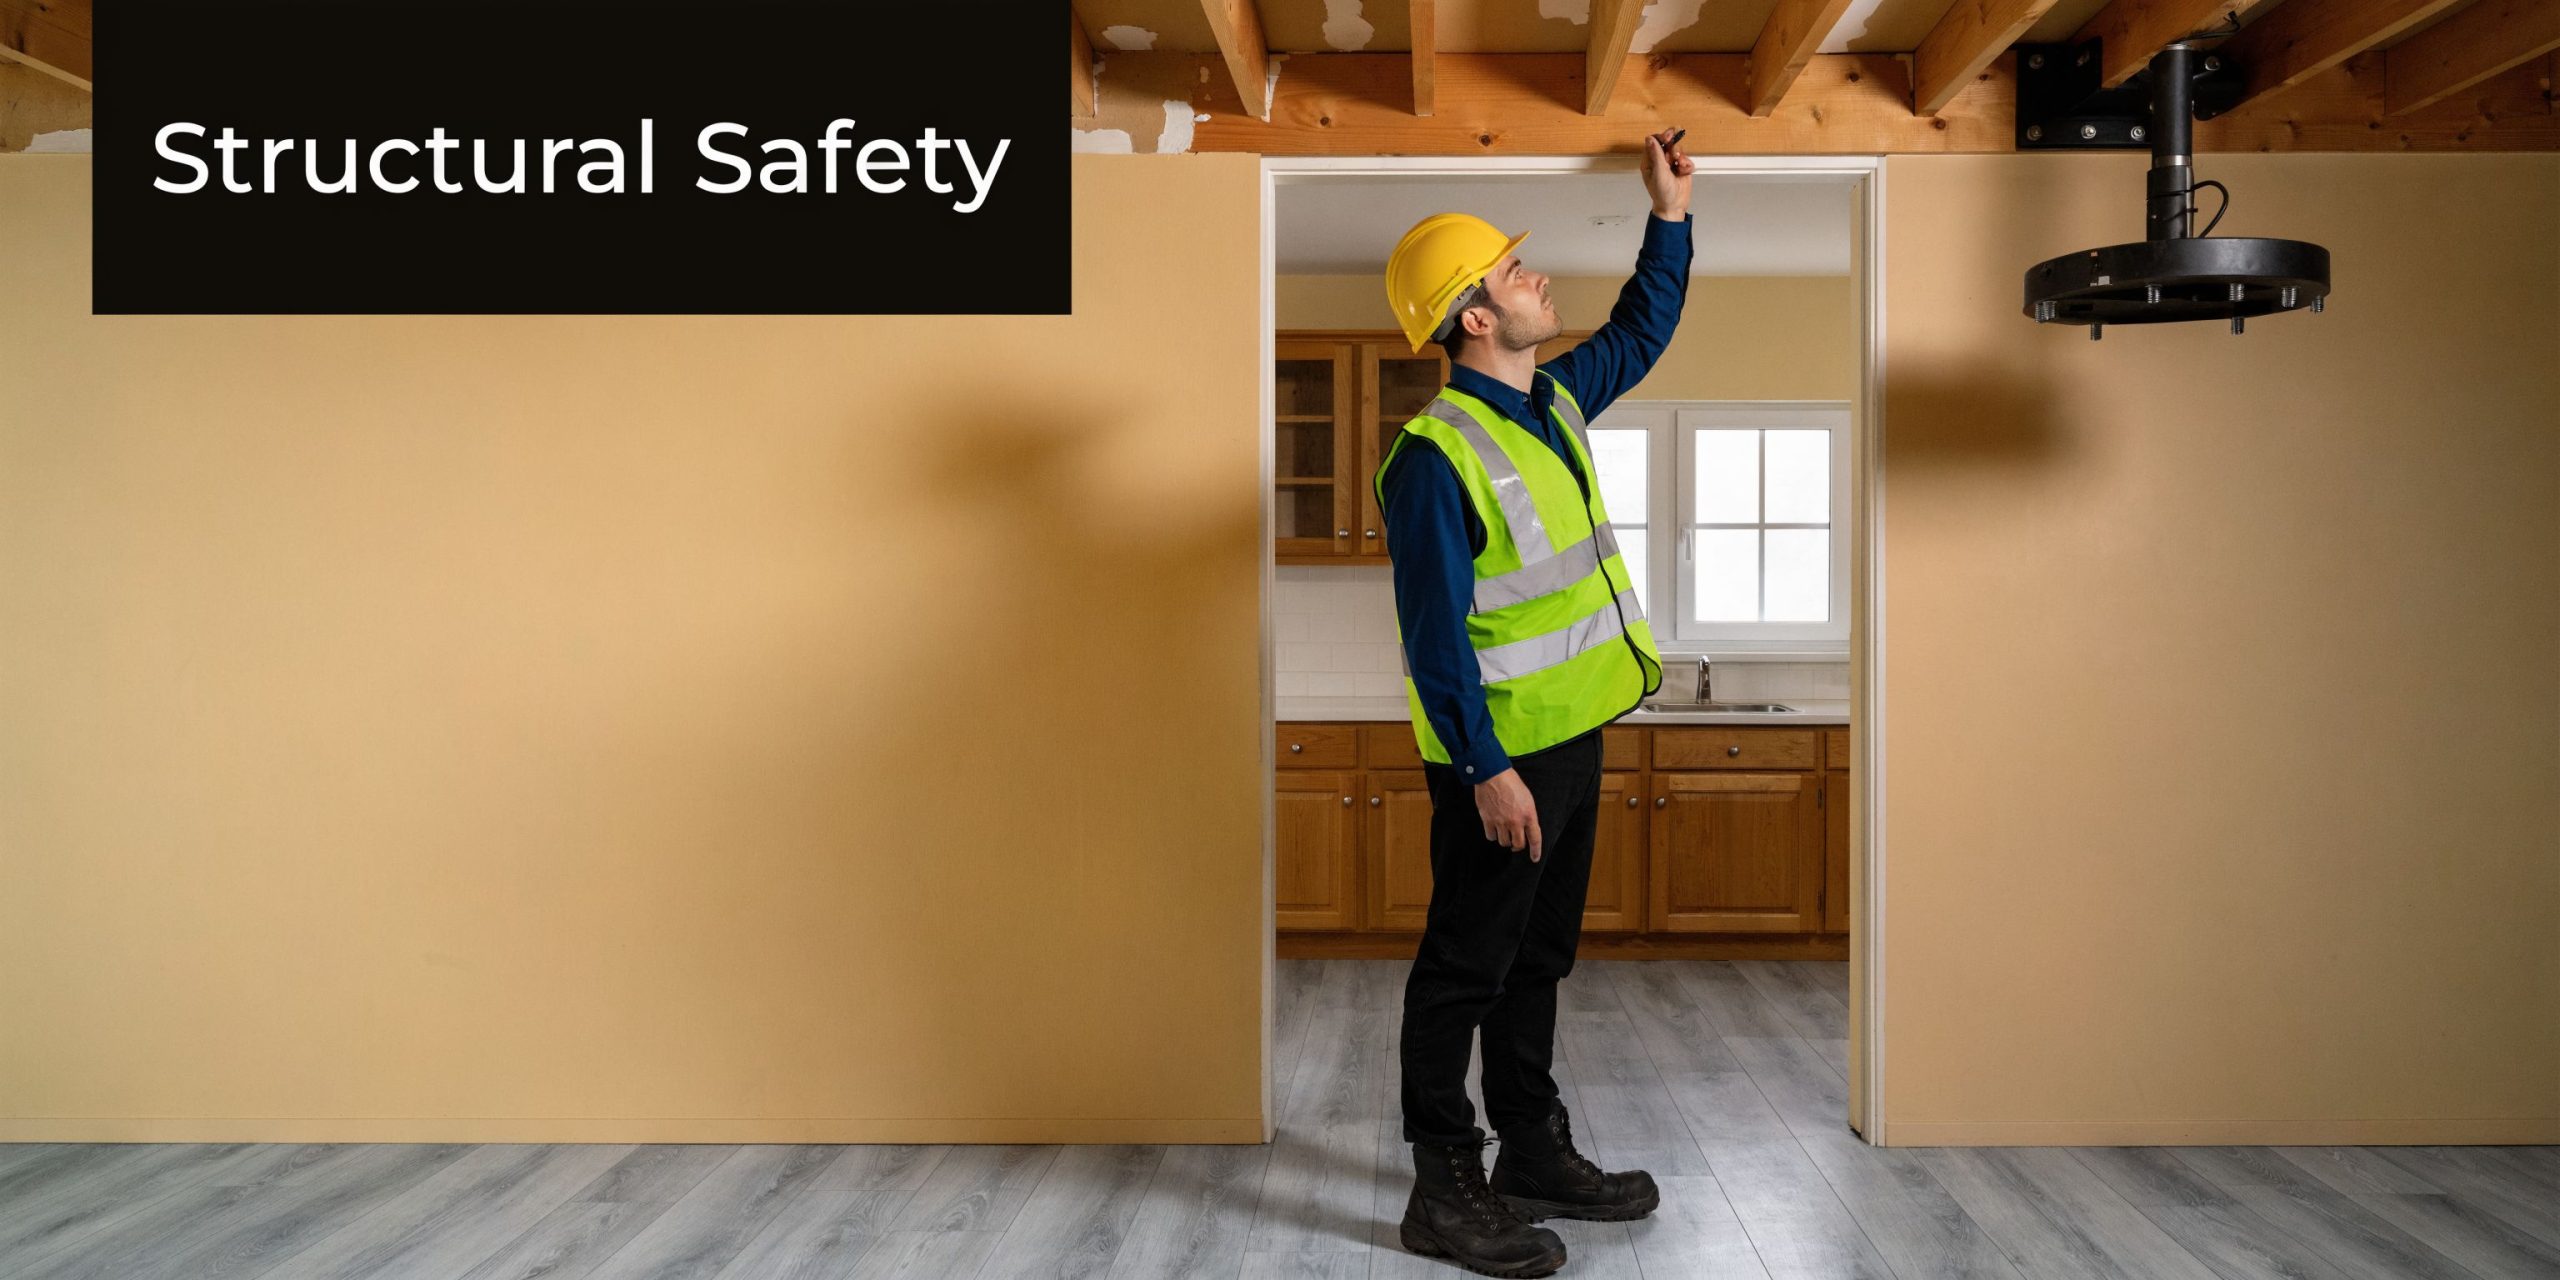
Finding the Sweet Spot Mounts and Structural Safety
The mount isn’t just hardware. It’s the part that decides whether the installation stays aligned, stays quiet, and stays attached.
That sounds dramatic, but it’s the truth. A lot of poor projector installs don’t fail because the projector is bad. They fail because the mount is wrong for the ceiling, or the ceiling was never properly assessed.
Match the mount to the house
A low-profile fixed mount usually looks best in a standard-height room. It keeps the projector tucked up close and reduces visual clutter.
An adjustable drop mount helps when the ceiling is high, sloped, or interrupted by trim details. In older houses around Vancouver proper and West Vancouver, I use that flexibility carefully. A mount with too much movement can solve one alignment problem and create a vibration problem.
Here’s the basic filter I use:
| Ceiling condition | Mount approach that usually works | What to avoid |
|---|---|---|
| Standard drywall over joists | Fixed or fine-adjust mount | Oversized universal mount with unnecessary articulation |
| Concrete condo slab | Concrete-rated anchoring strategy with a mount chosen for slab conditions | Treating concrete like wood framing |
| Lath and plaster heritage ceiling | Conservative mount layout, minimal disturbance, reversible approach where possible | Aggressive drilling without substrate verification |
| High or ornate ceiling | Drop pole or offset solution planned around trim and sightlines | Mounting that cuts through mouldings or medallions |
Structure first, cosmetics second
For typical wood-frame installations, joist location is a critical factor. The mounting guidance adapted for Greater Vancouver renovations calls for using a stud finder to locate joists, then drilling 5-6 mm pilot holes and fastening the ceiling plate with lag bolts torqued to 20-30 Nm. That same guidance notes that projector mounts should be fixed to joists to support loads in the 20-50 lb range, not to finish material alone, as outlined in the installation methodology cited here: https://www.taskrabbit.com/blog/how-to-mount-a-ceiling-projector/
In older framing, pilot holes matter even more. Aged wood is less forgiving than new lumber.
Skip pilot holes in an old house and the joist may tell you immediately that it didn’t like your plan.
In a set of 150 Vancouver heritage renovations, 28% of DIY install failures involved cracked joists from skipping pilot holes, based on the same Greater Vancouver mounting guidance above.
That stat tracks with what contractors see on site. Damage often comes from impatience, not complexity.
Concrete ceilings change the job
Burnaby high-rises and many newer condo towers across Vancouver and New Westminster present a very different ceiling condition. You’re often dealing with concrete, embedded services, strata rules, and limited concealment options.
That means the projector location has to do more work. In condos, I often prefer a layout that accepts a neat visible raceway over an overbuilt attempt to hide everything. Clean and honest is better than hacked and hidden.
Concrete also changes vibration behaviour. If the mount is solid, image stability can be excellent. If the wrong anchoring method is used, you may not see catastrophic failure, but you will see tiny movement in the picture every time the structure transmits vibration.
Heritage houses need reversible thinking
Generic AV advice often proves inadequate in such situations. Vancouver’s heritage inventory includes over 2,500 designated properties, and renovations in these homes often exceed budgets by 20-30% due to custom AV integrations. On top of that, Heritage Revitalization Agreements often require reversible modifications, which means a projector mount that seems harmless can create a compliance problem if it permanently alters protected fabric. That’s why non-invasive mounting strategies matter, as noted in this heritage-focused placement discussion: https://elitescreens.com/2016/09/projector-placement-and-why-vertical-projection-angles-matter/
In those homes, “just mount it to the ceiling” isn’t professional advice.
Better options may include:
- False beam strategies: These can create a mounting zone without cutting into original decorative work.
- Selective ceiling placement: A few inches away from a moulding profile can preserve the visual order of the room.
- Custom backer planning: Sometimes the right answer is to coordinate AV work with other ceiling or carpentry work already underway.
If you’re dealing with uncertain framing, heavy finish layers, or a heritage designation, a structural review saves grief. A residential structural engineer becomes particularly useful in these situations: https://domicile.construction/structural-engineers-residential/
What works and what doesn’t
What works is boring in the best way. The mount lands on structure, the projector sits on centre, the adjustments hold, and the room still looks like a room.
What doesn’t work is familiar too. Mounting into drywall anchors because the projector “isn’t that heavy.” Hanging below ornate plasterwork because the online guide didn’t mention heritage houses. Forcing a centred mount when the actual joist layout says otherwise.
The best-looking projector on the ceiling usually starts with the least flashy decision. Respect the building first.
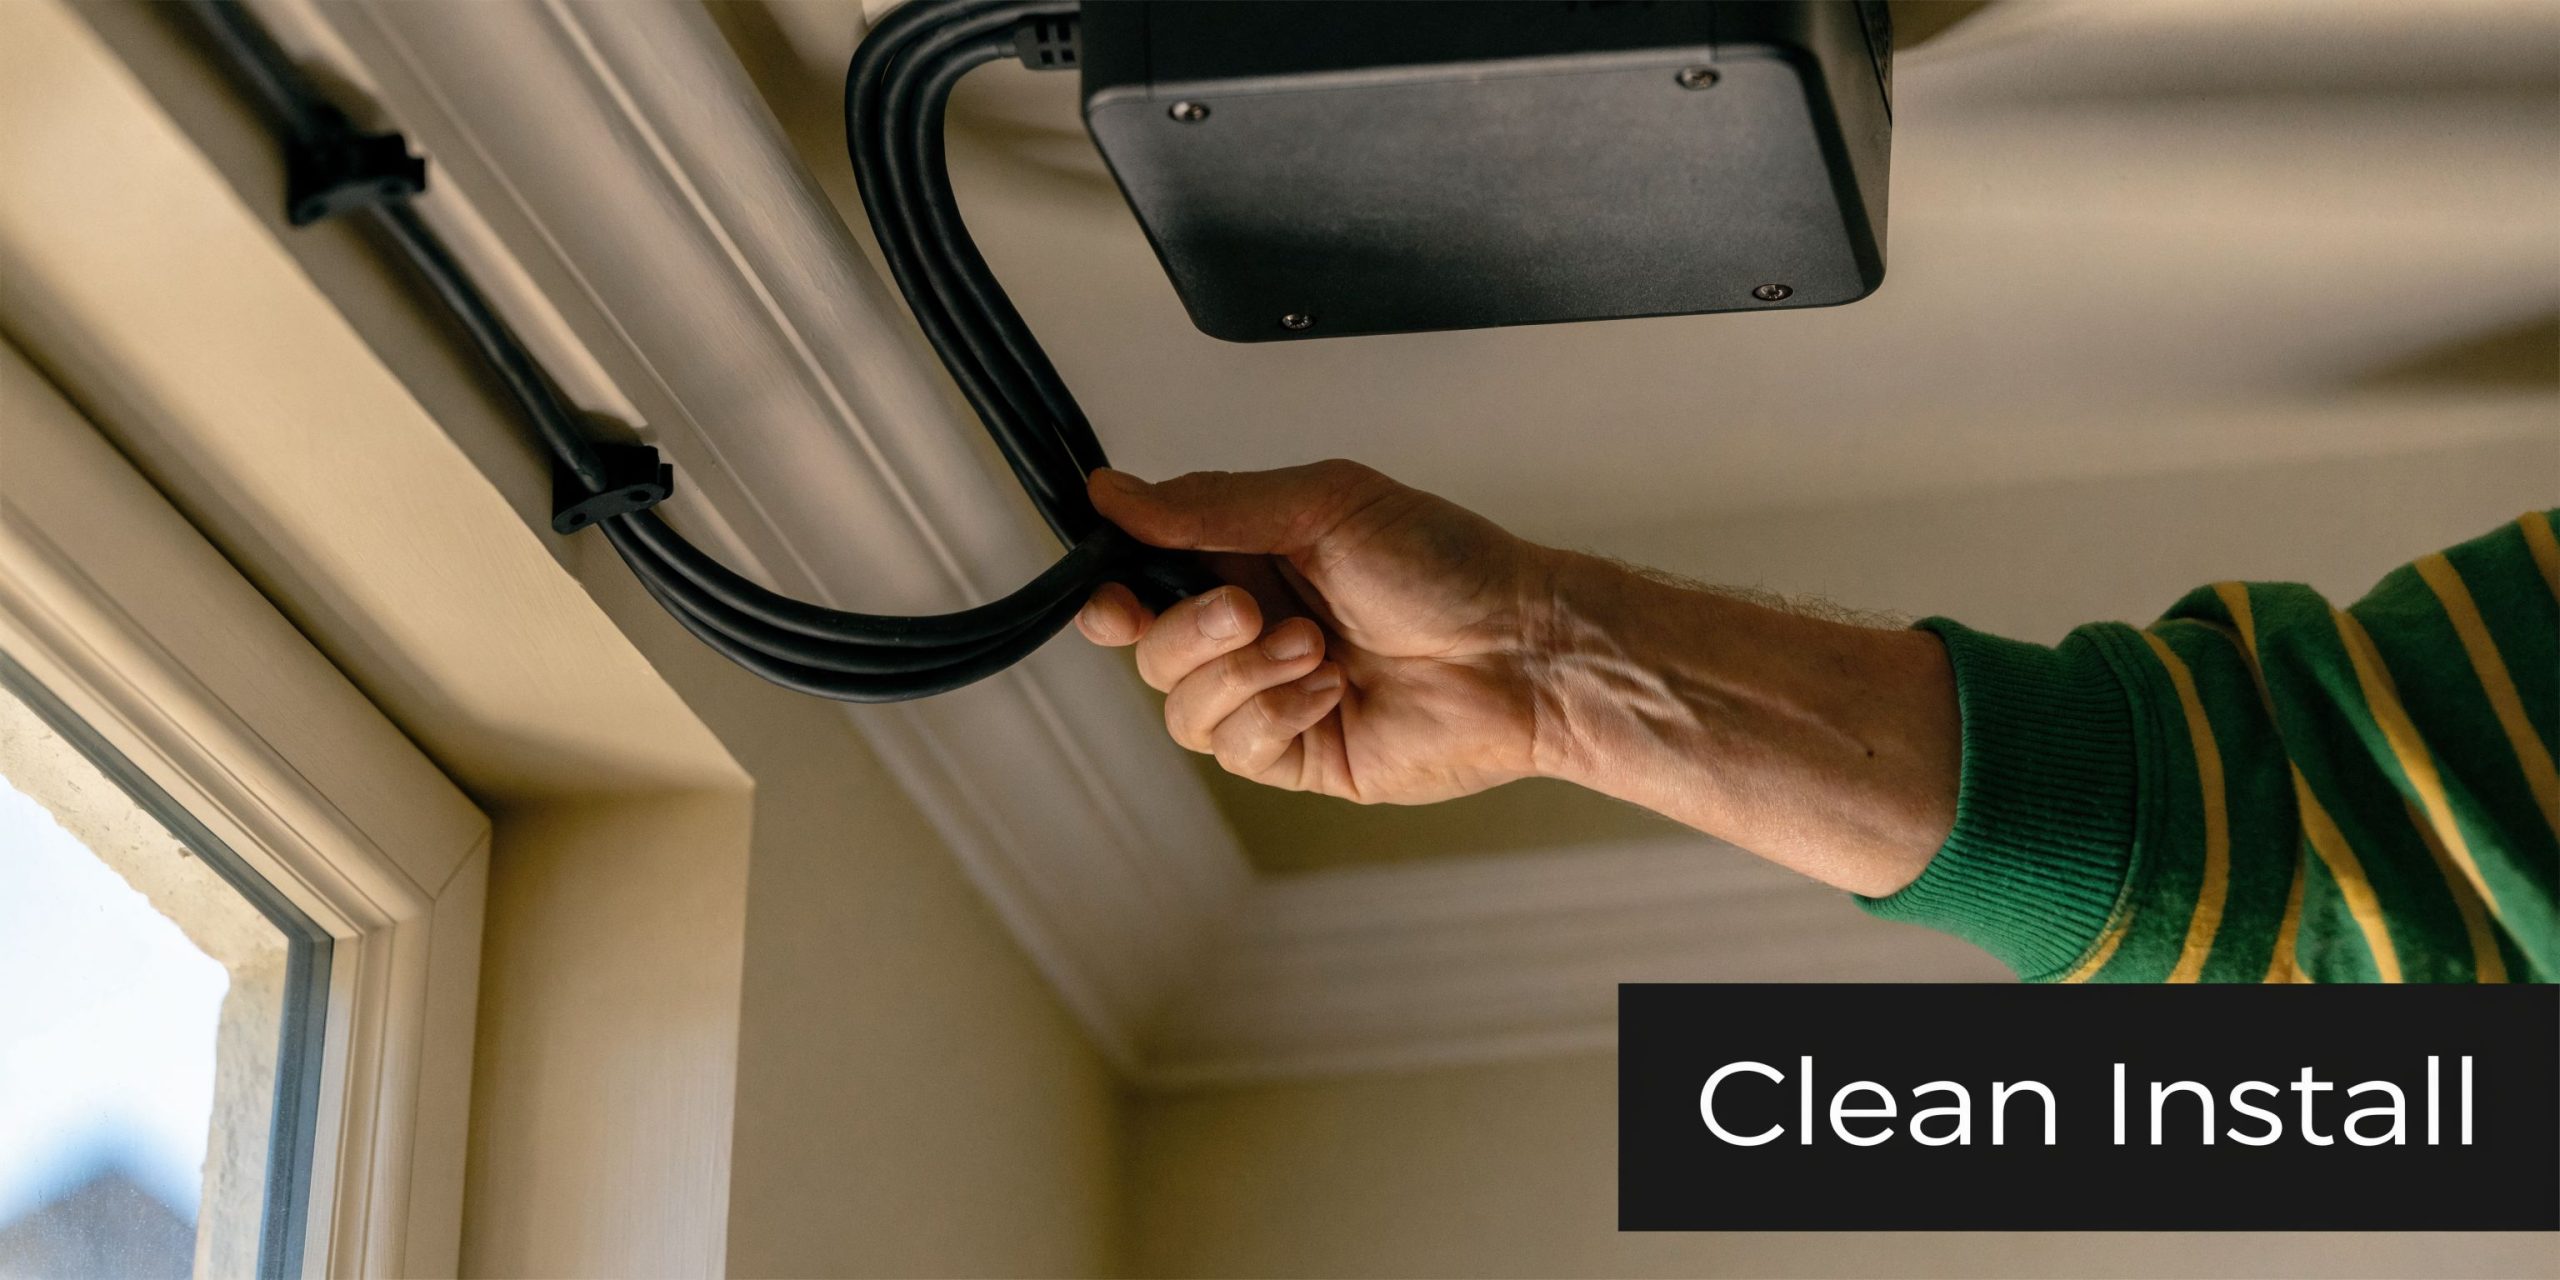
The Clean Install Mounting the Projector and Hiding Cables
This is the stage where a careful plan starts to show. It’s also the point where rushed work becomes visible for years.
A projector can be perfectly chosen and perfectly positioned, then ruined by a sloppy mount install or a cable run that looks temporary. Clean execution is what separates a proper home integration from a weekend experiment.
Secure the mount in the right order
I don’t start with the projector. I start with the ceiling plate and the ceiling itself.
The practical sequence used in Greater Vancouver installations is straightforward:
- Locate the joists with a stud finder and verify alignment with a level.
- Mark the plate carefully so the mount lands where the screen geometry demands, not just where it’s convenient.
- Drill 5-6 mm pilot holes before driving lag bolts.
- Fasten the plate with a socket wrench and tighten the lag bolts to 20-30 Nm.
- Attach the projector arms to the projector body on a padded surface.
- Lift and lock the assembly only after the mount itself is confirmed solid.
That sequence comes from the Greater Vancouver mounting method referenced earlier, and it’s the part DIY installers skip most often. In 150 Vancouver heritage renovations, 28% of DIY failures involved cracked joists from skipping pilot holes, according to the same installation guidance: https://www.taskrabbit.com/blog/how-to-mount-a-ceiling-projector/
Old houses need a slower hand
A North Vancouver or West Vancouver character house often has uneven framing, brittle plaster keys, and surprises above the ceiling line. You can’t muscle your way through that.
What usually works in these homes:
- Use pilot holes religiously: This reduces the chance of splitting aged framing.
- Probe the ceiling build-up carefully: Lath, plaster, patch layers, and previous repairs can distort what the stud finder tells you.
- Dry-fit the mount first: Hold the plate and projector path in place before committing to holes.
- Check lens position, not just body centre: The lens is not always centred on the chassis.
A lot of installers line up the body of the projector and forget the optical centreline. That creates avoidable correction work later.
Cable management is where the room either looks finished or doesn’t
You have two honest options. Surface concealment or concealed routing.
Surface raceways
This is the cleanest option when opening walls isn’t practical. In condos, finished basements, and rooms where disruption needs to stay low, a slim paintable raceway can look tidy if it’s routed with discipline.
Good raceway work follows the room lines. It runs parallel to trim, corners, and casing. It doesn’t wander.
In-wall or in-ceiling routing
This gives the best visual result when the renovation scope allows it. It also demands more planning.
Modern homes often include fire blocking, insulation, tighter cavities, and less forgiving cable paths than homeowners expect. Heritage homes add their own complications, especially where cavities are irregular or original finishes need to remain untouched.
The best hidden cable run is the one planned before the room is painted and patched. The second-best is the one that respects the house instead of fighting it.
If you’re trying to understand the mindset behind ceiling-mounted electrical fixtures, some of the same discipline applies to other overhead installs too. This guide on how to install a ceiling fan is useful because it reinforces the same basics: structure matters, sequencing matters, and overhead fixtures don’t forgive lazy fastening.
Keep media and power organised
A projector setup usually means some combination of HDMI, control cable, audio connections, and power. Even when the projector itself is simple, the system around it rarely is.
Common mistakes I see:
| Mistake | What it causes |
|---|---|
| Leaving excess cable at the projector | Visible loops and a messy silhouette |
| Ignoring bend radius | Stress on cable ends and difficult future servicing |
| Running without a clear endpoint plan | Equipment pileup near the receiver or cabinet |
| Treating power like low-voltage cabling | An installation that looks improvised and may need rework |
The room should still make sense when the projector is off. That’s my standard for a clean install.
A useful visual example of mount assembly and alignment is below. Watch it after you’ve mapped your own room, not before, so you can judge which parts apply and which don’t.
Final checks before first power-up
Before the projector ever turns on, I do a short physical check:
- Jiggle test the mount: It should feel planted, not springy.
- Confirm every set screw is tight: Especially on drop poles and adjustable arms.
- Check cable strain: Nothing should pull on the projector ports.
- Stand back and look at the room: If the install looks awkward with the power off, it won’t look better once the movie starts.
What works in the long term is a restrained installation. Hardware close to the ceiling. Cable routes that respect architecture. Access that still makes sense a year from now.
What doesn’t work is overbuilding the visible parts and underthinking the hidden ones.
Powering Up and Perfecting the Picture
This is the part homeowners usually expect to be easy. Sometimes it is. More often, it’s where small planning errors show up all at once.
If the image lands too high, too low, or slightly skewed, don’t reach for keystone correction first. Start with the mount position and projector adjustment range. Digital correction is useful, but it shouldn’t be your first fix.
Connect the system in a sensible order
I like to power up in this sequence:
- Connect your source equipment first. That may be a streaming device, AVR, gaming console, or media cabinet.
- Confirm signal reaches the projector. Don’t start image alignment until you know the source path is stable.
- Pull up a grid or test pattern. Alignment is much easier against straight lines than against a movie menu.
- Set the projector to its intended screen format. A mismatch here creates confusion later.
If the room also includes new lighting, dimming control matters more than people expect. Reflections, beam spread, and picture washout often trace back to fixture placement, which is why lighting planning belongs in the same conversation as AV planning. If you’re assessing broader room upgrades, this overview of recessed lighting costs is a useful companion piece: https://domicile.construction/cost-of-installing-recessed-lighting/
Use lens shift before keystone
Lens shift is the cleaner solution because it moves the image optically. It preserves picture integrity better than digital manipulation.
Keystone correction can rescue a slightly imperfect install, but heavy use of it is often a sign the projector is physically in the wrong place.
A simple rule:
| Adjustment tool | Best use |
|---|---|
| Lens shift | Fine-tuning image position without degrading geometry |
| Physical mount adjustment | Correcting tilt, centring, and pitch |
| Keystone correction | Small finishing corrections only |
In rooms with high ceilings or sloped conditions, projector placement may also need tighter control over vertical angle. That’s one reason UST and off-axis setups can be less forgiving than they look in marketing photos.
Dial in the picture for the actual room
Don’t calibrate for a pitch-black showroom if you live in a bright family room in Richmond. Set the projector for the way you’ll really use it.
Focus on these items:
- Focus: Check the centre and the corners. If the centre is sharp but the corners aren’t, recheck projector alignment before blaming the optics.
- Brightness mode: Use the mode that suits your light conditions, not the one with the most aggressive output.
- Contrast and shadow detail: Sports, streaming dramas, and animation all show poor settings differently.
- Colour mode: Start natural, then adjust only if the image looks noticeably cool, warm, or overpushed.
A projector that’s mounted correctly usually needs only modest digital correction. If you’re making big menu changes to fix shape, the problem is probably physical.
Finish with a real-world test
After the test pattern, use actual content. A dark scene tells you about shadow detail. Bright sports footage reveals motion and colour handling. Subtitles show whether edge focus is clean.
When these conditions are met, a projector on the ceiling stops feeling like hardware and starts feeling like part of the room. When the picture is square, the image is stable, and the source switching works without fuss, the system disappears. That’s the result you want.
Budgeting Your Project and When to Call a Contractor
A ceiling projector project can be modest, or it can become part of a much larger room upgrade. The budget changes quickly once ceilings, wiring, cabinetry, patching, painting, and permitting enter the picture.
The mistake I see most often is homeowners pricing only the projector and forgetting the installation around it. The hardware is just one piece.
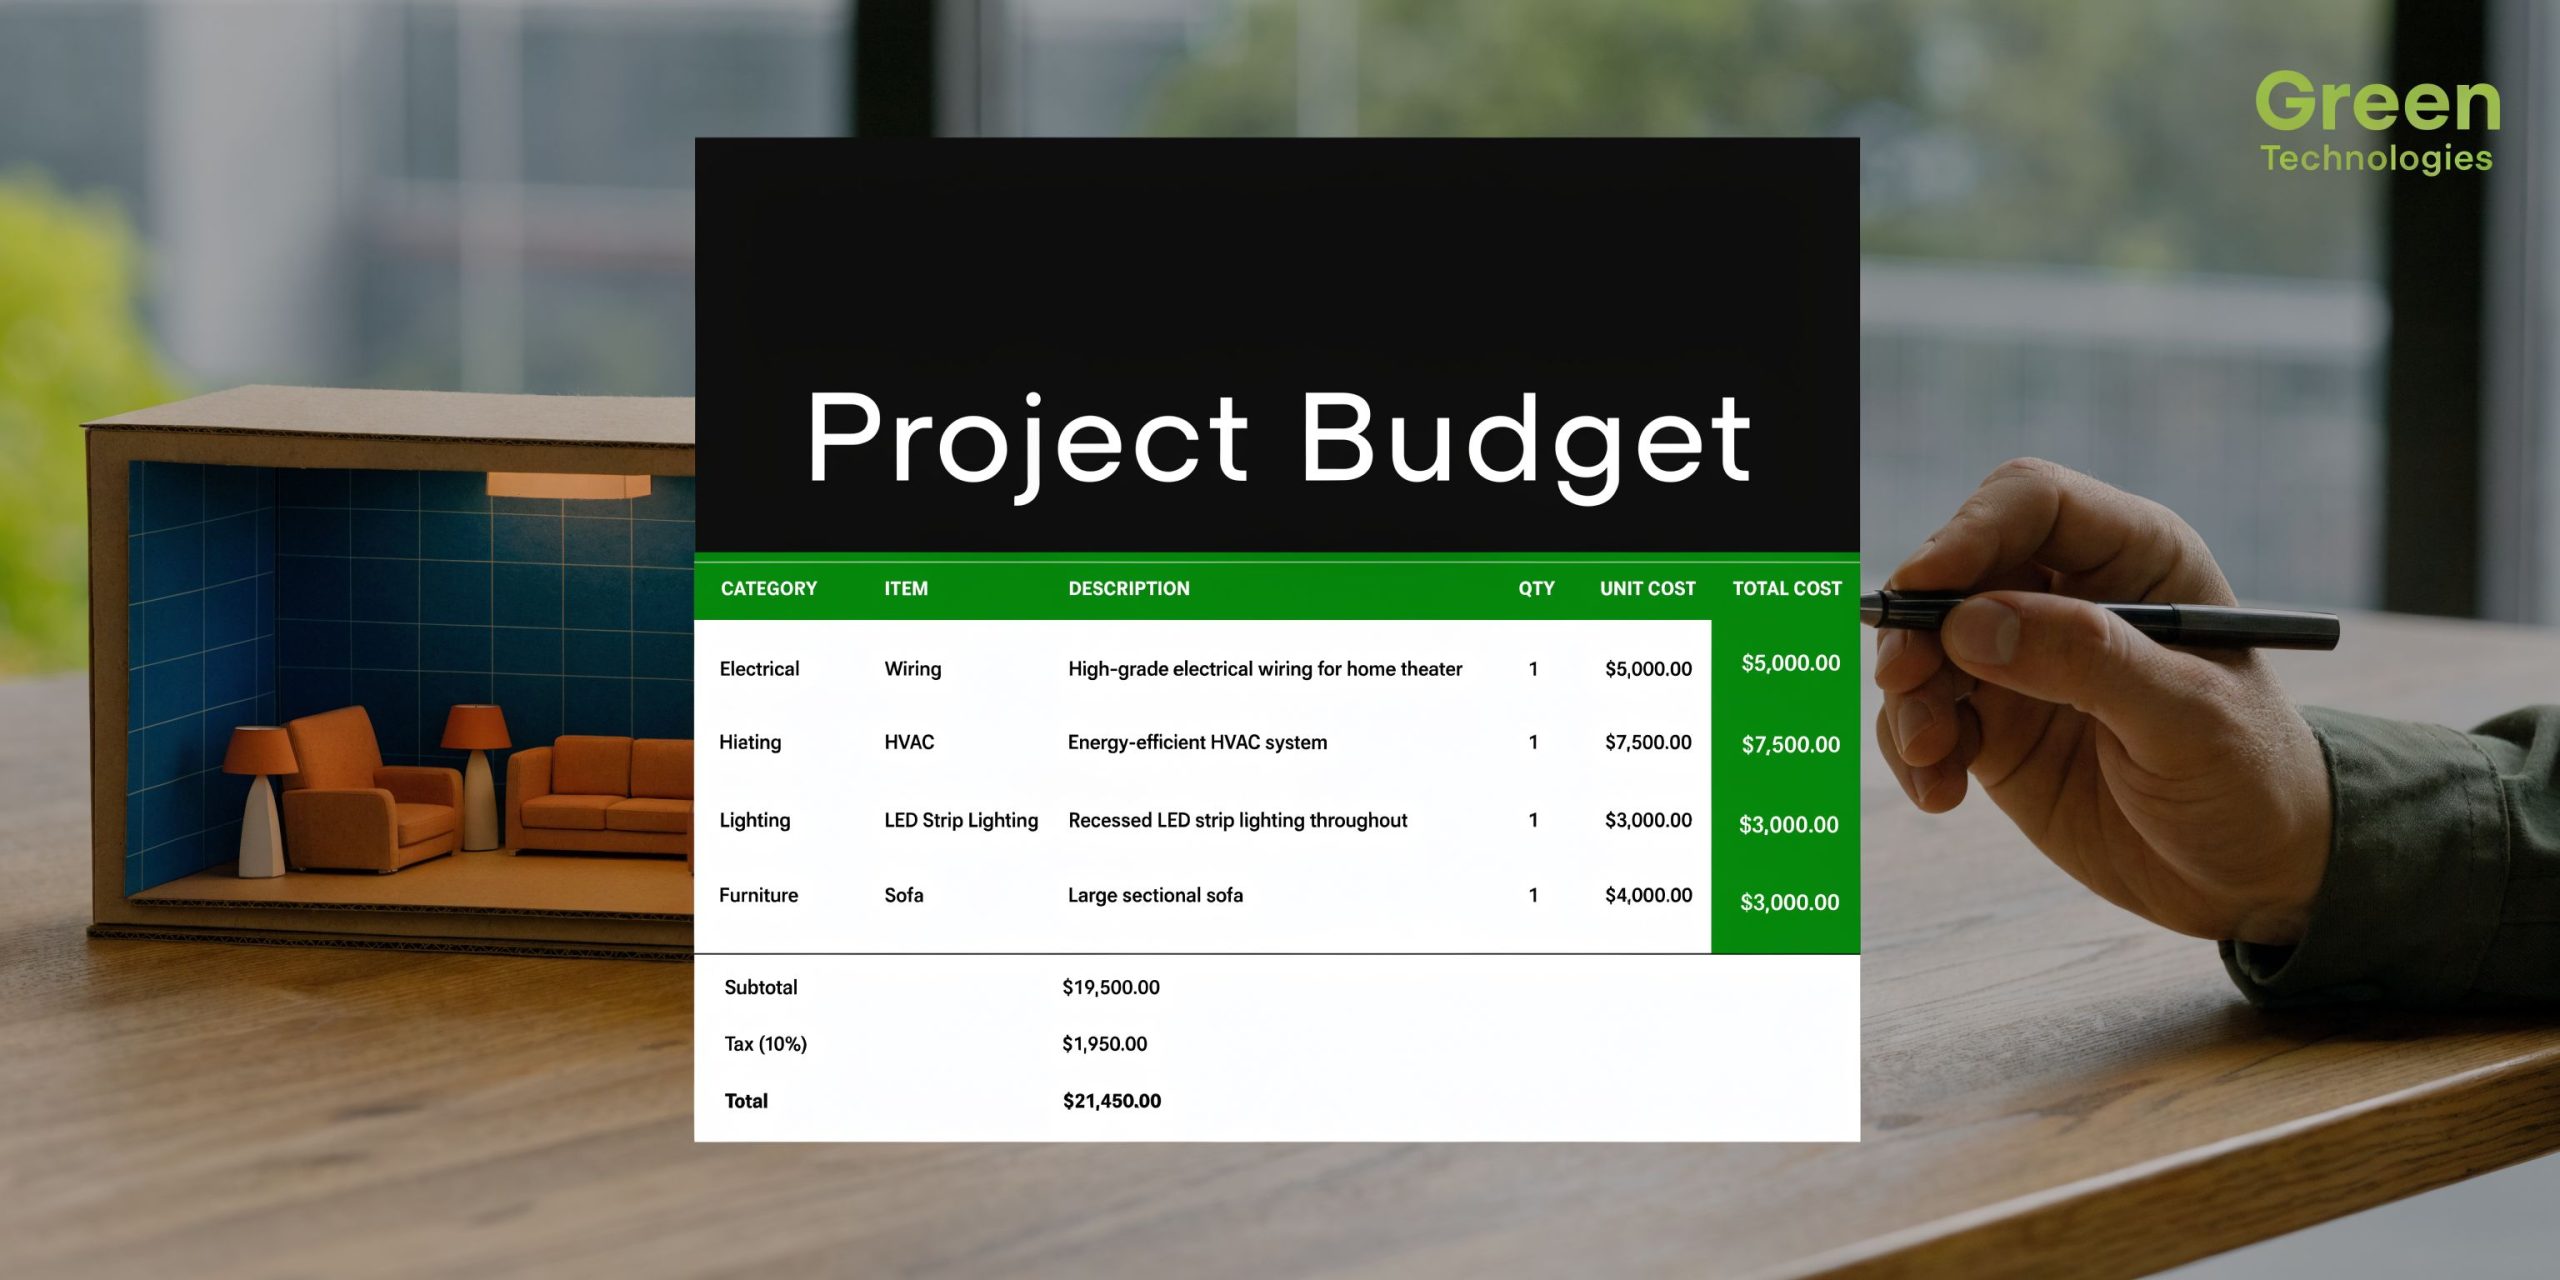
What you’re really paying for
At minimum, most projects include:
- The projector itself
- A mount suited to the ceiling condition
- Screen or wall preparation
- Power and signal cabling
- Patch and paint work if cables are concealed
- Labour for mounting, alignment, and testing
Then there are local variables. Concrete ceilings increase labour complexity. Heritage ceilings increase caution, finishing work, and sometimes engineering coordination. Open-concept rooms often need more thought around light control and speaker placement.
A simple budgeting frame helps:
| Budget item | DIY pressure point | Professional pressure point |
|---|---|---|
| Mounting | Wrong hardware or poor substrate read | Proper fastener choice and load path |
| Cabling | Visible runs or difficult fishing | Cleaner routing and lower disruption |
| Alignment | Time-consuming trial and error | Faster setup with better geometry |
| Finishes | Patchwork look after the fact | Better integration with the room |
| Permitting or review | Often overlooked | Handled as part of broader renovation coordination |
When DIY still makes sense
A straightforward room can be a reasonable DIY project. Standard drywall ceiling. Known joist layout. Easy cable path. No heritage concerns. No concrete. No hidden surprises.
In that kind of room, a careful homeowner can get a good result if they’re patient and realistic about the finish level.
DIY makes less sense when the room has any of the following:
- Concrete slab ceiling
- Lath and plaster or decorative heritage finishes
- Complicated attic or suite conversion context
- Need for concealed wiring
- Uncertain structural support
- Expectation of a fully integrated, nearly invisible result
Permits and approvals are where many projects stumble
This becomes more important when the projector is being integrated into a renovation, attic conversion, or legal suite build. In those cases, the projector mount isn’t just AV gear. It’s part of a permitted construction scope.
For attic conversions in Greater Vancouver, City of Vancouver permitting data from 2025 Q1 shows an 87% approval rate for AV installs when structural plans are stamped by an engineer, versus 42% rejection for DIY-style plans using drywall-only anchors. The same guidance notes common pitfalls such as overheating from poor ventilation and cabling faults, which is a useful reminder that these systems interact with the building, not just the screen, as referenced here: https://global.xgimi.com/blogs/tips-tutorials/how-to-mount-projector-to-ceiling
That’s one reason contractors coordinate early with the right trades. If you want a useful non-promotional overview of what skilled trades coordination looks like on electrical scopes, this page on electrical contractors is a decent broad primer.
Why people end up calling a contractor anyway
It usually comes down to risk, finish quality, or both.
A contractor earns their keep when the job involves multiple layers of decision-making:
- assessing the ceiling condition
- choosing a mounting strategy that won’t damage the structure
- coordinating electrical and low-voltage work
- preserving heritage details
- handling patch, paint, and trim integration
- getting the projector physically and visually right
That’s not just handyman work. It’s renovation coordination.
If you’re weighing whether this belongs in a larger renovation scope, this overview of what a contractor does gives a practical sense of where that value comes from: https://domicile.construction/what-does-a-contractor-do/
Paying for expertise often costs less than repairing a ceiling, repainting a room, and buying a second mount after the first plan fails.
The projector on the ceiling is the visible part. The hidden value is the work that keeps the install quiet, stable, code-aware, and appropriate for the home it’s going into.
Frequently Asked Questions About Ceiling Projectors
Can I mount a projector on a sloped or vaulted ceiling
Yes, but the mount has to suit the angle. A fixed flat-ceiling mount usually creates more correction work than it solves. On sloped ceilings, I prefer a mount with proper adjustment at the ceiling connection point, not just at the projector plate. That keeps the projector body level before image tuning starts.
How do I reduce projector fan noise
Distance helps. So does not mounting the projector directly over the main seating position if the room gives you another good option. Quieter operation also comes from choosing a projector that isn’t constantly running in its highest-output mode because the room is too bright for the setup.
Can I project straight onto a wall instead of using a screen
You can, and some homeowners are happy with it, especially in casual rooms. But the wall has to be very flat, with an even finish and consistent colour. Most painted walls reveal roller marks, patching, and subtle texture once a bright image hits them. If picture quality matters, a proper screen is still the safer choice.
What maintenance does a ceiling-mounted projector need
Keep the lens clean, keep vents clear, and make sure the unit remains accessible enough for routine service. That matters even more in homes where climbing a ladder is already awkward. If maintenance access is poor, the projector choice or mounting height should be reconsidered before installation.
Are modern projectors capable enough for a serious home setup
Yes. The technology has moved a long way from the classroom units many people remember. A Canadian milestone makes the point well: DLP projectors created the world’s largest video projection at Quebec City’s 400th anniversary in 2008, stretching 2/3 km long, far beyond what was possible when overhead projectors had become common in schools by 1985, as noted in this visual history of projection technology: https://teachempowered.org/the-overhead-projector-a-visual-history/
Is a projector on the ceiling always the best option
No. It’s the best option when the room geometry, lighting, and maintenance access all support it. In some homes, especially bright family rooms or accessibility-focused spaces, another layout may be easier to live with. Good design starts by admitting that not every room wants the same answer.
If you’re planning a renovation in Vancouver, Burnaby, Richmond, North Vancouver, West Vancouver, New Westminster, Coquitlam, Port Coquitlam, or Port Moody, Domicile Construction Inc. can help you work through the structural, finishing, and integration details that make a ceiling projector setup feel like part of the home, not an add-on. Their team handles the bigger renovation context too, from heritage-sensitive upgrades to attic and suite conversions, so the projector plan fits the room properly from the start.