10 Shiplap Wall Ideas for Your Vancouver Home
April 23, 2026

You finish painting, bring the furniture back in, and the room still feels unfinished. That is usually the moment shiplap starts to make sense for Greater Vancouver homeowners. It adds shadow lines, texture, and a sense of built-in detail that plain drywall often lacks.
Used well, shiplap suits a wide range of local housing stock. In older Vancouver and New Westminster homes, it can sit comfortably beside original casings, fir floors, and more traditional trim profiles. In newer Burnaby, Richmond, Coquitlam, and North Vancouver homes, it gives flat walls more shape without forcing a full redesign.
The local climate changes how I approach it. Vancouver-area homes deal with damp air, cooler seasons, and rooms that do not always dry out quickly, especially bathrooms, basements, and exterior-facing walls. Board spacing, material choice, paint finish, and how the wall terminates at trim all matter more here than they would in a drier market. In heritage houses, the goal is usually restraint. In newer homes, the goal is often to add character without making the room feel busy.
Planning matters before a single board goes up. If the wall will hold shelves, sconces, a television, or a fireplace treatment, backing and layout should be sorted out early. If you are already planning a home renovation, treat shiplap as part of the wall assembly and finish plan, not a last-minute decorative add-on.
Colour is part of that decision too. In many Vancouver rooms, especially north-facing ones, the wrong white can read cold and flat. A softer tone usually works better with local light conditions and older millwork. This guide to Benjamin Moore off-white paint colours is a useful starting point if you are trying to match shiplap to existing finishes.
These ideas focus on what works in Vancouver-area homes, including the trade-offs. Some details look sharp in a photo but create extra maintenance, trap moisture, or fight the character of the house. The right approach should suit the room, the age of the home, and the way you live in it.
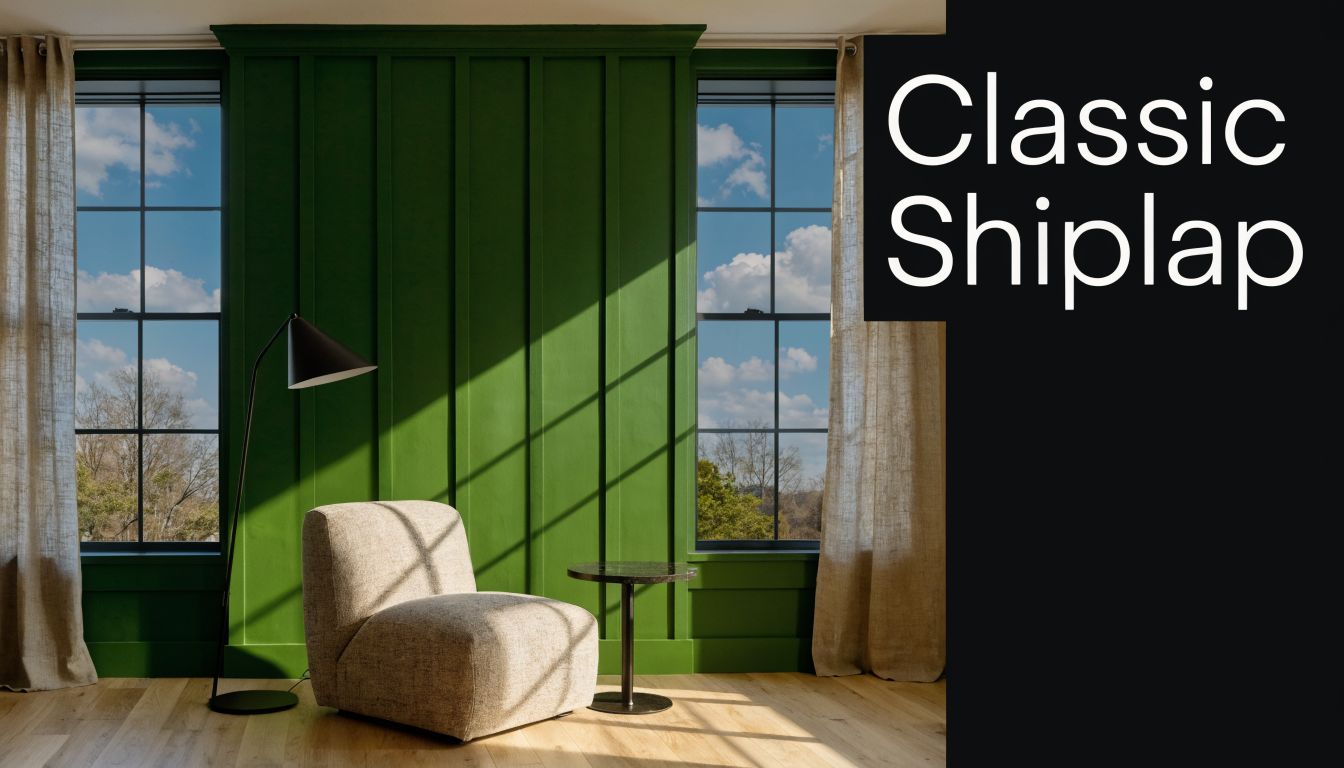
1. Classic White Shiplap Accent Wall
A classic white shiplap accent wall is still the safest bet if you want texture without committing the whole room to a stronger design move. In bedrooms, it works well behind the bed. In living rooms, it can centre a seating wall or frame millwork. In bathrooms, it brightens the room fast, especially when the existing finishes feel heavy.
In Kitsilano and Point Grey homes, this approach works because it respects older trim profiles while still looking fresh. In newer West Vancouver or Coquitlam homes, it helps plain rectangular rooms feel less boxy. The best results usually come from keeping the surrounding walls quieter so the shiplap reads as architecture, not clutter.
What makes it work
White shiplap succeeds when the details are crisp. Board spacing has to stay consistent, outside corners need to be clean, and the top termination has to make sense with existing casing or crown. If any of that feels improvised, the wall looks decorative rather than built-in.
Paint choice matters more than most homeowners expect. A bright white can feel stark in north-facing Vancouver rooms, while a softer off-white often sits better with older flooring and warmer millwork. If you’re comparing tones, this guide to Benjamin Moore off-white colours is a useful place to narrow the field.
Practical rule: In bathrooms, choose a finish that can handle cleaning and humidity. Flat paint usually isn’t the right call on shiplap.
A few specifics help:
- Match board width to room size: Narrower boards usually suit smaller bedrooms, powder rooms, and compact entryways.
- Seal the assembly properly: On exterior-facing walls, install over a properly insulated and vapour-managed wall assembly.
- Don’t rely on caulk to hide bad carpentry: Use caulk for a finished look, not to correct uneven layout.
This is the version of shiplap that rarely goes out of place. It isn’t the boldest option, but it’s one of the most dependable.
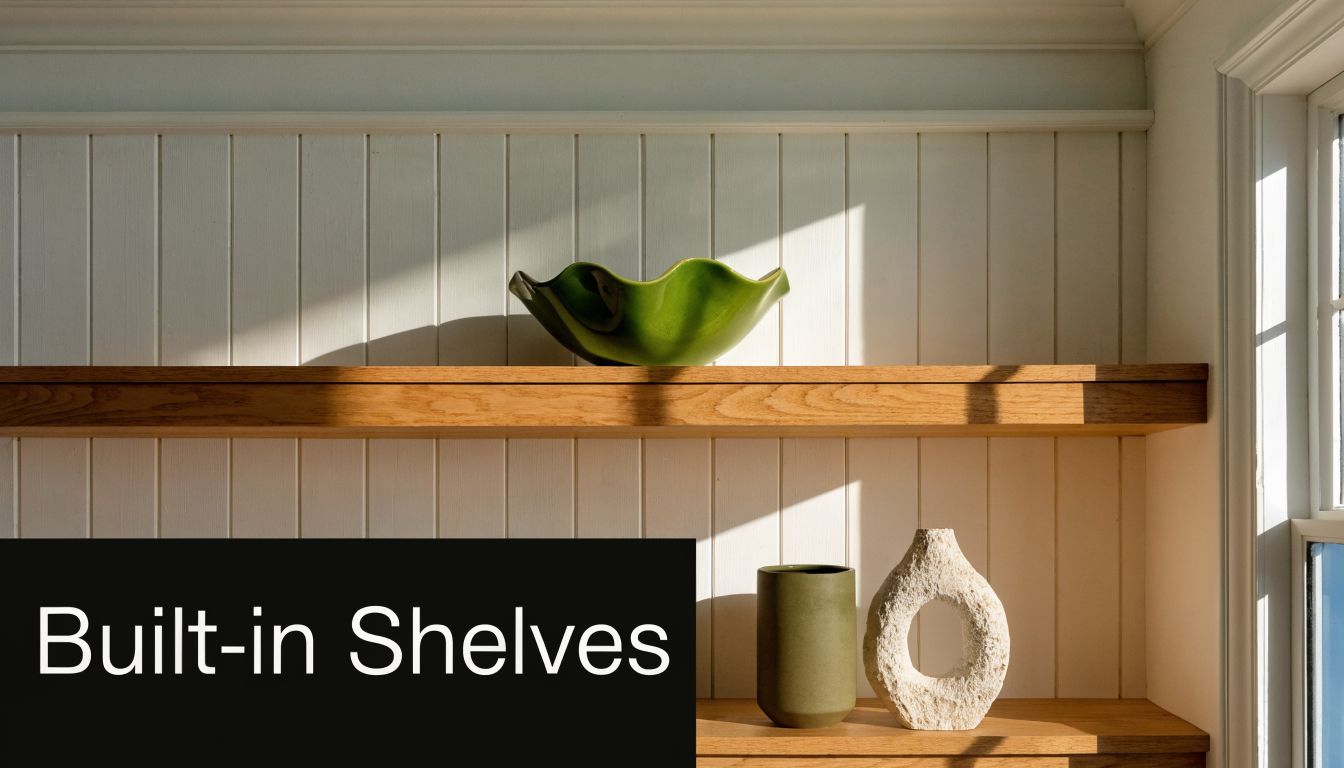
2. Shiplap with Integrated Shelving
If you want a wall to work harder, combine shiplap with shelving from the start. This looks especially good in kitchens, home offices, nurseries, and bathrooms where storage needs to feel intentional instead of tacked on later. In Mount Pleasant kitchens and Coquitlam family homes, open shelves over shiplap often land in that sweet spot between practical and polished.
The mistake is treating the shiplap as a backdrop first and the shelving as a separate project. Weight, bracket location, and stud layout need to be resolved before the first board goes up. If not, installers end up cutting around hardware or fastening shelves where the structure isn’t ideal.
Layout first, finish second
On a home office wall in Vancouver’s west side, shelving can hold books, printers, and décor. In a bathroom, it may only need to carry towels and baskets. Those are very different load conditions, so bracket choice and fastening method should reflect actual use, not just the look you want.
When clients ask for floating shelves, the cleanest installations usually hide reinforcement inside the wall before cladding starts. If the wall won’t be opened, exposed brackets anchored properly into framing are often the smarter answer. Good design isn’t only about what’s visible.
For homeowners also reworking storage elsewhere, these closet design ideas can help tie shelving details together across the house.
Use these rules as a baseline:
- Locate studs early: Mark framing before installation so shelf placement stays flexible.
- Control shelf spacing: Leave enough height for real objects, not just styling pieces.
- Repeat materials carefully: If shelves are stained wood, echo that tone in flooring, stools, or cabinetry nearby.
Shelving always exposes installation quality. If the shiplap lines drift even slightly, every shelf makes it more obvious.
This idea works best when the wall has a job to do. If the shelves will stay mostly empty, a plain accent wall often looks stronger.
3. Mixed Shiplap and Wood Tones
Not every shiplap wall needs to be painted white. Mixing painted shiplap with natural wood tones gives a room more warmth and keeps it from feeling too crisp or too farmhouse. In Dunbar, Kerrisdale, and other parts of Vancouver where homeowners are modernizing older interiors, this balance often suits the house better than an all-white treatment.
A common version is white or soft off-white shiplap paired with a stained mantle, oak shelf, walnut vanity, or fir trim detail. The contrast gives the wall depth. It also helps bridge old and new materials, which matters in homes where original floors or millwork are staying.
Where the balance matters
This approach shines in living rooms, bedrooms, and bathrooms where you want texture but don’t want the wall to feel cold. Around a vanity, a wood-framed mirror over painted shiplap can soften stone and tile. In a bedroom, a stained wood picture rail or perimeter trim can make a shiplap headboard wall feel more finished.
The hard part is restraint. Too many wood tones create confusion fast, especially in homes that already have mixed flooring, cabinets, and furniture. Usually one clear wood species or stain family is enough.
A few combinations tend to hold up well:
- Upper and lower contrast: Painted shiplap above, natural wood detail below.
- Feature trim: Keep the field painted and let one wood element carry the warmth.
- Bathroom caution: In humid spaces, use finishes that are meant to handle moisture.
This style is a better fit than all-white when the room already has character and you want to build on it rather than erase it. It’s also forgiving in houses where existing wood flooring doesn’t pair naturally with bright white walls.
4. Shiplap Wainscoting
Full-height shiplap isn’t always the right move. In many Vancouver homes, partial wall coverage looks more refined. Shiplap wainscoting gives you the texture and durability of paneling while keeping the room lighter above the chair-rail line.
This works particularly well in entryways, dining rooms, kitchens, powder rooms, and family bathrooms. In Shaughnessy or Kitsilano character homes, it can feel historically comfortable. In newer Burnaby or Richmond homes, it adds architectural detail where the original shell may be plain.
Why partial coverage often looks better
A lower band of shiplap protects the wall where bags, chairs, and everyday traffic do the most damage. It’s practical in mudroom-style entries and busy family zones. It also gives you a clean place to introduce colour above, whether that’s a warm neutral, a muted green, or wallpaper.
The top trim is what separates a proper wainscot look from a cut-off accent panel. Use a cap or trim profile that suits the house. In a period home, that might mean a more traditional profile. In a contemporary renovation, a simpler square-edged trim often looks cleaner.
Good execution comes down to proportion:
- Set the height with the room: Lower ceilings usually want a more restrained wainscot height.
- Finish transitions cleanly: Plan outlet and switch cuts so they don’t look random.
- Use moisture-resistant coatings where needed: Kitchens and bathrooms need tougher finishing than dining rooms do.
In narrow New Westminster hallways or compact North Vancouver powder rooms, wainscoting can be the smarter design move because it gives detail without shrinking the space visually.
5. Shiplap with Board-and-Batten Accents
This is a more structured version of shiplap. Horizontal boards create the field, and battens add vertical rhythm on top. The result has more depth than standard shiplap and more refinement than a simple feature wall.
It suits transitional homes and newer builds particularly well. In a master bedroom in Kitsilano or a living room in West Vancouver, it can give a wall a custom millwork feel without building a full panel system from scratch. It also works on island ends, mudroom walls, and walk-in closets where plain shiplap may look too flat.
Strong look, tighter tolerances
Board-and-batten over shiplap only works if the layout is drawn properly before cutting starts. Battens need to relate to the room and to nearby features like windows, beds, sconces, or cabinetry. Random spacing is the quickest way to make it look DIY in the wrong sense.
Painting battens and shiplap the same colour gives a quieter, more architectural effect. Using contrast creates more drama, but it also highlights every joint and every alignment issue. In most homes, tone-on-tone is the safer long-term choice.
If the wall already has enough going on, board-and-batten over shiplap can become visual noise. It needs room around it.
A few situations where it tends to work:
- Bedroom focal walls: Especially behind beds with centred lighting.
- Closet or dressing areas: Where added detail feels intentional and fitting.
- Large blank walls: Where standard shiplap may not carry enough presence.
This isn’t the cheapest option and it’s not the most forgiving. But when the proportions are right, it reads like custom carpentry instead of surface decoration.
6. Shiplap Fireplace Surround
Rain is hitting the windows, the fireplace is on, and the whole room still feels flat. That is often the point where a shiplap fireplace surround makes sense in Greater Vancouver homes. It gives the fire wall more presence without the cost and weight of full stone or tile from floor to ceiling.
A fireplace is also one of the few places where decorative paneling has to meet real performance requirements. In Vancouver, Burnaby, and Richmond renovations, I look at three things first. The fireplace type, the manufacturer’s clearance rules, and how the wall handles heat and seasonal moisture. A good design can still fail if those basics are ignored.

Build it around the appliance, not just the look
Gas inserts, direct-vent units, electric fireplaces, and older wood-burning assemblies all create different constraints. Some surrounds can carry painted wood trim close to the opening. Others need non-combustible material in key zones, with shiplap held farther back or used only above the mantle line. The manual decides that, not the mood board.
In newer, tighter homes, heat buildup can be more noticeable around the fireplace wall. In older character houses, the challenge is usually the substrate. Plaster may be wavy, framing may be out of plane, and existing trim profiles can make a simple install look awkward if the proportions are wrong. In those homes, the surround should feel like it belongs to the house, especially in heritage areas across Vancouver where overly crisp detailing can look out of place.
Paint choice matters here too because fireplace walls get more light, more attention, and often more temperature fluctuation than a standard feature wall. For finish guidance, this primer on the best paint for interior wood is a useful starting point.
A few practical decisions make the difference between a custom-looking result and a wall that feels added later:
- Check required clearances first: Start with the fireplace manual and local code requirements before drawing any panel layout.
- Choose board width to suit the room: Narrow boards can look busy around a small firebox. Wider profiles usually read better from across the room.
- Resolve the edges properly: Returns into casing, tile, stone, or drywall need intentional trim details. Raw transitions stand out immediately.
- Be careful with full-height installations: Floor-to-ceiling shiplap works best where ceilings are high enough and the chimney mass can carry the scale.
- Use moisture-stable material in the right setting: In damp Lower Mainland conditions, MDF is not always the best call, especially near exterior chimney walls or areas with temperature swings.
Done properly, a shiplap fireplace surround gives the room a stronger centre. It can suit a newer build in West Vancouver, a renovated bungalow in Burnaby, or a character house in East Vancouver. The difference is in the detailing, and that is where an experienced local builder like Domicile Construction earns their keep.
7. Coloured Shiplap
White gets most of the attention, but coloured shiplap often gives a room more personality and better balance. Soft sage, muted blue, warm greige, charcoal, and earthy tones all work in the right setting. In Vancouver homes with lots of cloudy daylight for much of the year, colour can bring warmth that bright white sometimes doesn’t.
This approach suits powder rooms, bedrooms, offices, and built-in alcoves especially well. In smaller spaces, one painted shiplap wall can do more than artwork because it changes how the whole room feels. In a home office, darker tones can add focus. In a powder room, a soft green or blue can calm the room down.
Test the room, not the paint chip
Light changes quickly across Greater Vancouver depending on orientation, tree cover, and season. A colour that looks balanced in a showroom can feel cold in a north-facing Burnaby bedroom or muddy in a shaded North Vancouver office. Large samples on the wall are worth the effort.
Coloured shiplap also asks more of the finish work. Joints, nail filling, and caulking need to be cleaner because deeper colours and lower sheens tend to show imperfections. If the room has several competing finishes already, adding colour to the walls can push it too far.
For product selection and sheen, this guide to the best paint for interior wood is a practical starting point.
Try these combinations:
- Warm greige: Good in bedrooms with wood floors and black hardware.
- Muted blue: Strong in coastal-inspired spaces without becoming theme-driven.
- Soft green: A reliable choice for powder rooms and vanity walls.
Colour works best when the room’s other materials are disciplined. If the tile, cabinetry, and furniture are already loud, keep the shiplap quieter.
8. Shiplap Ceiling Installation
Walk into an older Vancouver bedroom with a tired flat ceiling, uneven patches around old light boxes, and no architectural detail, and a shiplap ceiling can change the room fast. It adds texture, cleans up a lot of visual noise, and gives the space a finished surface that plain drywall often cannot. In the right room, it feels intentional rather than decorative.
Ceilings also expose installation mistakes quickly. Every cut lands in your line of sight. Every change in framing shows up in the board lines. In Greater Vancouver homes, especially character houses and 1980s to 1990s renovations in Burnaby and Richmond, it is common to find joists that are out of plane, patched electrical runs, or old vent locations that need to be dealt with before a single board goes up.
Plan the ceiling like a finish system
A good result starts with layout, backing, and service locations. Pot lights, speakers, smoke alarms, bath fans, attic hatches, and sprinkler heads need confirmed positions before installation. If those decisions happen late, the ceiling usually ends up with awkward cuts or misaligned board joints.
Board direction matters too. On a narrow room, running shiplap lengthwise can make the space feel longer. On a vaulted ceiling, following the roof slope usually looks cleaner because it respects the structure instead of fighting it. For heritage homes in Vancouver, I usually keep the pattern simple and let the house carry the character.
Paint choice matters overhead. Lighter colours tend to work better because they reflect more light and keep the ceiling from feeling lower. In bathrooms or upper-floor rooms with less air movement, product selection and gap detailing also matter more because our damp climate will expose poor prep.
Keep these job-site realities in mind:
- Electrical first: Finalize lights, fans, and switches before cladding starts.
- Flatness matters: Shim or strap uneven framing so the finished lines stay straight.
- Bathrooms need real ventilation: Shiplap is a finish, not a fix for moisture.
- Labour runs higher than wall work: Overhead cutting, staging, and trim detailing take more time.
This can be a strong choice in kids’ rooms too, especially where you want the walls to stay simple and durable. If that room also connects to a family bath, our guide to bathroom ideas for kids covers practical finish decisions that hold up better in busy homes.
A shiplap ceiling looks clean and straightforward once it is painted. Getting there usually takes careful prep, accurate layout, and better finish carpentry than homeowners expect.
9. Shiplap Bathroom Features
A lot of Vancouver-area homeowners fall for bathroom shiplap after seeing a clean vanity wall online. Then practical conditions emerge. Steam, poor fan performance, cold exterior walls, and daily splash zones will expose bad material choices fast, especially in older homes in Vancouver and draftier renovations in Burnaby and Richmond.
Shiplap can work well in a bathroom. It just needs the right placement.
The safest applications are outside the direct spray zone. Behind a mirror, around a vanity, or on the upper portion of a powder room wall, shiplap adds warmth without asking it to do a tile assembly’s job. In a small ensuite, that texture can keep the room from feeling too glossy or flat.
Inside a shower or tub surround, I usually steer clients back to tile or another fully waterproof system. That is the better fit for routine water exposure, fewer callbacks, and lower maintenance over time. A mixed approach often gives the best result. Shiplap on the vanity wall, tile where the water hits.
That trade-off matters even more in Greater Vancouver’s damp climate. In many local homes, moisture lingers longer than people expect, especially where the fan is undersized, the window stays shut, or insulation behind the exterior wall is inconsistent. In heritage houses, the wall assembly may already be less forgiving, so finish choices need to respect the building, not just the look.
For busy family bathrooms, these bathroom ideas for kids are useful if you want finishes that still look good after hard daily use.
A few details make the difference between a bathroom feature and a repair job:
- Use stable material: In higher-humidity rooms, primed MDF is often the wrong call. Wood or better moisture-tolerant trim products usually hold up better.
- Prime all sides before installation: That includes cut ends, not just the face.
- Leave proper expansion tolerance: Tight joints in a damp room can telegraph movement later.
- Caulk selectively: Seal transitions and edges, but do not rely on caulk to solve poor detailing.
- Size the exhaust fan properly: Good ventilation reduces paint failure, swelling, and mildew at joints.
Domicile Construction helps homeowners in Greater Vancouver choose where shiplap belongs in a bathroom and where another finish will perform better. That is usually the difference between a bathroom that looks sharp for years and one that starts showing stress after a single wet winter.
In most bathrooms, selective use is the smart move.
10. Diagonal or Angled Shiplap
A diagonal shiplap wall can look sharp in the right room, then feel expensive and overworked the moment the layout is off by even a little. In Greater Vancouver homes, I usually treat this as a finish-carpentry feature, not a casual accent wall. It suits newer condos and renovated character homes where the wall plane is fairly clean and the design can carry a stronger pattern.
This style asks more from the room than standard horizontal shiplap. Every outlet, window return, inside corner, and ceiling line becomes more visible once boards run on an angle. That means more cuts, more waste, and a much smaller margin for error during install.
Vertical shiplap is often the safer version of this idea.
It gives height without creating as much visual tension, so it works well in entryways, home offices, and narrow wall sections. Diagonal layouts have more impact, but they usually belong on one contained feature wall, especially in Vancouver and Burnaby homes where room sizes can be modest and existing trim details already carry a lot of character.
Older houses need extra care. In heritage homes across Vancouver, New Westminster, and parts of Richmond, an angled shiplap installation can conflict with existing casings, picture rails, plaster irregularities, or heritage detailing that is worth preserving. If the wall is out of level, and many older walls are, the pattern can drift enough to show it. Before any board goes up, the layout needs to be drawn from a fixed reference point, and the substrate needs to be checked for flatness.
This installation video shows the kind of layout precision these patterns demand.
A few rules help this style stay intentional:
- Limit it to a focused area: One wall, a stair run, or a recessed niche usually reads better than a full room.
- Dry-layout the pattern first: Set your centreline and check how the boards die into corners, trim, and outlets before cutting material.
- Expect higher waste: Angled cuts leave more offcuts than horizontal installs, so order accordingly.
- Use stable, straight boards: Minor bowing shows up faster on a diagonal pattern.
- Hire for precision: This is finish carpentry work, especially in older Greater Vancouver homes with uneven framing and patched walls.
Domicile Construction helps homeowners decide whether diagonal or vertical shiplap fits the house, the budget, and the wall condition before the first cut is made. That early planning matters here. Good execution gives the wall energy and structure. Poor execution leaves you staring at every line that missed.
10 Shiplap Wall Ideas Comparison
| Style | Implementation Complexity 🔄 | Resources & Cost ⚡ | Expected Outcomes 📊 | Ideal Use Cases 💡 |
|---|---|---|---|---|
| Classic White Shiplap Accent Wall | Low, straightforward horizontal installation | Low, standard boards and paint; affordable | Bright, timeless focal point; subtle depth | Bedrooms, living rooms, bathrooms, heritage homes |
| Shiplap with Integrated Shelving | Medium, cut openings and integrate shelves; pro recommended | Medium–High, shelving hardware; ~20–40% more | Functional storage plus display; added architectural interest | Kitchens, home offices, bathrooms, nurseries |
| Mixed Shiplap and Wood Tones | Medium, coordinate finishes and staining | Medium–High, multiple materials and finishing | Warm, layered aesthetic; better at hiding dust/shadows | Heritage homes, open-concept spaces, kitchens |
| Shiplap Wainscoting (Partial Wall) | Medium, precise measurements and trim work | Low–Medium, uses ~40–50% less material than full wall | Sophisticated, protective lower wall; perceived higher ceilings | Bathrooms, dining rooms, entryways, kitchens |
| Shiplap with Board-and-Batten Accents | High, precise battens and trim; skilled carpentry | High, extra materials and labor for battens | High-end, custom architectural look; vertical emphasis | Master bedrooms, entryways, high-end residential projects |
| Shiplap Fireplace Surround | Medium, careful planning around hearth and codes | Medium, possible heat-resistant materials; pro install advised | Strong unified focal point; increases room warmth and appeal | Living rooms, open-concept homes, heritage fireplaces |
| Coloured Shiplap (Non-White Hues) | Low–Medium, paint selection and application | Low, similar to standard; may need extra coats | Personalized, curated look; better conceals dust than white | Bathrooms, bedrooms, home offices, powder rooms |
| Shiplap Ceiling Installation | High, scaffolding, electrical coordination, complex install | High, 2–3x wall cost; pro labor and equipment required | Dramatic, immersive statement; hides ceiling imperfections | Master bedrooms, vaulted ceilings, cottages, luxury renovations |
| Shiplap Bathroom Features (Vanity Backsplash & Shower) | High, waterproofing, sealing and ventilation essential | Medium–High, marine-grade paint and vapour barriers | Spa-like aesthetic; fewer grout lines, but moisture risk if failed | Vanity backsplashes, powder rooms, bathroom accent walls |
| Diagonal or Angled Shiplap (Vertical/Diagonal) | High, precise cutting, layout and increased waste | High, ~20–40% premium for complexity and materials | Dynamic, contemporary visual movement; bold focal point | Feature walls, modern/high-end homes, creative spaces |
Bringing Your Shiplap Vision to Life in Vancouver
The best shiplap wall ideas aren’t the ones that look strongest in a photo. They’re the ones that still make sense after you account for moisture, trim transitions, existing framing, and how the room will be used. That’s especially true in Greater Vancouver, where a bathroom in Richmond, a character house in Vancouver, and a hillside property in North Vancouver all bring different constraints to the same design choice.
For many homeowners, the appeal of shiplap starts with texture and ends with practicality. It can brighten a dark bedroom, sharpen a fireplace wall, or make a powder room feel far more considered. It also connects naturally with local housing stock. In Vancouver’s older homes, that connection is literal. Many already contain historic wood wall systems behind later finishes. In newer homes across Burnaby, Coquitlam, Port Moody, and New Westminster, shiplap can add a layer of architectural character that the original build may not have included.
The challenge isn’t coming up with inspiration. It’s choosing the version that fits the house. A classic white accent wall is forgiving and broadly useful. Integrated shelving makes sense when the wall also needs to perform. Mixed wood tones soften a room that might otherwise feel too stark. Wainscoting often suits tighter spaces better than full-height coverage. Ceiling applications and angled layouts can be excellent, but they demand more planning and cleaner execution than generally expected.
Bathrooms and heritage homes need extra caution. In wet areas, the product choice and wall assembly matter more than the style idea. In older houses, the installation has to respect uneven substrates, existing trim language, and local review requirements. Vancouver’s heritage context isn’t only about preserving what’s old. It’s about making upgrades that don’t feel disconnected from the structure around them.
That’s where experienced construction input matters. A good contractor doesn’t just install boards neatly. They check what’s behind the wall, coordinate electrical and millwork details, flag potential moisture issues, and make sure the final finish reads like part of the house. On more complex projects, they also help manage municipal requirements in places like North Vancouver, New Westminster, and Vancouver itself, where permit scope and review can affect material decisions early.
There’s also the practical side of finishing a renovation cleanly. Once demolition, cutting, and trim work are done, waste removal becomes part of keeping the project on track. If you’re coordinating the final cleanup, this article on full service junk removal after renovations gives a practical overview of why many homeowners prefer to hand that part off.
If your project involves a heritage property, bathroom upgrade, fireplace feature, integrated shelving, or any wall where design and building performance need to work together, it’s worth getting advice before materials are ordered. Domicile Construction specializes in exactly that kind of work across Greater Vancouver. The value isn’t just in making shiplap look good on day one. It’s in making sure it still looks right, performs properly, and fits the home years from now.
If you’re ready to explore shiplap wall ideas for your home in Vancouver, Burnaby, Richmond, North Vancouver, West Vancouver, New Westminster, Coquitlam, Port Coquitlam, or Port Moody, contact Domicile Construction Inc.. The team can help you assess the room, choose the right material and finish, and build a result that feels custom-fitted to your home instead of copied from a trend.