Step in Bathroom Renovations for Vancouver Homes
April 13, 2026

A lot of homeowners in Greater Vancouver reach the same moment. The bathroom still works, technically, but every day asks for a small compromise. You step over a tub wall that feels higher than it used to. The room stays damp. The layout is tight. In an older Vancouver or New Westminster house, the finishes may have charm, but the bathing area can feel like it belongs to another era.
That’s where a step in bathroom starts to make sense.
For some households, the goal is safety. For others, it’s comfort, easier cleaning, or a cleaner modern look. In Burnaby bungalows, Richmond condos, and North Shore character homes, the same question keeps coming up. How do you make the bathroom easier to use without making it look clinical or stripping out the home’s character?
That question gets more complicated in local homes. Heritage properties often have uneven floors, older framing, and preservation concerns. Condo owners may face strata review before they can touch plumbing or waterproofing. Detached homeowners in places like Coquitlam or Port Moody may have more freedom, but they still need to think about permits, drainage, and practical day-to-day use.
A good step in bathroom isn’t just a shower with less edge. It’s a carefully planned system. The floor slope matters. The threshold detail matters. Waterproofing matters. In older homes, so does how the new work meets old structure.
Introduction to Step in Bathroom Upgrades
A Vancouver bathroom renovation often starts with a very ordinary moment. You are half awake, the floor is cool, and the tub wall in a 1910s Strathcona house suddenly feels taller than it did a few years ago. The room may still look charming, with old trim and thick plaster walls, but the way it works no longer matches the people using it.
A step in bathroom upgrade changes that daily experience. In practical terms, it replaces a high tub entry or awkward shower edge with a bathing area that is easier to enter and simpler to use. The goal is not only comfort. It is to make the room work better for real life, whether that means aging in place, helping a parent use a basement suite safely, or making a tight family bathroom feel less cramped.
In Greater Vancouver, this kind of project asks for more thought than a generic online guide usually suggests. Older houses in neighbourhoods like Strathcona, Mount Pleasant, and parts of New Westminster often hide lath and plaster walls, uneven joists, and plumbing that was set for a cast-iron tub decades ago. A step in shower in one of these homes is a bit like fitting a new door into an old frame. The idea is simple, but the opening has to be measured carefully or the whole assembly feels off.
Municipal rules can shape the design early. Vancouver heritage properties may trigger design review concerns if exterior changes are involved. In a condo in Richmond or Burnaby, strata may want details on waterproofing, noise control, and plumbing shutdowns before work begins. Even in a detached home with fewer approval layers, changing floor structure for a lower shower entry can affect permit scope, especially if joists need to be altered to create the right slope.
That local context is what makes a successful upgrade feel thoughtful rather than rushed.
Why local homeowners are choosing this upgrade
Some homeowners want a cleaner visual line with less interruption at the shower entry. Others are planning for future mobility needs before a problem becomes urgent. In many Metro Vancouver homes, both goals point to the same solution.
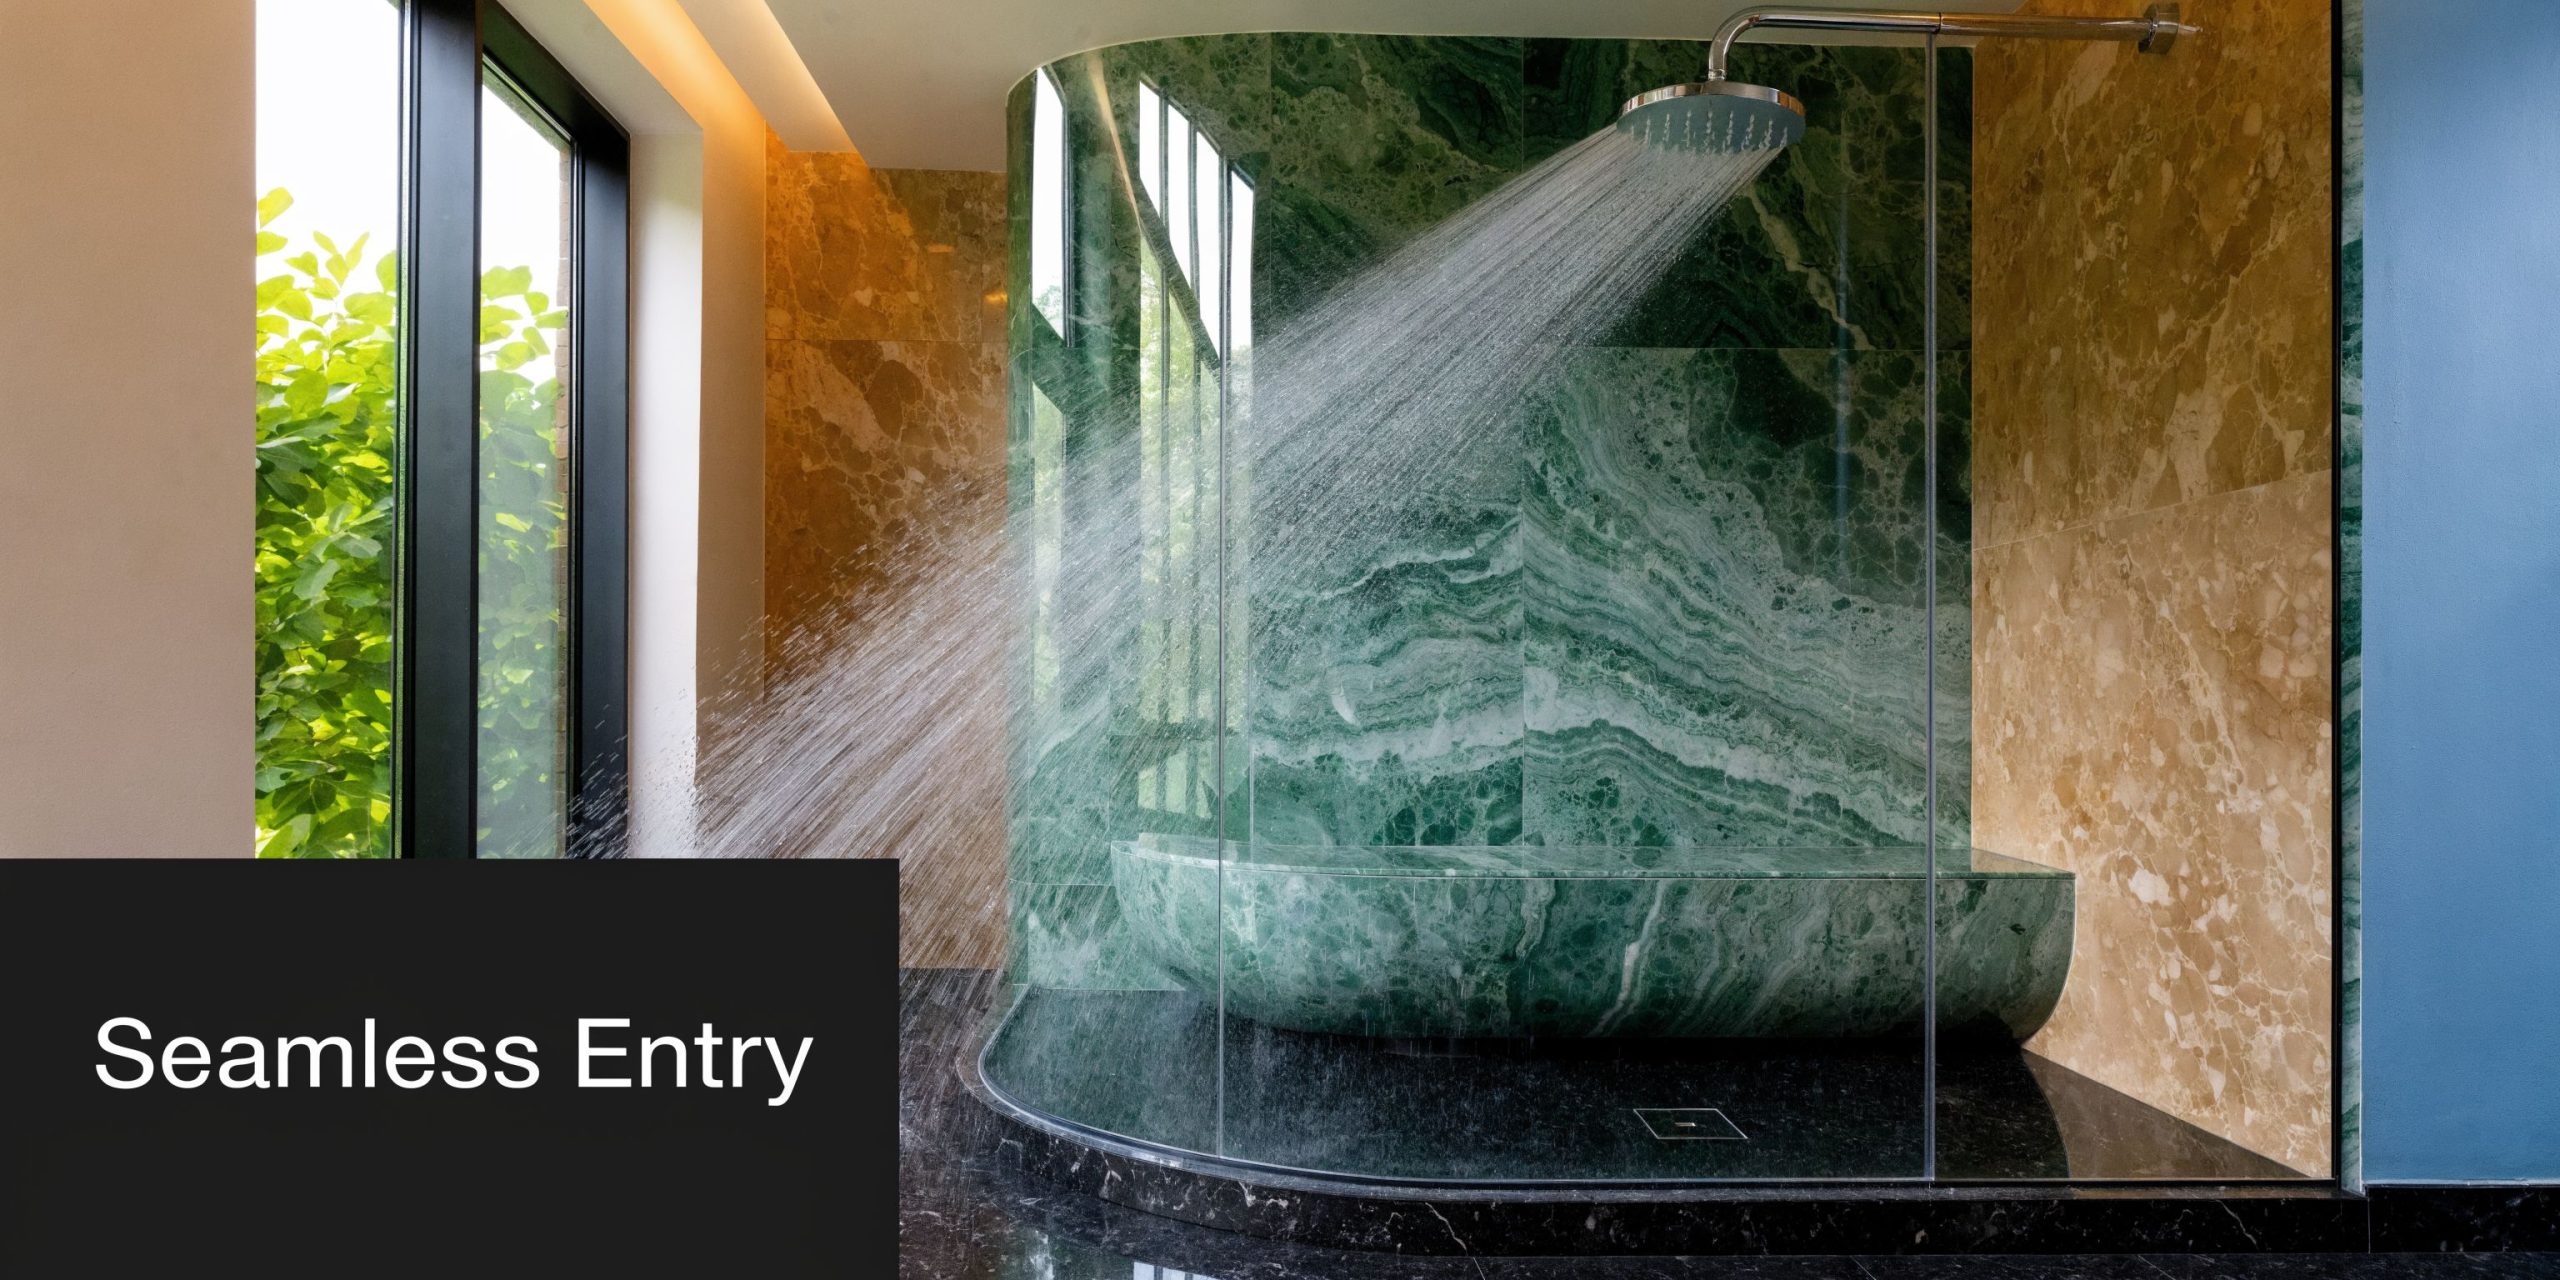
The appeal is easy to understand. A step in bathing area removes the little obstacle that gets repeated every single day. It also creates room for practical additions such as grab bars, better lighting, and a built-in seat. For homeowners comparing options, a shower base with integrated seating can be a useful example because it shows how comfort, safer entry, and water control can be designed together instead of treated as separate decisions.
What makes the upgrade feel successful
The best projects usually share three traits:
- The entry feels natural. You walk in without the awkward lift and pause that a tub wall creates.
- The water stays where it should. Floor pitch, drain location, and waterproofing are planned before finish materials are chosen.
- The design respects the house. A character home in Kitsilano or West Vancouver can feel updated without losing the details that make it feel like home.
A good test is simple. If the new shower looks modern but leaves water creeping toward the vanity, the design was only solved on paper. In older Vancouver homes especially, the critical work happens below the tile, where structure, slope, and waterproofing all have to agree.
Understanding Step in Bathroom Types
The term step in bathroom covers a few different shower setups, and the differences matter once you start pricing work or talking to a contractor. In a newer condo, the choice may be mostly about style and floor space. In a Vancouver character home with uneven joists, old mortar beds, or a tightly framed alcove, the shower type can affect structure, waterproofing, and even how easily the permit review goes.
Curbless showers
A curbless shower has no raised edge at the entry. The bathroom floor continues into the shower, and the surface is sloped so water runs to the drain instead of out into the room.
For homeowners, the simplest way to read it is this. The floor has to do two jobs at once. It must feel flat enough to walk across comfortably, but pitched enough to control water. That balancing act is usually straightforward in a full gut renovation. It gets trickier in older homes in areas like Mount Pleasant, Kitsilano, or New Westminster, where floor framing was never built with this kind of shower in mind.
Curbless designs are popular because they look open and make a small room feel less chopped up. They also support long-term accessibility planning. In heritage homes, though, removing the visual barrier at the entrance often means more hidden work below the tile. A contractor may need to recess the subfloor, adjust joists within code limits, or rebuild the bathroom floor height so the shower can slope properly without creating a hump at the doorway.
Low-threshold showers
A low-threshold shower maintains a defined entry, but with a minimal lip. Under BCBC 2024, that threshold is typically no more than 13 mm high, and changes in level over 6 mm generally need a 1:2 bevel to reduce trip risk and soften the transition.
This type is often the practical middle ground. You still get easier access than a tub or older shower curb, but you keep a small edge that helps contain water. In many Metro Vancouver renovations, that makes the build simpler, especially where the bathroom floor cannot be dropped much without affecting adjacent rooms or original trim details.
That is why low-threshold showers show up so often in older bungalows and post-war homes in Burnaby, East Vancouver, and Coquitlam. The room keeps a familiar footprint, the drainage strategy is easier to control, and the design can respect the house instead of forcing a fully flat entry into a structure that fights it.
Which one suits your home
The better choice usually comes from the house, not the trend.
A curbless system often fits projects where the floor is already being rebuilt, where aging-in-place is a clear goal, or where the room layout allows careful control of slope and drainage. A low-threshold system often fits bathrooms with tighter structural limits, more modest budgets, or an alcove layout that you want to preserve.
In heritage and character homes, there is also a preservation question. If your bathroom still has original baseboards, door casings, mosaic tile outside the wet area, or a narrow doorway that limits layout changes, a low-threshold shower may protect more of the home's existing fabric while still improving daily use. In some Vancouver neighbourhoods, especially where exterior and character concerns draw closer review, homeowners are often surprised that interior bathroom work can still raise permit questions once plumbing, framing, and waterproofing details are involved.
Some homeowners also add seating for comfort and support. If that option is on your list, this example of a shower base with integrated seating shows how easier entry and built-in support can work together without making the room feel clinical.
Common point of confusion
People often use walk-in, step-in, and curbless interchangeably. They overlap, but they do not mean the same thing.
| Term | What it usually means |
|---|---|
| Step in bathroom | A bathroom designed around easier-entry bathing, usually with a low-threshold or curbless shower |
| Walk-in shower | A shower you can enter without climbing over a tub wall. It may still have a small lip |
| Curbless shower | A specific walk-in design with no raised entry curb |
That wording matters during planning. A homeowner may ask for a walk-in shower, a designer may draw a low-threshold base, and a contractor may price a fully curbless assembly. In a Vancouver renovation, those are not small differences. They can change the floor build-up, the drain location, the tile layout, and the amount of structural correction an older house needs before the first waterproof layer goes in.
Accessibility Benefits and Use Cases
A homeowner in a 1950s Burnaby bungalow often notices the problem before calling a contractor. The bathroom still works, but the tub wall has become a daily obstacle. What used to feel routine now feels like stepping over a short fence on a wet floor.
That is the primary value of a step in bathroom. It reduces the awkward movement at the point where slips often happen, especially for older adults, people recovering from surgery, and households helping a parent or grandparent bathe safely.
Why easier entry changes daily life
Getting into a tub usually requires three motions at once. Lift the leg high enough. Turn the body sideways. Shift weight onto a wet surface. In an older home with a tight bathroom, there is not much room to correct your balance if any part of that sequence goes wrong.
A low-threshold or curbless shower removes that high step and simplifies the movement. The body can move forward instead of up and over. That sounds minor on paper. In real use, it feels more like replacing a ladder rung with a gentle ramp.
This matters in Greater Vancouver for reasons that generic guides often miss. Many heritage and postwar homes were built for compact bathrooms, not aging in place. In neighbourhoods with older housing stock, such as parts of East Vancouver, Burnaby, and New Westminster, homeowners are often trying to improve access inside rooms that were never sized for walkers, shower seating, or assistance from another person.
Features that support accessibility without making the room feel clinical
Good accessibility usually comes from several coordinated choices rather than one product.
- Grab bars where movement changes direction: near the shower entry, beside the controls, and close to a bench or sitting spot
- Built-in or fold-down seating: useful for bathing during recovery, reduced stamina, or assisted care
- Slip-resistant flooring: traction matters more than a polished showroom look once water is involved
- Handheld shower heads: easier for seated use, child washing, and helping another person bathe
- Wider shower openings: better for mobility aids, but also easier for everyday use and cleaning
Many homeowners looking into a walk-in shower for seniors begin with one concern, usually safety, then realize the same layout also works better for children, guests, and future aging in place.
One room can serve several stages of life.
Use cases in Metro Vancouver homes
The same upgrade solves different problems depending on the house.
A Burnaby bungalow from the 1950s or 1960s often has smaller joists, older plumbing locations, and subfloors that were never designed for a low-entry shower assembly. That does not mean a step in bathroom is off the table. It means the planning has to account for how much floor adjustment is possible without weakening the structure or creating awkward height changes at the bathroom door. For that homeowner, accessibility is tied directly to how carefully the subfloor is modified.
A Port Coquitlam house built in the 1980s or 1990s usually presents a different puzzle. These homes often have larger bathroom footprints and more standard framing layouts than heritage homes, which can make access upgrades easier to fit. The priority there is often shared use. A hall bath may need to work for kids rushing through bedtime, grandparents visiting for long stays, and adults who want a room that still feels current rather than medical.
In a Vancouver heritage home, the use case can be even more specific. A homeowner may want safer bathing on the main floor while preserving original trim, plaster transitions, or character details that affect permit review in certain neighbourhoods. The bathroom may be interior, but once plumbing, framing, or floor alterations start, the renovation still needs to respect the age and quirks of the house.
Accessibility and style can work together
Accessible design does not require a hospital look. A tiled bench can read like part of the architecture. Grab bars now come in finishes that match faucets and shower frames. Slip-resistant tile can look refined if the right texture and format are chosen.
The best step in bathrooms feel calm because the support is built into the design instead of added as an afterthought. That is especially important in Vancouver homes where resale, family use, and long-term comfort all matter at once.
Water control is part of accessibility too. If a shower is easier to enter but harder to keep dry outside the wet area, the room becomes less safe, not more safe. This guide on bathroom waterproofing gives a useful ove…com.au/waterproofing-bathroom-melbourne/) gives a useful overview of the layers and detailing that help these bathrooms perform properly over time.
Design Layout Materials and Waterproofing
A good step in bathroom starts with water movement, not finish samples. In many Greater Vancouver renovations, that lesson shows up late, after a homeowner has already chosen tile, glass, and fixtures.
Older houses make that sequencing even more important. In a Vancouver heritage home, the floor may slope before the shower is even built, joists may be undersized by current expectations, and plaster or original trim can limit how much wall build-up you can hide. A step in shower has to fit the room you have, not the perfect rectangle shown in a product brochure.
Start by reading the room like a map. Where does the water go, where does the person stand, and what part of the house will object if you change too much?
Layout first
Layout should solve three problems at once. Entry should feel easy, water should stay controlled, and the room should still make sense with the rest of the house.
In a narrow East Vancouver bathroom, keeping the vanity where it is may avoid a larger plumbing rework and reduce disruption to original flooring outside the bathroom. In a character home in Kitsilano or Mount Pleasant, that can matter because changing more surfaces often means more patching, more trim work, and sometimes more permit review if heritage features are involved. In a newer Coquitlam home, you may have enough width to add a bench, wider clearances, and a larger glass panel without that same balancing act.
This visual sums up the renovation sequence well.
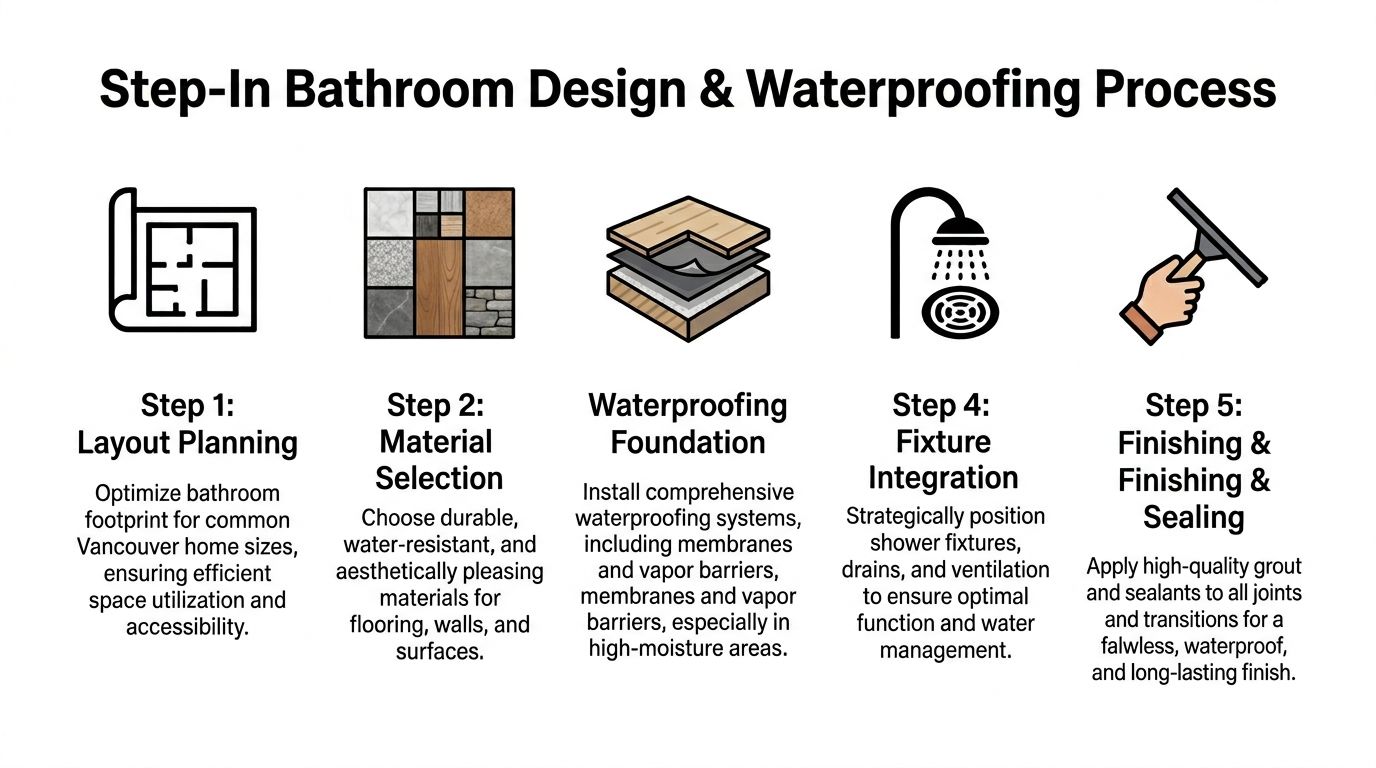
A few layout decisions shape the whole project:
- Drain position: A linear drain near the back wall or entry can simplify tile cuts and create a more predictable plane for drainage, but it needs the right floor build-up.
- Glass placement: A fixed panel can keep spray contained without making a small room feel boxed in.
- Bench location: A bench should support dressing, shaving, or seated bathing without narrowing the path of travel.
- Niche placement: Storage belongs where a person can reach it easily without standing in the direct spray zone.
- Transition to the rest of the bathroom: In curbless designs, the shower floor and main floor have to work like one assembly, not two separate surfaces pushed together.
Slope controls everything
A step in shower floor needs consistent fall toward the drain. That is basic, but it is also where many projects go wrong.
Floor slope works like the grade on a driveway. Too little, and water sits. Too much, and walking feels awkward. In older Vancouver and New Westminster homes, existing subfloors are often uneven enough that the shower base cannot be set in place and trusted to perform. The floor usually needs careful prep before waterproofing starts.
Inspection problems often come from the same cluster of issues. Inconsistent slope, weak transitions at the bathroom entry, and poorly detailed drain connections are common examples. Those problems matter more than a tile pattern because they decide whether water leaves the space or slowly spreads into places you cannot see.
Field note: A well-built shower floor should feel steady and natural underfoot. You should notice the comfort before you notice the pitch.
Material choices in Vancouver homes
Materials affect more than appearance. They change traction, maintenance, installation complexity, and how naturally the shower fits an older house.
Tile
Tile gives the most design freedom, which is why it is common in heritage-sensitive work. It can echo older mosaic floors, pair well with traditional trim profiles, and handle custom niches or benches more gracefully than many prefabricated systems.
Small-format floor tile usually makes sloped surfaces easier to build and can improve grip because there are more grout joints. Large wall tile can reduce visual clutter, though it asks for flatter walls and more precise prep. In older homes, that prep can be a project of its own because the framing behind the walls is rarely as straight as it looks from the doorway.
Acrylic and composite bases
Prefabricated and semi-prefabricated bases reduce some on-site variables. They can be practical in condos, secondary suites, and simpler tub-to-shower conversions where speed and easier cleaning matter most.
They are less forgiving stylistically in a heritage bathroom. A very contemporary pan can feel out of place beside original window trim, old fir flooring at the doorway, or a period-style vanity. That does not rule it out. It means the whole room needs to be composed carefully so the shower feels intentional.
Solid surface systems
Solid surface sits between custom tile work and basic prefab options. It has fewer joints, a cleaner maintenance profile, and a more customized look than many stock bases.
For some homeowners, it solves a common Vancouver problem. They want modern water control and easier cleaning, but they do not want the bathroom to lose the warmth of an older home.
Waterproofing sits below every good finish
The visible surface is only the raincoat. The primary protection is the layer underneath.
A durable shower assembly depends on connected waterproofing, not isolated products. Membranes, sealed corners, drain integration, pipe penetrations, niches, benches, and transitions at the bathroom floor all have to work together. In an older house, movement in the framing and small irregularities in the substrate make those details even more important.
Local conditions add another layer of caution. Greater Vancouver homes deal with persistent moisture, and many older bathrooms have limited natural drying. If ventilation is weak or the wet area is not detailed properly, the room may look finished while moisture lingers behind it.
For a deeper look at the assembly logic, this guide on bathroom waterproofing explains membranes…com.au/waterproofing-bathroom-melbourne/) explains membranes and sealed transitions in plain language.
Material choice also affects cost because waterproofing methods, substrate prep, and floor modification needs change from one shower type to another. Homeowners comparing options often benefit from this bathroom remodelling cost breakdown before locking in a layout.
Later in the planning process, many homeowners find it helpful to watch installation details rather than only reading about them. This video gives a practical visual sense of how shower build-ups come together.
A simple design workflow
This order usually prevents expensive revisions:
- Confirm the footprint: Decide what must stay, especially walls, windows, and plumbing lines that become harder to move in older homes.
- Choose the entry style: Curbless and low-threshold showers need different floor planning and different transition details.
- Set the drain approach: Linear and centred drains each affect slope, tile layout, and framing needs.
- Build the waterproofing plan: Choose the full assembly before finish selections start driving decisions.
- Select the visible materials: Tile, panels, glass, fixtures, bench details, and trim should fit the technical plan already in place.
That sequence saves trouble because layout, slope, and waterproofing set the rules. The finishes only succeed when those hidden parts are right.
Budgeting Cost Planning and Permitting Essentials
This is the part homeowners often want simplified into one number. A realistic budget doesn’t work that way.
A step in bathroom can range from a relatively straightforward conversion to a more involved rebuild that changes structure, plumbing locations, and floor levels. In Greater Vancouver, labour conditions, building age, and municipal review all affect the final cost.
What the installation typically costs
Verified data from Angi states that installation costs for walk-in showers average $9,000, with typical ranges between $6,000 and $12,000 as of 2026. The same source notes that semi-prefabricated systems can start around $800 and reach $15,000 total for materials and labour, while professional installation more broadly can range from $750 to $20,000 depending on type, size, and features. It also notes that tub-to-shower conversions show an average return on investment of 60% (Angi walk-in shower cost guide).
Those numbers are useful as planning anchors, not promises. In Vancouver, costs move depending on tile choice, whether structural floor changes are needed, and how much hidden repair work appears once demolition starts.
A low-threshold conversion in a simple alcove will often be less involved than a fully curbless shower in an older heritage home with uneven framing and dated plumbing.
What tends to push the budget up
The expensive parts are often the parts you don’t see.
- Subfloor correction: Common in older homes where levels and framing need adjustment.
- Drain relocation: Necessary when the ideal shower layout doesn’t match existing plumbing.
- Waterproofing complexity: Niches, benches, and multiple transitions add labour.
- Tile labour: Detailed tile layouts and premium finishes increase install time.
- Permit and review requirements: Particularly relevant when scope extends beyond finish replacement.
If you’re still shaping your numbers, this breakdown of remodelling bathroom cost can help you compare fixture, labour, and finish decisions more clearly.
Permitting in Greater Vancouver
Permit rules differ by municipality and by project scope. A simple finish refresh may not be treated the same way as plumbing relocation, structural floor work, or electrical changes.
The most practical approach is to assume that a true step in bathroom renovation may trigger review if you’re altering plumbing, changing waterproofed assemblies in a meaningful way, or modifying structure in an older house. Heritage properties can add another layer because exterior or character-related constraints may influence how work is approached, even when the bathroom itself is interior.
Because the verified data does not provide municipal permit fee figures, it’s more accurate to treat local fees qualitatively and confirm them directly with the city before final budgeting.
Cost ranges and permit fees in Greater Vancouver
| Installation Type | Average Cost | Permit Fee Range | Notes |
|---|---|---|---|
| Semi-prefabricated low-threshold shower | From $800 total for materials and labour in the verified source | Varies by municipality and scope | Often suited to simpler conversions where layout remains close to existing |
| Typical walk-in shower installation | $9,000 average, with $6,000 to $12,000 typical range | Varies by municipality and scope | Useful planning benchmark for many standard renovations |
| Custom walk-in or curbless shower | Can reach $15,000 total for materials and labour in the verified source | Varies by municipality and scope | More likely when tile work, custom glass, or structural floor changes are involved |
| Professional installation range across project types | $750 to $20,000 | Varies by municipality and scope | Broad range reflects major differences in type, size, and features |
| Metro Vancouver permitting across Vancouver, Burnaby, Richmond, North Vancouver, West Vancouver, New Westminster, Coquitlam, Port Coquitlam, and Port Moody | Not fixed in the verified data | Confirm with each municipality | Check permit triggers early if plumbing, electrical, structure, or heritage issues are part of the project |
Budgeting approach that keeps projects steadier
A practical budget usually separates the project into three buckets:
Core construction
Demolition, plumbing, substrate preparation, waterproofing, and shower build.Visible finish choices
Tile, glass, fixtures, vanity updates, and accessories.Unknown conditions allowance
Especially important in Vancouver homes with older walls and floors.
Homeowners usually run into trouble when they budget only for the visible layer. The room might need a new drain line, floor adjustment, or framing repair before the shower can even begin.
Working with Contractors in Metro Vancouver
A homeowner in Mount Pleasant opens a bathroom wall expecting a simple shower upgrade. Behind the tile is old plumbing, uneven framing, and a floor that drops just enough to complicate a curbless entry. The contractor matters most at that moment, not when showing polished portfolio photos, but when explaining what the house will allow, what local inspectors may ask for, and how to adjust the plan without losing the goal of a practical step in bathroom.

That difference shows up often across Greater Vancouver. A bathroom in a newer Burnaby condo is one kind of project. A bathroom in a Kitsilano character house, a North Vancouver post-war split-level, or a New Westminster heritage property is another. Older homes often hide sloped floors, patched plumbing, plaster repairs, and framing that was never built with today’s shower assemblies in mind.
Start with build questions, then style
Finishes are the easy part to discuss. The harder questions reveal whether a contractor can deliver the design you want.
Ask how they handle threshold details, floor slope, drain placement, waterproofing at corners and penetrations, and subfloor correction if the structure is out of level. Ask who prepares permit documents and who books inspections when plumbing, electrical, or heritage review is triggered.
As noted earlier, low-threshold details need to be measured carefully. A good contractor should explain those tolerances in plain language and describe how they verify them before tile and glass go in.
A useful way to judge this is simple. If the contractor answers like a teacher, that is a good sign. If every answer becomes “we’ll sort it out on site,” the planning may be too loose for an older Vancouver home.
Look for experience that matches your house
Relevant experience is more valuable than a broad gallery of attractive bathrooms.
A contractor who mainly renovates Richmond condos may still need help on a heritage-adjacent home in Vancouver proper. Character homes often require more than standard bathroom knowledge. The contractor may need to protect original trim, work around older venting and drain layouts, or explain how a new shower detail can be approved without disrupting the home’s existing character more than necessary.
In some neighbourhoods, permit review can feel a bit like fitting a new lining into an old coat. The outside appearance may need to stay consistent while the inside gets rebuilt to perform properly. Contractors who work regularly in Vancouver, North Vancouver, and New Westminster usually understand that balance better than firms focused only on straightforward suburban layouts.
What careful vetting looks like
Ask for examples of projects with similar constraints, not just similar finishes. A small East Van bathroom with an uneven floor and limited joist depth is a better comparison than a large custom ensuite in a new build.
Then clarify scope in writing. Who handles demolition protection, dust control, disposal, material ordering, waterproof inspection photos, and trade coordination? Homeowners get into trouble when one side assumes glass, accessories, or painting are included and the other side has priced only the shower build.
Change management matters too. Renovation work often exposes hidden conditions. If a wall opens and reveals rot, outdated piping, or a venting problem, the contractor should pause, explain the issue clearly, and provide a written change showing scope, cost, and schedule before extra work starts.
Questions worth asking at the first meeting
These questions usually produce better conversations than “How soon can you start?”
- How do you confirm the existing floor can accept a curbless or low-threshold shower assembly?
- If the drain location has to move, what structural or plumbing limits could affect the layout?
- Have you worked on homes with plaster walls, old cast iron, or uneven framing in this municipality?
- How do you document waterproofing before tile covers it?
- Who speaks with the city if permit staff ask for revisions or added details?
- How do you protect nearby rooms and hallways in older homes with finished wood floors?
One more practical question helps too. Ask what happens if drainage issues show up elsewhere in the bathroom during demolition. A contractor who understands broader plumbing behaviour can explain whether the problem is local to the shower or part of a larger line issue. This overview of toilet and shower clogging simultaneously is a useful example of the kind of whole-system thinking that separates cosmetic planning from renovation planning.
How strong contractors explain the project rhythm
A well-run bathroom renovation follows a sequence, and the sequence matters because each layer supports the next one. Structure and plumbing come before substrate. Substrate comes before waterproofing. Waterproofing comes before tile. If one step is rushed, the visible finish may look fine at first but fail where you cannot see it.
That is especially true in older Metro Vancouver homes. Heritage-era framing can be a bit like setting tile on a table with one short leg. You can decorate it beautifully, but you still have to correct the support before the surface behaves properly. Contractors who explain the order of work clearly usually manage surprises better and produce cleaner inspection outcomes.
Maintenance Safety Features and Real Examples
A well-built step in bathroom should get easier to live with over time. In many Greater Vancouver homes, especially older ones, the room acts a bit like a rain jacket. If the seams stay sound, everything works as intended. If one seam fails, moisture finds the weak spot first.
That is why maintenance matters after the tile is in and the glass is clean. Small checks catch the problems that usually start out hidden.
What to check regularly
Start with the signs you can see and feel during normal use.
- Clear the drain cover: Hair, soap film, and lint slow water before a true clog forms.
- Inspect sealant lines: Check corners, glass connections, and plumbing penetrations for gaps, peeling, or mildew that keeps returning.
- Watch drying time: A floor that stays damp longer than it used to can point to poor slope, blocked drainage, or weak ventilation.
- Clean slip-resistant flooring properly: Textured tile grips better when residue is removed from the low spots.
- Test safety hardware: Grab bars, fold-down seats, and handheld shower brackets should feel firmly anchored, not slightly loose.
One warning sign deserves quick attention. If the toilet and shower begin backing up or draining poorly at the same time, the issue may be farther down the plumbing line rather than in the shower itself. This explanation of toilet and shower clogging simultaneously helps homeowners tell the difference between a simple local blockage and a larger line problem.
Safety features that keep working years later
Safety is not just a product list. It is a set of details that still performs after years of daily use.
Good choices usually include:
- Grab bars fastened into proper backing, not only drywall or tile
- A bench or fold-down seat that feels rigid under load
- A handheld shower that can be reached from standing or seated positions
- Slip-resistant flooring with enough texture to grip, but not so much that cleaning becomes difficult
- Lighting that makes floor edges, drain areas, and entry transitions easy to read
The best safety features often blend into the room. In a character home in Mount Pleasant or Kerrisdale, that may mean choosing bars with finishes that sit comfortably beside older trim and plumbing fixtures rather than making the bathroom look clinical.
Three local-style examples
These are representative Greater Vancouver scenarios, based on common housing types and renovation constraints.
Burnaby bungalow with one main bath
A lot of Burnaby’s postwar bungalows have a single family bathroom tucked into a compact footprint, often with older dimensional framing and a tub alcove that leaves little room to spare. In these homes, a low-threshold shower often makes more sense than forcing a fully curbless build where the floor depth is limited.
That approach keeps the existing layout efficient while still improving access. It also reduces how much floor structure may need to be altered to maintain proper slope to the drain, which matters if the joists run the wrong direction for a recessed shower base. Homeowners in these houses usually want practical gains without turning one bathroom into a major structural project.
Richmond condo focused on resale and comfort
Richmond condo bathrooms bring a different set of limits. The challenge is often less about age and more about strata rules, concrete slabs, acoustic requirements, and fixed plumbing locations that cannot shift much without approvals.
In that setting, a step in bathroom usually works best when the design stays disciplined. A compact entry, fewer grout joints, and a glass panel that is easy to wipe down can improve day-to-day use without asking the building to accommodate major drain relocation. If a curbless look is the goal, the assembly still has to respect slab conditions and any strata requirements around waterproofing details, shutoffs, and noise control during work.
Kitsilano heritage home balancing access and character
Kitsilano presents one of the clearest examples of the heritage challenge. Older houses here may have original fir floors, trim profiles worth saving, plaster walls, and framing that has settled enough to complicate a level shower entry.
The tension is familiar. Homeowners want easier access, but they also want the bathroom to still belong to the house. The best answer is often careful rather than flashy. Keep visible character where possible. Hide the modern waterproofing, reinforcement, and drainage work beneath the finished surfaces. If floor adjustment, subfloor replacement, or structural correction is needed, coordinate that work early, especially when the home has heritage value or sits in a neighbourhood where exterior and character considerations often make owners more cautious about broader alterations.
Older Vancouver homes often need two bathroom renovations at once. The one you see, and the one beneath it that keeps water, structure, and safety under control.
That balance is what separates a generic update from one that respects both aging in place and the house itself.
Conclusion and Next Steps
A well-designed step in bathroom changes more than the shower entry. It changes how the room feels to use every day.
For some Greater Vancouver homeowners, the main benefit is safety. For others, it’s cleaner design, easier maintenance, or planning ahead for long-term comfort. In older homes across Vancouver, Burnaby, New Westminster, North Vancouver, West Vancouver, Coquitlam, Port Coquitlam, Port Moody, and Richmond, the strongest projects usually share the same pattern. They respect the house, meet code, and solve the practical issues hidden beneath the surface.
The local context matters. Heritage homes bring floor and framing challenges. Condos bring approval layers. Older bathrooms often need smarter drainage and better waterproofing than homeowners first expect. A beautiful tile choice can’t compensate for poor slope, weak prep, or a threshold that wasn’t detailed correctly.
If you’re thinking about your own project, start with a short checklist:
- Assess the core problem first: Is it safety, layout, maintenance, or all three?
- Decide between curbless and low-threshold: Based on structure, budget, and who uses the room.
- Confirm code and permit requirements early: Especially if plumbing or structural work is involved.
- Budget for hidden conditions: Not just tile and fixtures.
- Choose a contractor who can explain the technical details clearly: Not just show attractive finished photos.
A step in bathroom works best when it feels natural. You shouldn’t have to think about the threshold, the drainage, or whether the room can handle daily use. It should work. In a city full of older housing stock and character homes, that kind of simplicity takes careful planning.
If you’re planning a bathroom renovation in Vancouver or nearby communities, Domicile Construction Inc. can help you evaluate layout options, accessibility goals, heritage home constraints, and the practical build details that make a step in bathroom last.