Vancouver Vinyl Window Installer: A Homeowner’s Guide
May 29, 2026

If you live in Vancouver, Burnaby, Richmond, North Vancouver, West Vancouver, New Westminster, Coquitlam, Port Coquitlam, or Port Moody, you've probably felt it through the glass before you even noticed it on your heating bill. Cold air along the sill. Condensation on the inside pane. A musty smell near older trim. In a coastal climate, old windows rarely fail in a dramatic way. They fail slowly.
That's why choosing a vinyl window installer isn't only about ordering new units. It's about how those windows are fitted into an existing wall, how water is managed, and whether the crew understands the difference between a straightforward replacement in a newer Burnaby house and a delicate retrofit in a character home in Vancouver or New Westminster.
Why New Vinyl Windows Are a Smart Choice for Your Home
Older homes across Greater Vancouver often have the same symptoms. Drafts near the frame, fogging, swelling trim, and rooms that never feel evenly heated in winter. In many cases, homeowners first try weatherstripping or temporary film kits, which can help for a season. If you need a short-term fix first, this guide on how to insulate your windows for a cozier home is useful.
A proper replacement changes more than comfort. It improves how the room feels on a damp January morning, how much condensation collects around the opening, and how much maintenance you're dealing with every year. Vinyl works well here because it's practical, stable, and low-maintenance for ordinary residential use.
Why vinyl makes sense in this climate
Vinyl windows aren't a niche product. They're the largest segment of the replacement window market, and the broader U.S. vinyl windows and doors market is valued at $7.3 billion, with a projected 2.7% CAGR from 2023 to 2028, according to Freedonia's vinyl windows and doors market study. That matters because mature product categories usually offer better availability, more standardisation, and more installer familiarity.
For Vancouver-area homes, the advantage is practical. Vinyl frames don't need regular painting, they handle wet weather well when installed properly, and they fit a wide range of home styles, from post-war bungalows in Burnaby to townhomes in Coquitlam and detached houses in North Vancouver.
Good vinyl windows can perform well. Poor installation can still make them drafty, hard to operate, and vulnerable to moisture problems.
Where homeowners often make the wrong call
The biggest mistake is shopping by frame alone. Homeowners compare brochure features and ignore the opening itself. But the wall condition, existing flashing, trim details, and installation method usually matter more than a showroom sample.
If your home is exposed to more wind or weather, the glazing package may also deserve a closer look. In some situations, triple-glazed windows for colder and noisier conditions are worth considering, especially on busy streets or in rooms with persistent comfort issues.
A good vinyl window installer will talk about drainage, sealing sequence, and fit. A weak one will mostly talk about discounts.
Finding and Vetting a Quality Window Installer in Your Area
Greater Vancouver has no shortage of companies willing to sell windows. The hard part is finding the installer who can handle your specific house. That's especially true in older neighbourhoods, where openings are rarely perfectly square and the surrounding wall assembly may already have hidden moisture issues.
The public conversation around replacement windows usually centres on energy savings, frame materials, and glass options. What it often skips is the part that determines long-term performance. As noted by Ringer Windows on installation quality and contractor vetting, homeowners rarely get clear guidance on how to verify installer skill, even though installation quality is what helps prevent drafts, leaks, and premature failure.
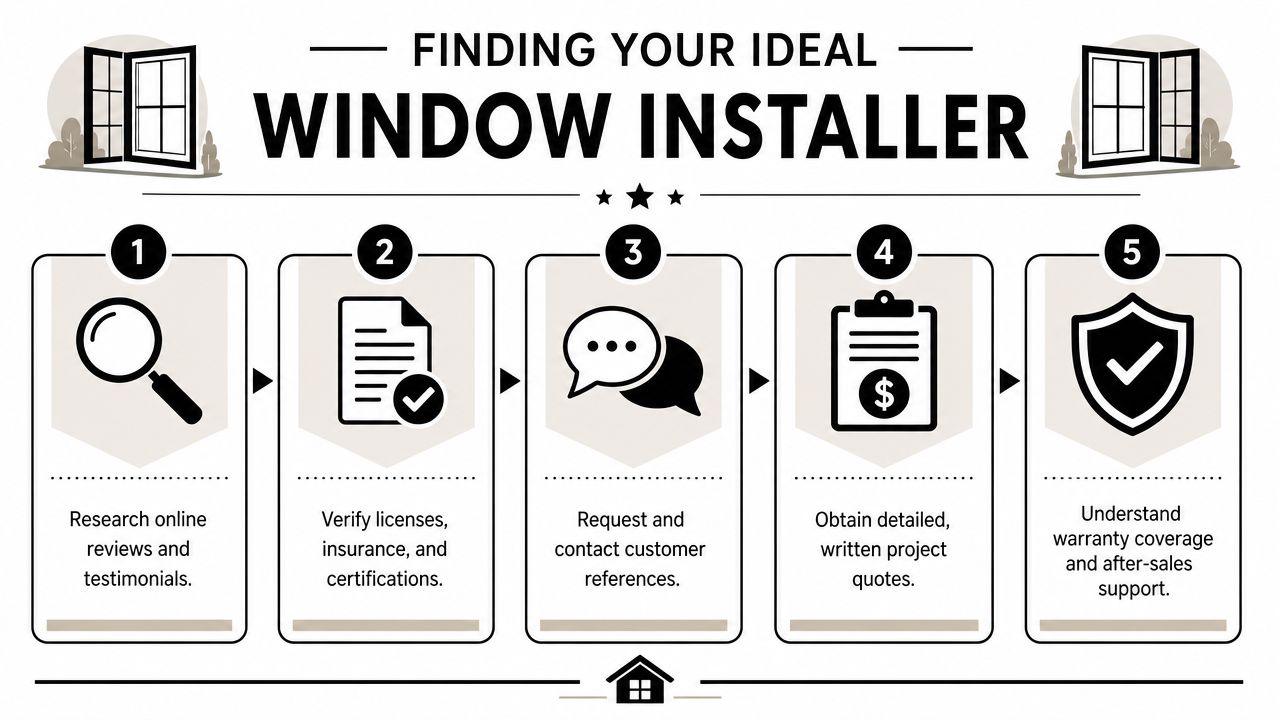
What to verify before you even discuss products
Start with the business itself, not the sales pitch.
- WorkSafeBC coverage: Ask for confirmation that the crew working on your house is covered.
- Liability insurance: Don't settle for a verbal “yes”. Ask for current proof.
- Local experience: A contractor who mostly works in dry climates or on new subdivisions may miss the retrofit issues common in Vancouver and New Westminster.
- Scope of trade: Some companies sell windows and subcontract the install. That isn't automatically bad, but you need to know who is doing the work.
If you're comparing broader renovation teams rather than window-only firms, this article on RBA Home Plans general contractor tips gives a solid framework for evaluating communication, scope, and accountability.
Questions that expose real skill
A polished quote doesn't tell you much. The answers to a few technical questions will.
Ask this directly: “How do you manage water at the sill, and what do you do if you find damage after the old window comes out?”
That question matters because experienced installers know that a window replacement often becomes a small envelope repair. If the answer is vague, or if they jump straight to “we just foam and caulk it,” keep looking.
Other useful questions:
How do you measure for out-of-square openings?
In older Vancouver homes, very few openings are perfectly uniform.Will you replace interior trim or reuse it where possible?
This affects both cost and final appearance.How do you protect floors, furnishings, and exterior landscaping?
Good crews have a routine. Weak crews improvise.Who handles permit questions if structural changes are needed?
This matters more than many homeowners realise.What labour warranty do you provide on the installation itself?
Product warranty and install warranty are not the same thing.
Local red flags
Some warning signs are easy to miss because they sound confident.
Red flag one is a too-simple answer
If the company says every job is the same, that's a problem. A condo in Richmond, a detached house in West Vancouver, and a heritage-adjacent home in East Vancouver do not get the same approach.
Red flag two is no discussion of wall condition
Any serious vinyl window installer should mention rot checks, sill condition, exterior tie-in, or hidden damage behind trim. If nobody talks about the existing assembly, they may be pricing your project as if the opening will be perfect.
Red flag three is no written detail
You want a written scope that names what's included. If you need help comparing contractors beyond windows alone, a local list of general contractors near me in Greater Vancouver can also help you see who has real renovation depth rather than a narrow sales model.
Understanding Window Replacement Costs and Contracts
Homeowners usually want one clean number. Fair enough. But window replacement quotes vary because the work behind each opening varies. Access, trim condition, siding tie-in, scaffold needs, heritage requirements, and hidden repair work all change the final price.
The industry itself is large and competitive. In the U.S. window installation industry, which includes vinyl window installation as a defined service line, revenue is estimated at $6.7 billion in 2025 and the sector includes 25,194 businesses in 2025, according to IBISWorld's window installation industry profile. That kind of fragmentation helps explain why quotes can differ so widely. You aren't just comparing products. You're comparing business models, crews, overhead, and installation standards.
What usually drives the price
A simple insert replacement in a clean, square opening costs less than a full retrofit where exterior trim, rotten framing, or siding repairs are involved. Upper-storey work in North Vancouver or West Vancouver may also involve more setup and more safety planning than a ground-floor opening in a bungalow.
Here's a practical planning table for budgeting conversations.
| Window Style | Average Size (inches) | Estimated Cost per Window (CAD) |
|---|---|---|
| Fixed picture | 36 x 48 | Varies by manufacturer, glazing package, access, and installation scope |
| Slider | 48 x 36 | Varies by manufacturer, glazing package, access, and installation scope |
| Single-hung or double-hung | 36 x 60 | Varies by manufacturer, glazing package, access, and installation scope |
| Casement | 24 x 48 | Varies by manufacturer, glazing package, access, and installation scope |
| Awning | 24 x 24 | Varies by manufacturer, glazing package, access, and installation scope |
| Bay or bow assembly | Custom | Varies significantly based on structural and finishing requirements |
I'm keeping that table qualitative for a reason. Without a verified local pricing dataset, any precise range would be guesswork. What matters more is understanding what the quote includes.
Read the contract line by line
A proper contract should spell out the work in plain language. If it doesn't, you're relying on memory and sales talk.
Look for these items:
- Exact scope: Removal, disposal, supply, installation, insulation, trim, caulking, touch-up, and cleanup.
- Window specification: Style, operation, colour, glass package, hardware, and any custom sizing.
- Allowance language: If something says “as required,” ask what that means in practice.
- Change-order process: Hidden rot and framing corrections happen. The contract should explain how additional work is approved.
- Payment schedule: Deposits, progress payments, and holdback terms should be clear.
- Warranty terms: Product and labour should be listed separately.
The most important clause is the one that defines what happens when the crew opens the wall and finds damage. If that process isn't written down, disputes start fast.
Product warranty and labour warranty are different
This catches homeowners all the time. The manufacturer may warranty the window unit. That doesn't mean they warranty how it was installed into your house. If the opening was prepared badly, if the sealing sequence was wrong, or if water was trapped, you may end up with a problem that isn't covered the way you assumed.
Ask for both warranties in writing. Also ask who you call first if a problem shows up. The answer should be immediate, not evasive.
Navigating Vancouver Permits and Heritage Home Rules
Window replacement can look simple from the sidewalk. From a permit and building-envelope standpoint, it isn't always simple at all. In Greater Vancouver, the rules can shift depending on whether you're replacing like-for-like units, changing opening sizes, altering structure, or working on a heritage or character home.

In practice, homeowners in Vancouver, Burnaby, New Westminster, and the North Shore should never assume one municipality treats a project exactly like another. A same-size replacement may be fairly routine in one situation, while a similar-looking project triggers review because of heritage status, façade changes, or structural alterations.
When permits often become part of the job
If you're changing the opening size, adding a new window where none existed, modifying structural framing, or working on a designated heritage property, you should expect more scrutiny. That's also true when exterior appearance controls apply.
For permit basics and the paperwork side, this guide on how to get a building permit in Vancouver-area projects is a helpful starting point.
Why heritage homes need a different mindset
Older and heritage homes in coastal British Columbia need careful planning because standard advice often skips the moisture details that matter most in existing walls. Public-facing installation content tends to focus on standard openings and new-construction logic, but older homes need tighter attention to sill details, continuity of the weather-resistive barrier, and reliable drainage paths, as highlighted in this discussion of retrofit moisture management in older coastal BC homes.
That issue shows up all over Vancouver and New Westminster. A heritage-sensitive project isn't just about matching sightlines or preserving trim profiles. It's about upgrading performance without trapping water in an assembly that was built to dry differently than a modern wall.
On an older house, the wrong sealing method can create a moisture problem that didn't exist before the renovation.
What works in a rainy climate
In coastal BC, the opening has to manage water, not pretend water will never get there. Good replacement work usually includes careful assessment of the sill, integration with the surrounding wall layers, and restraint in sealing so incidental moisture still has a path to escape.
That's where many generic install guides fall short. They show a clean opening, a new unit, foam, and sealant. Real Vancouver houses are rarely that tidy once the trim comes off.
If your house has wood siding, stucco details, or layered renovations from different decades, ask specifically how the installer will reconnect the new window to the surrounding wall system. If the answer sounds rushed, the risk sits with the homeowner, not the salesperson.
What to Expect During Your Window Installation
The installation day shouldn't feel mysterious. A good crew makes the process predictable, protects the house, and explains what they're doing when the opening reveals something unexpected.

Before any tools come out, you should already know which windows are being done first, where the crew will park, how floors are being protected, and whether pets need to be kept away from work areas. Small details matter because window replacement is repetitive work, but every opening can still bring a surprise.
Before the crew arrives
Do these basic prep steps the day before:
- Clear access: Move furniture, lamps, and breakables away from the windows.
- Remove coverings: Take down blinds, curtains, and any sensors attached to the frame.
- Protect routines: Plan around noise, open walls, and temporary loss of use in specific rooms.
- Ask for a day-one walkthrough: You want to meet the site lead, not just the salesperson.
A visual overview of the process can help if this is your first replacement project.
What good installation looks like
The old sash and frame come out carefully. Then the crew checks the rough opening for damage, irregular framing, or signs of past leakage. Experienced installers typically slow down at this point.
Once the opening is ready, the new unit is test-fit, adjusted, and shimmed properly. One key detail from manufacturer guidance is maintaining consistent sash-to-jamb margins while the sash is slightly open, then placing shims at three points, top, middle, and bottom, with shims no closer than 4 in. from the top or bottom, as outlined in this manufacturer-based installation demonstration. That step helps keep the frame plumb and prevents the sash from binding later.
If a window operates poorly on day one, it usually wasn't installed square. That problem rarely fixes itself.
Sealing, insulating, and moisture control
Homeowners often assume “more caulk” means “better installation.” It doesn't. A practical moisture-control benchmark for vinyl window installation is to seal the sides, top, and corner gaps while leaving the bottom unsealed in at least part of the exterior caulk line so water can drain. One installation guide also recommends a 3/8-inch bead of silicone caulk at the interior head, stops, and sill, plus low-expansion foam around the perimeter, as shown in these vinyl window installation instructions from Home Depot Canada.
That sequence matters. Overfilling foam or fully sealing the bottom can trap moisture where it shouldn't stay.
The final walkthrough
Before the crew leaves, open and close every operating sash. Lock each unit. Look at the sightlines from inside. Check the caulking. Ask where the drainage points are and what to watch for in the first heavy rain.
Cleanup is part of the job, not a bonus. So is a clear handoff on warranty paperwork and care instructions.
Maintaining Your New Windows and Final Thoughts
New windows don't need much maintenance, but they do need the right kind. Neglect is rarely dramatic at first. It starts with blocked drainage, failed caulk joints, dirt in the tracks, and homeowners using the wrong cleaners on vinyl frames.
A simple maintenance routine
Run through this checklist a couple of times a year:
- Clean frames gently: Use mild soap, water, and a soft cloth. Avoid abrasive pads and harsh solvents.
- Check caulking and sealant: Look for gaps, cracking, or shrinkage around the perimeter.
- Keep weep paths clear: Drainage openings must stay unobstructed.
- Vacuum tracks and sills: Grit wears hardware and affects smooth operation.
- Inspect after major storms: In Vancouver's climate, wind-driven rain can expose weak details quickly.
If you want a straightforward cleaning guide, this article on how to achieve streak-free windows is a useful reference for routine care.
What homeowners should watch in the first year
A new window should operate smoothly, latch properly, and stay dry where it's supposed to stay dry. If you notice stiff movement, recurring condensation at unusual points, staining near trim, or water appearing where it shouldn't, call the installer early. Small problems are easier to correct before they affect surrounding finishes.
The long-term takeaway is simple. The window matters, but the installer matters more. In Greater Vancouver, where rain, older housing stock, and municipal rules all complicate a “simple” replacement, the best results come from crews who understand retrofit work, moisture management, and local approval requirements.
A good vinyl window installer doesn't just put a new product in an old hole. They make sure the house can handle another wet season without regrets.
If you're planning a window replacement, heritage upgrade, or broader exterior renovation in Greater Vancouver, Domicile Construction Inc. can help you assess the opening, handle permits, and approach the work with the care older Vancouver homes require.