Discover bathroom remodel ideas on a budget: Vancouver
November 25, 2025

Embarking on a bathroom remodel in Vancouver doesn't have to mean a massive financial commitment. Many homeowners across the Lower Mainland, from the heritage homes in New Westminster to the modern condos in Burnaby and Port Moody, are seeking ways to refresh their space affordably. The key is strategic, high-impact updates that enhance both style and function without overspending. A successful, budget-conscious project starts with a solid strategy. For a detailed roadmap, understanding how to plan your bathroom renovation is the crucial first step to ensuring success from start to finish.
This guide provides 10 practical and stylish bathroom remodel ideas on a budget, tailored specifically for residents in Vancouver, Richmond, Coquitlam, and the North Shore. We will move beyond generic advice to give you actionable steps, from clever DIY projects to cost-effective material swaps that deliver a high-end look. We'll explore how simple changes like refreshing paint and hardware can dramatically alter your space, and how to choose affordable yet durable flooring and fixtures that stand up to daily use.
You will learn how to revitalise your existing vanity, install an eye-catching accent wall, and upgrade lighting for a fraction of the cost of a full gut renovation. Each idea is designed to offer maximum visual impact for minimal investment. Whether you're preparing your home for sale in a competitive market like West Vancouver or simply creating a more enjoyable personal sanctuary in Port Coquitlam, these tips prove that a stunning and functional bathroom is well within financial reach. We’ll provide the specific insights needed to make smart decisions, helping you allocate your resources where they matter most for a beautiful, long-lasting result.
1. Paint Cabinets and Hardware Refresh
Before you consider a full vanity replacement, which can cost thousands, look at the transformative power of paint. This is often the most impactful and budget-friendly bathroom remodel idea, instantly modernizing a space without the need for major demolition or plumbing work. If your existing vanity is structurally sound but simply dated, a high-quality paint job is your best first step.
This approach is especially effective for the solid wood or MDF builder-grade cabinets common in many homes across Vancouver, Burnaby, and Richmond. A dated 1990s honey-oak vanity can be reborn with a sophisticated navy blue or a crisp, clean white, while an old-fashioned raised-panel door style gains a sleek, contemporary look with a coat of charcoal grey. The change is dramatic, shifting the entire bathroom's aesthetic for a minimal investment.
Keys to a Professional Finish
Achieving a durable, smooth finish requires careful preparation. A fantastic and budget-friendly way to update your bathroom is by painting bathroom vanities and cabinets, giving them a fresh, modern look. For a flawless result, follow these critical steps:
- Preparation is Paramount: Start by thoroughly cleaning the surfaces with a TSP (trisodium phosphate) substitute to remove grease and grime. Lightly sand all surfaces with 150 to 220-grit sandpaper to scuff the old finish, which helps the new primer and paint adhere properly.
- Prime for Durability: Use a high-quality bonding primer specifically designed for slick surfaces like cabinets. This step is crucial for preventing chipping and ensuring the topcoat has a solid foundation.
- Choose the Right Paint: Select a paint formulated for cabinetry, like a semi-gloss or satin finish enamel. Brands like Benjamin Moore's ADVANCE or Sherwin-Williams' ProClassic are engineered to level out smoothly and cure to a hard, scrubbable finish.
- Upgrade the Hardware: The final touch is replacing old, dated knobs and pulls. Swapping out tarnished brass or chrome hardware for matte black, brushed nickel, or champagne bronze handles provides a high-impact update that completes the cabinet's transformation.
2. Budget-Friendly Flooring Options
Old, cracked, or discoloured flooring can instantly date a bathroom, but a full replacement doesn't have to drain your renovation budget. Opting for affordable alternatives like luxury vinyl plank (LVP), ceramic tile, or modern peel-and-stick products provides a dramatic transformation. These materials offer the waterproofing and durability essential for a high-moisture environment at a fraction of the cost of natural stone or high-end porcelain.
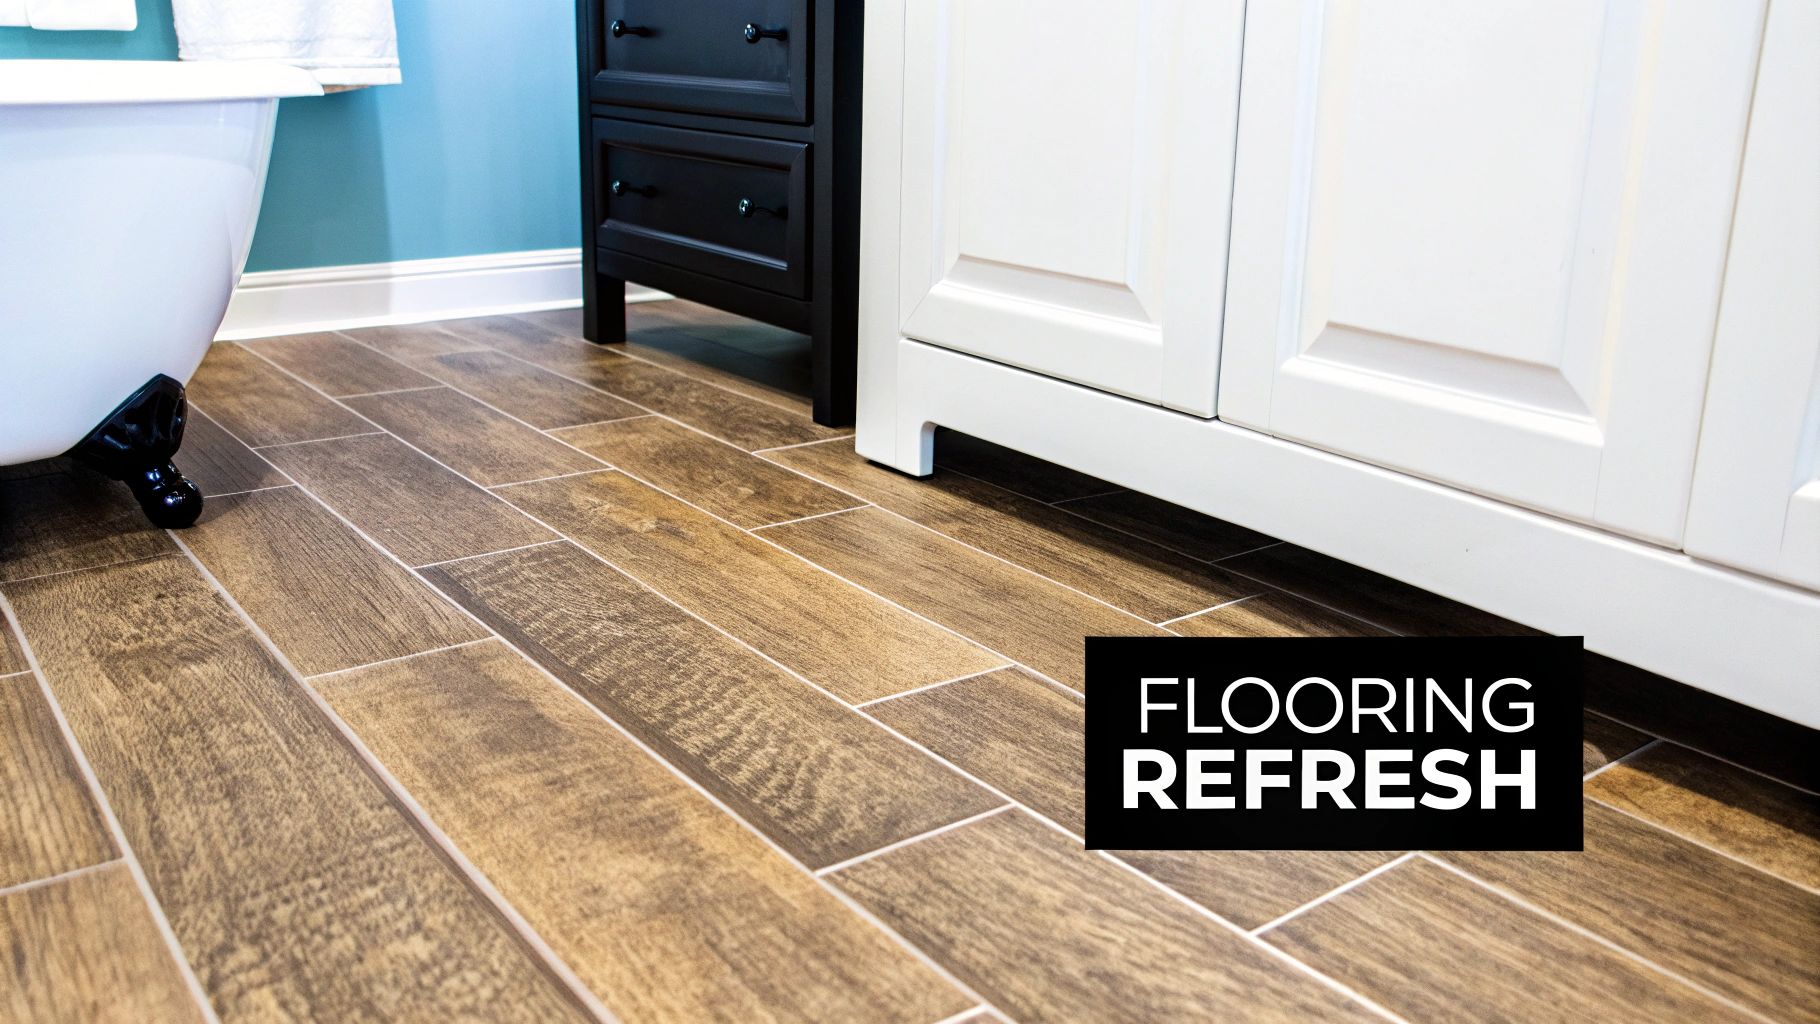
This strategy is one of the most effective bathroom remodel ideas on a budget because it completely alters the room's foundation. For homeowners in a Vancouver or Burnaby condo, waterproof LVP that mimics the look of white oak or marble can create a seamless, high-end aesthetic without the high cost and complex installation. Similarly, a small powder room in a New Westminster home can gain significant character with peel-and-stick hexagonal tiles, creating a modern mosaic pattern that is both stylish and easy to install as a DIY project.
Keys to a Lasting and Stylish Floor
Choosing the right material is only half the battle; proper installation is critical for longevity, especially in a damp bathroom environment. Even the most budget-friendly flooring can look high-end when installed correctly. For more ideas that work well in compact spaces, you can find additional budget-friendly tips for renovating your condo at domicile.construction.
- Prioritize a Waterproof Substrate: Ensure your subfloor is level, clean, and properly sealed. Using a waterproof membrane or underlayment beneath your new flooring is a crucial step to prevent moisture from seeping through and causing damage.
- Choose Slip-Resistant Finishes: Safety is paramount in a wet area. Look for tiles or vinyl with a high coefficient of friction (COF) rating or a textured surface to reduce the risk of slips and falls.
- Measure Meticulously: Always purchase at least 10% more flooring than your calculated square footage. This accounts for cuts, mistakes, and potential future repairs, ensuring a perfect match.
- Consider Professional Prep Work: While materials like peel-and-stick tiles are DIY-friendly, hiring a professional to prepare the substrate can be a wise investment. An improperly prepared surface can lead to peeling, cracking, or water damage down the line.
3. Affordable Lighting Upgrades
Never underestimate the power of lighting to redefine a bathroom’s atmosphere and functionality. Upgrading outdated fixtures is a brilliant bathroom remodel idea on a budget that makes a space feel larger, cleaner, and more inviting without any structural changes. Replacing old, inefficient lights with modern, energy-efficient options provides an immediate aesthetic lift and long-term savings on your hydro bill.
This strategy is particularly effective in many homes across North Vancouver and Port Moody, which might still feature dated Hollywood-style strip lights or tarnished brass sconces from decades past. Swapping a bulky, heat-producing fixture for a sleek LED vanity light in matte black or brushed nickel instantly updates the room. The change not only modernizes the aesthetic but also improves the quality of light, which is crucial for tasks like shaving or applying makeup.
Keys to a Brighter Bathroom
Proper lighting enhances both the look and usability of your bathroom. For a well-lit and welcoming space that feels professionally designed, consider these essential steps:
- Layer Your Lighting: A successful lighting plan includes multiple sources. Start with ambient light from a central ceiling fixture or recessed LEDs, add focused task lighting around the vanity, and consider accent lighting to highlight architectural features.
- Choose the Right Temperature: For a flattering and natural-looking glow, select bulbs with a colour temperature of around 3000K (Kelvin). This provides a soft, warm-white light that isn't too yellow or starkly blue, creating a spa-like feel.
- Install a Dimmer Switch: Adding a dimmer switch is a low-cost upgrade that offers incredible flexibility. It allows you to adjust the intensity for a bright, energizing morning routine or a soft, relaxing ambiance for an evening bath.
- Prioritize Safety and Suitability: Bathrooms are high-humidity environments, so ensure any fixtures you choose are rated for damp or wet locations, especially those installed directly inside a shower enclosure. This is a critical safety measure to prevent electrical issues.
4. DIY Tile Backsplash or Accent Wall
Instead of retiling the entire bathroom, which is a major expense and undertaking, a DIY tile backsplash or accent wall can deliver a powerful design punch for a fraction of the cost. This targeted approach is a fantastic bathroom remodel idea on a budget, adding custom detail, colour, and texture without the need for extensive demolition. It’s an ideal project for a homeowner with a bit of patience and an eye for detail.
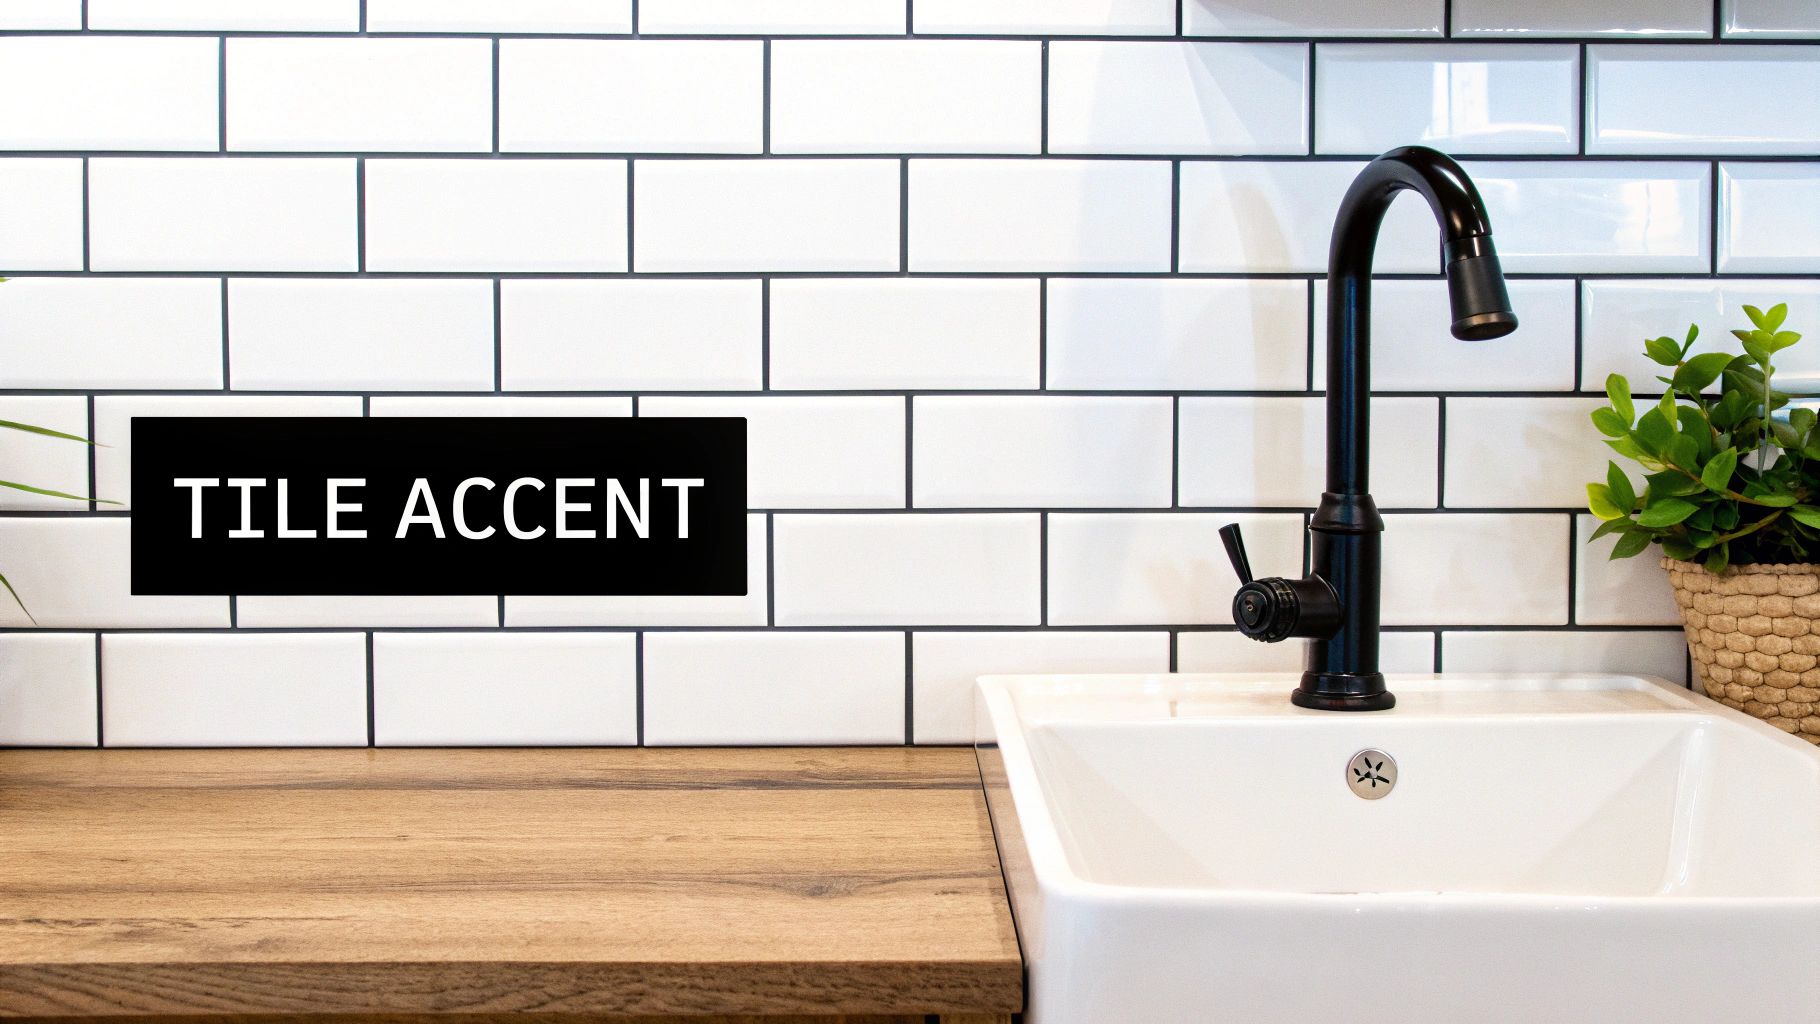
This method is particularly effective for homeowners in areas like Coquitlam or Port Coquitlam looking to update a standard bathroom layout. A stunning geometric tile behind the vanity mirror or a full accent wall of mosaic tiles in the shower area can create a focal point that makes the entire room feel more luxurious and intentionally designed. From classic white subway tile with a bold, dark grout to intricate Moroccan-inspired patterns, the options are nearly limitless and accessible at various price points.
Keys to a Successful Tile Installation
A professional-looking tile job is all about meticulous preparation and the right technique. Even a small error can be noticeable, so taking your time is essential for achieving a polished result that enhances your bathroom's value.
- Plan Your Layout: Before you mix any mortar, lay your tiles out on the floor to finalise your pattern. Use a level to draw guidelines on the wall to ensure your first row is perfectly straight. This is the most critical step for a clean finish.
- Use the Right Tools: Rent or purchase a tile saw for clean cuts around outlets and corners. Use tile spacers for consistent, uniform grout lines, and apply thin-set mortar with a notched trowel held at a 45-degree angle for even coverage.
- Work Methodically: Mix only small batches of thin-set mortar that you can use within 20-30 minutes to prevent it from drying out. Work in small, manageable sections, pressing each tile firmly into the mortar with a slight twist.
- Grouting and Sealing are Crucial: After the mortar has cured for at least 24 hours, apply your grout. For high-moisture areas like a bathroom, consider an epoxy grout for superior water and stain resistance. After the grout cures (typically 72 hours), apply a quality grout sealer to protect it from moisture and discolouration.
5. Budget Mirror and Frame Updates
Never underestimate the power of a mirror to redefine your vanity area. Replacing a standard, builder-grade plate mirror is one of the most effective bathroom remodel ideas on a budget, capable of making the space feel larger, brighter, and significantly more stylish without any plumbing or major construction. This simple swap can introduce a new design element, be it modern, rustic, or classic.
This upgrade is especially impactful in the smaller bathrooms common in Vancouver condos or the main-floor powder rooms of West Vancouver family homes. A large, frameless mirror can create an illusion of depth, while an ornate or uniquely shaped framed mirror acts as a functional piece of art. The change is immediate, elevating the entire look and feel of the vanity for a relatively small cost.
Keys to a High-Impact Mirror Upgrade
A new mirror can completely change the character of your bathroom, but proper selection and installation are key to achieving a polished, professional look. From sleek, modern LED options to DIY-framed existing mirrors, there are numerous budget-friendly paths to a stunning result.
- Size and Placement Matter: Before buying, measure your vanity and wall space. A good rule of thumb is to choose a mirror that is slightly narrower than your vanity. For optimal viewing, the centre of the mirror should be at eye level, typically with the bottom edge about 5 to 10 inches above the faucet.
- Frame it Yourself: If your budget is tight, consider adding a custom frame to your existing frameless mirror. You can purchase wood or MDF trim from a local hardware store, cut it to size with mitered corners, paint or stain it to match your vanity or new hardware, and affix it directly to the mirror with a strong adhesive.
- Explore Budget-Friendly Retailers: You don't need a designer budget for a stylish mirror. Retailers like IKEA, Wayfair, and Amazon offer a vast selection of affordable options, from simple metal-framed circles to elegant bevelled-edge rectangles and rustic wood-framed designs.
- Consider Integrated Lighting: LED-backlit mirrors are no longer a luxury-only item. Many affordable models are available that provide even, flattering task lighting while adding a contemporary, high-end feel. Look for features like anti-fog functions and adjustable colour temperatures to customize the ambiance. Ensure you have a nearby electrical outlet or plan for an electrician to install one.
6. Fresh Paint on Walls and Trim
Never underestimate the power of a fresh coat of paint. It stands as one of the most cost-effective yet transformative bathroom remodel ideas on a budget, capable of completely altering the atmosphere of your space. The right colour can make a small bathroom feel larger, a dark one feel brighter, and an outdated one feel instantly modern and clean.
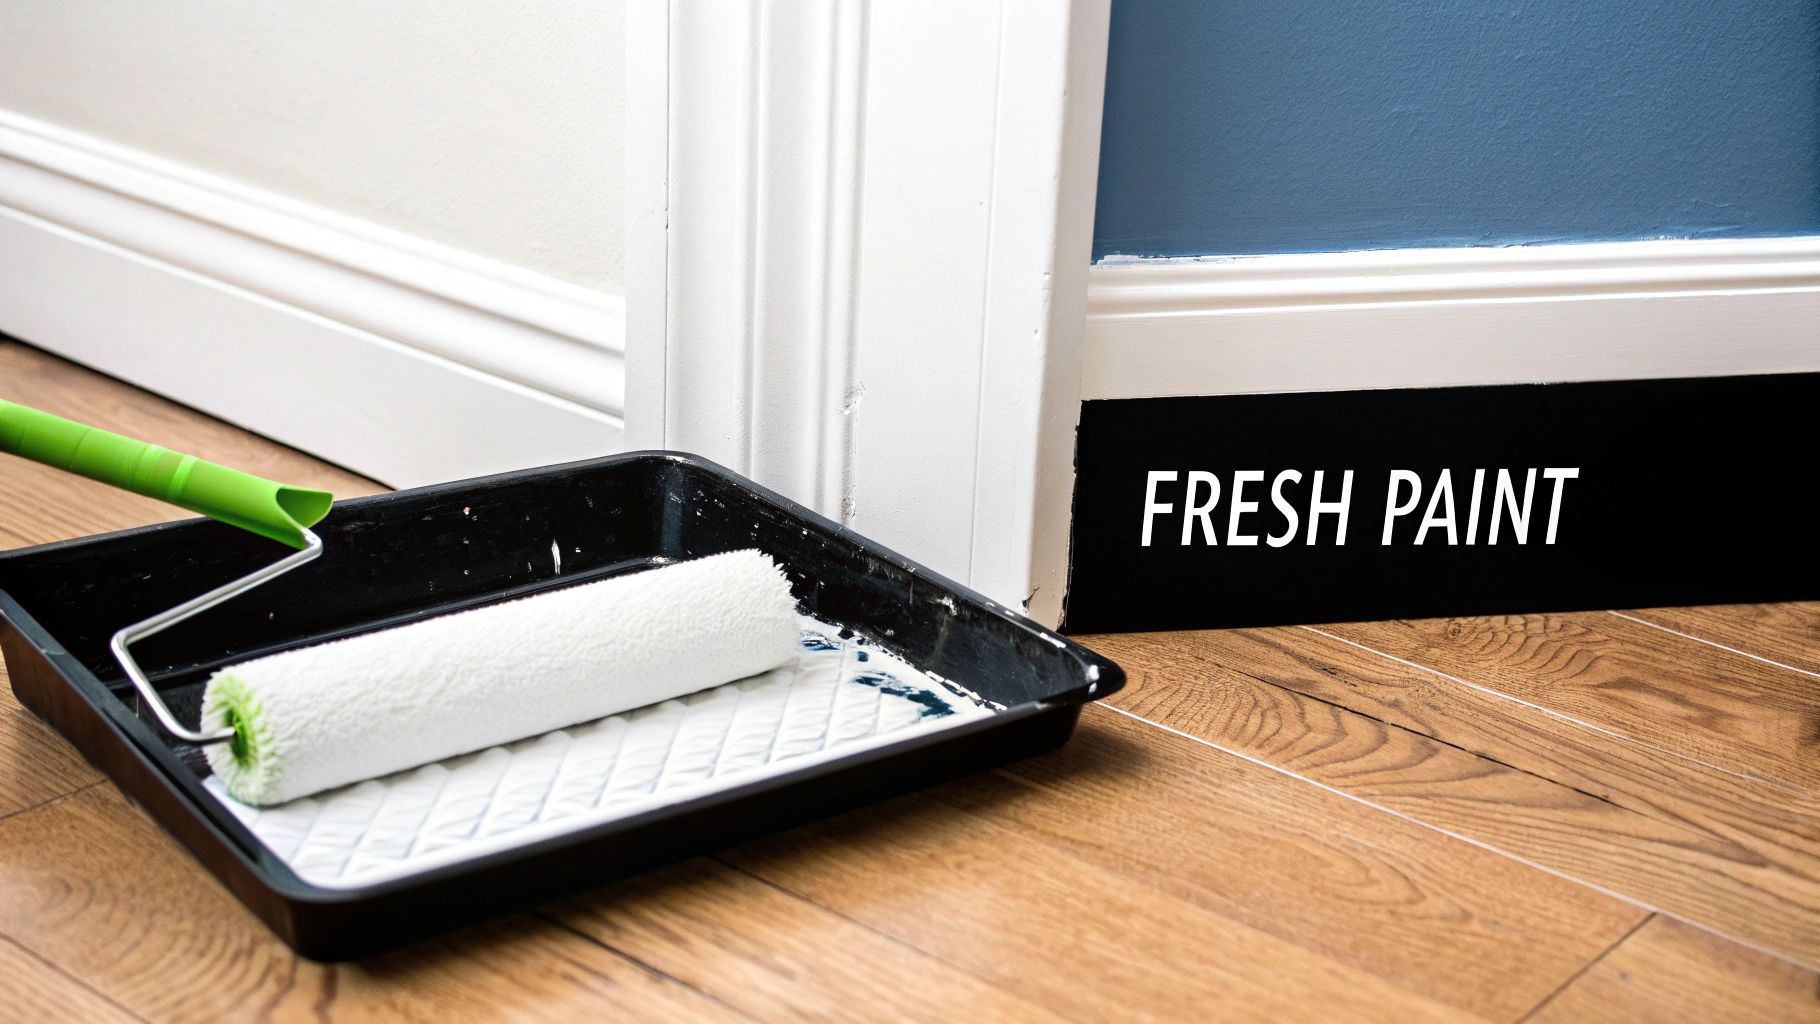
This simple update is particularly impactful in the diverse housing stock across Metro Vancouver, from Burnaby condos to classic New Westminster homes. For example, a crisp white or soft grey can lend a clean, modern aesthetic that maximizes light, while a soft spa-like blue or green creates a relaxing retreat. For a touch of personality, consider a bold accent wall behind the vanity, or opt for a timeless warm beige for enduring appeal.
Keys to a Lasting Finish
Achieving a professional, long-lasting paint job in a high-moisture environment like a bathroom requires more than just choosing a colour. The right product and preparation are essential to prevent peeling, bubbling, and mildew growth. For a flawless result that withstands daily steam and humidity, follow these critical steps:
- Choose the Right Formulation: Always select a paint specifically formulated for bathrooms. These paints contain mildewcides that inhibit the growth of mould and mildew, a common issue in our damp coastal climate. Brands like Benjamin Moore's Aura Bath & Spa or Behr's Premium Plus Ultra are excellent choices.
- Select the Proper Sheen: A satin or semi-gloss finish is ideal for bathroom walls and trim. These sheens are more moisture-resistant and far easier to wipe down than matte or eggshell finishes, ensuring your walls stay looking fresh. Trim, in particular, benefits from a durable semi-gloss.
- Prioritize Ventilation and Prep: Before you begin, ensure the room is well-ventilated. Thoroughly clean the walls to remove any soap scum or residue, and apply a high-quality, moisture-resistant primer. This ensures even coverage and strong adhesion for the topcoat.
- Test Your Colours: Lighting in bathrooms can be tricky. Always buy sample pots and paint large swatches on different walls to see how the colour looks at various times of the day before committing to the full project.
7. Budget-Friendly Fixtures and Hardware Replacements
Often overlooked, the small details like faucets, towel bars, and toilet paper holders have a significant impact on a bathroom's overall feel. Swapping out these fixtures and hardware is one of the most effective and affordable bathroom remodel ideas on a budget. It allows you to introduce modern finishes and styles without altering plumbing or undertaking major construction, offering a high-end look for a minimal investment.
This strategy is particularly useful for giving a quick facelift to a guest bathroom or updating the look of a recently purchased home in areas like Burnaby, Port Moody or Coquitlam. A tarnished, leaky two-handle faucet from the early 2000s can be replaced with a sleek, single-handle chrome or matte black model, instantly making the space feel more contemporary and functional. Coordinating this new finish with matching towel rings, robe hooks, and cabinet pulls creates a cohesive, designer-curated aesthetic that elevates the entire room.
Keys to a Seamless Fixture Upgrade
A successful hardware swap depends on careful selection and proper installation. Focusing on compatibility and a consistent design language is key to making this simple update look professional and polished. For a smooth transition, follow these critical steps:
- Check for Compatibility First: Before purchasing a new faucet, check the existing sink's configuration. Count the number of holes (one for single-handle, three for widespread) and measure the distance between them to ensure your new faucet will fit without requiring a new countertop.
- Choose a Unified Finish: Select a finish and stick with it for all hardware. Whether you opt for brushed nickel, oil-rubbed bronze, or modern matte black, consistency across your faucet, showerhead, towel bars, and even lighting creates a harmonious and intentional design.
- Prioritize Function and Quality: Look for reputable brands like Delta or Moen, which offer reliable, budget-friendly lines with excellent warranties. A faucet with a WaterSense label will also help conserve water, a welcome benefit for homeowners in the Metro Vancouver area.
- DIY Installation is Achievable: Replacing a faucet or towel bar is a manageable DIY project for most homeowners. Turn off the water supply lines under the sink before you begin, and follow the manufacturer's instructions or a reliable YouTube tutorial. This hands-on approach saves significantly on labour costs.
8. Affordable Shower Enclosure and Tub Updates
A worn-out bathtub or a flimsy shower curtain can significantly date a bathroom, but a full replacement isn't always necessary or affordable. Instead, focusing on strategic, budget-friendly shower and tub updates can deliver a high-end feel for a fraction of the cost. This is a powerful bathroom remodel idea on a budget that boosts both aesthetics and daily functionality without the intensive plumbing and tile work of a full overhaul.
This approach is perfect for revitalizing the standard acrylic tubs and shower stalls common in many homes across the Lower Mainland, from Richmond to Coquitlam and Port Moody. A discoloured or scratched tub can be professionally refinished to look brand new, while swapping a dated, framed shower door for a semi-frameless model instantly brightens and opens up the space. These upgrades provide a clean, modern aesthetic that feels like a major renovation.
Keys to a Polished Shower and Tub Refresh
Achieving a durable and visually appealing update requires careful selection and installation. For homeowners looking to maximize their investment, these cost-effective tub and shower solutions are a central part of any successful Vancouver bathroom renovation. For a fantastic result, focus on these key steps:
- Consider Tub Refinishing: Instead of replacing a structurally sound but stained or dated acrylic or cast-iron tub, professional refinishing is an excellent option. This process involves stripping the old finish, repairing imperfections, and applying a new, durable coating, which can be tinted to a classic white or even a contemporary colour.
- Opt for Cost-Effective Enclosures: Fully frameless glass doors are beautiful but costly. A semi-frameless sliding or pivot door offers a similar sleek look with a much lower price tag. Look for models with clear or frosted acrylic panels to further reduce costs while maintaining a clean, modern appearance.
- Use Wall Surrounds: Tiling a shower can be labour-intensive and expensive. Acrylic or cultured marble wall panel systems are a fantastic alternative. They are installed in large sheets over waterproof backer board, eliminating grout lines and making cleaning significantly easier while providing a seamless finish.
- Prioritize Proper Installation: Whether you're installing a new door or a wall surround, meticulous attention to waterproofing and sealing is critical. Always use high-quality, mould-resistant silicone caulk and ensure all seams are perfectly sealed to prevent water damage, a common concern in our damp Vancouver climate.
9. Budget Textiles and Accessories Refresh
Never underestimate the power of soft furnishings and decor to completely redefine a space. This is one of the most immediate and affordable bathroom remodel ideas on a budget, requiring zero tools or installation skills. By simply swapping out tired, mismatched textiles, you can introduce new colours, textures, and a sense of curated style without touching a single fixture.
This strategy is particularly effective for renters or homeowners in areas like Burnaby and Richmond who want to personalize a standard bathroom without making permanent changes. A drab, all-white bathroom can be instantly transformed into a spa-like retreat with the addition of plush, coordinated towels in a calming seafoam green, a textured shower curtain, and a bamboo bath mat. This approach injects personality and warmth for a tiny fraction of the cost of a traditional renovation.
Keys to a Polished Look
Achieving a cohesive, designer-inspired aesthetic is all about thoughtful coordination and layering. You don't need a large budget, just a clear vision. For a polished result that looks more expensive than it is, follow these simple guidelines:
- Create a Colour Palette: Start with a new shower curtain as your centerpiece and pull two or three colours from its design to guide your towel and bath mat selection. This ensures a coordinated, intentional look.
- Invest in Quality Towels: While budget-friendly, don't skimp on the one item you use daily. Opt for high-quality cotton or bamboo-blend towels. They offer superior softness and absorbency, and their durability makes them a better long-term investment.
- Layer Textures: Combine different materials to add depth and visual interest. Pair a smooth cotton shower curtain with a waffle-weave towel set, a plush bath mat, and a woven wicker basket for storing toiletries. This layering prevents the room from feeling flat.
- Declutter and Accessorize: The final step is to clear countertop clutter and add a few strategic decorative pieces. Use stylish trays or small baskets to corral everyday items. A small plant (real or faux), a scented candle, or an elegant soap dispenser can complete the transformation, making the space feel refreshed and new.
10. Storage Solutions and Organisation
Clutter is often the biggest culprit in making a bathroom feel small, dated, and dysfunctional. Before considering a costly expansion, focus on maximising your existing footprint with smart storage and organisation. This is a highly effective, low-cost bathroom remodel idea on a budget that boosts both functionality and aesthetic appeal without requiring any major structural work or plumbing changes.
This approach is perfect for the characteristically compact bathrooms found in many Vancouver condos or older Burnaby and New Westminster homes where space is at a premium. By taking advantage of unused vertical and corner spaces, you can dramatically increase your storage capacity. Adding floating shelves above the toilet, installing a new medicine cabinet, or implementing under-sink organisers can make a bathroom feel significantly larger and more serene, transforming a chaotic space into a well-ordered retreat.
Keys to a Tidy and Functional Space
Implementing effective storage solutions is about more than just adding shelves; it's about creating a system that works for your daily routine. Intelligent bathroom storage solutions can completely revitalise the feel of the room. For a tidy and efficient result, follow these critical tips:
- Utilise Vertical Space: Install floating shelves or an over-the-toilet storage unit (also known as an etagere) to draw the eye upward and provide space for towels, toiletries, or decorative items. This leverages wall space that is otherwise wasted.
- Optimise Cabinet Interiors: Don't just stuff items into your vanity. Use pull-out drawers, tiered organisers, and stackable bins to categorise items and make everything easily accessible. This simple step can double your usable under-sink space.
- Choose Moisture-Resistant Materials: In the humid environment of a bathroom, especially in coastal areas like Vancouver, North Vancouver, and West Vancouver, opt for materials that resist moisture. Consider powder-coated metal, treated wood, bamboo, or high-quality plastic for shelving and organisers to prevent warping and mould.
- Balance Open and Closed Storage: While open shelving is great for displaying beautiful items and providing easy access, closed storage (like a medicine cabinet or vanity) is essential for hiding clutter. A mix of both creates a visually interesting and practical space.
10-Point Budget Bathroom Remodel Comparison
| Item | 🔄 Implementation Complexity | ⚡ Resources & Cost | ⭐ Expected Outcome | 💡 Ideal Use Cases | 📊 Key Advantages |
|---|---|---|---|---|---|
| Paint Cabinets and Hardware Refresh | Low–Medium 🔄 (sanding, priming, painting) | Paint, primer, hardware; $200 DIY / $800–1,500 pro; 3–7 days ⚡ | High visual refresh; moderate durability ⭐⭐⭐⭐ | Solid wood or structurally sound dated vanities 💡 | Cost-effective reuse, eco-friendly, reversible 📊 |
| Budget-Friendly Flooring Options | Medium 🔄 (subfloor prep, leveling) | LVP/ceramic/peel‑and‑stick; $400–1,200 for 5×8; 2–3 days ⚡ | Durable, waterproof; good resale appeal ⭐⭐⭐⭐ | Wet areas, renters, budget remodels 💡 | Waterproof, wide design range, low maintenance 📊 |
| Affordable Lighting Upgrades | Low–Medium 🔄 (fixture swap or minor wiring) | LED fixtures, switches; $100–400; 1–2 hours ⚡ | Improved light quality, energy savings ⭐⭐⭐⭐ | Improve visibility, makeup/mood lighting, energy efficiency 💡 | Energy savings, instant aesthetic/function boost 📊 |
| DIY Tile Backsplash or Accent Wall | Medium 🔄 (layout, cutting, grout) | Tiles, adhesive, grout; $150–600; 2–4 days ⚡ | Strong focal point; durability varies by method ⭐⭐⭐ | Accent behind vanity or small feature walls; DIYers 💡 | Custom look, protects walls, removable options (peel‑and‑stick) 📊 |
| Budget Mirror and Frame Updates | Low 🔄 (mounting; LED needs power) | Framed/LED mirrors; $60–300; 0.5–2 hours ⚡ | High aesthetic uplift; adds function (anti‑fog/LED) ⭐⭐⭐ | Small vanities, consolidating lighting, quick upgrades 💡 | Enlarges space visually, LED integration, easy swap 📊 |
| Fresh Paint on Walls and Trim | Low 🔄 (prep, priming, painting) | Bathroom paint, primer; $100–800; 2–3 days ⚡ | High visual impact; moisture‑resistant options ⭐⭐⭐⭐ | Fast whole‑room refresh, hide imperfections 💡 | Cheapest remodel, reversible, mildew‑resistant choices 📊 |
| Budget-Friendly Fixtures and Hardware Replacements | Low–Medium 🔄 (simple installs; some plumbing) | Faucets, bars, accessories; $100–500; 1–3 hours ⚡ | Functional update; moderate longevity ⭐⭐⭐ | Replace worn fixtures, improve water efficiency 💡 | Improves function, water‑saving, modernizes instantly 📊 |
| Affordable Shower Enclosure and Tub Updates | Medium 🔄 (measuring, sealing, possible pro install) | Semi‑frameless doors/refinishing; $200–600; 4–48 hours ⚡ | Better containment and look; durability variable ⭐⭐⭐ | Replace curtain, refresh tub surface, budget enclosures 💡 | More water control, modernizes, lower cost than glass 📊 |
| Budget Textiles and Accessories Refresh | Very Low 🔄 (purchase and swap) | Towels, mats, curtains; $100–250; 1–2 hours ⚡ | Immediate style change; durability depends on quality ⭐⭐⭐ | Seasonal updates, staging, quick color refreshes 💡 | Fast, inexpensive, flexible styling swaps 📊 |
| Storage Solutions and Organization | Low–Medium 🔄 (anchoring, layout) | Shelves, organizers; $50–300; 1–3 hours ⚡ | Improved function and perceived space ⭐⭐⭐⭐ | Small bathrooms, decluttering, maximizing vertical space 💡 | Maximizes storage, reduces clutter, affordable 📊 |
Ready to Start Your Budget-Friendly Bathroom Transformation?
Embarking on a bathroom renovation can feel like a monumental task, but as we’ve explored, a stunning transformation doesn’t require a monumental budget. The key to a successful, cost-effective project lies in strategic planning and focusing on high-impact changes that deliver the most visual and functional value for your investment. By implementing these bathroom remodel ideas on a budget, you can create a sanctuary that feels fresh, modern, and uniquely yours.
Your Roadmap to a Revitalised Space
Let's recap the core principles that will guide you from vision to reality. The most powerful budget-friendly strategies often involve reviving what you already have. A simple coat of specialized paint on tired vanity cabinets, coupled with new, modern hardware, can single-handedly redefine the room’s character. Similarly, swapping out a dated builder-grade mirror for a more stylish framed option or even framing the existing one yourself introduces an instant touch of elegance.
We also delved into material intelligence:
- Flooring: Choosing luxury vinyl tile (LVT) or plank (LVP) gives you the sophisticated look of stone or wood without the hefty price tag and demanding upkeep.
- Surfaces: Instead of a full-scale retiling project, consider a DIY peel-and-stick backsplash or a single, striking accent wall to create a focal point.
- Fixtures: You don’t need to reroute plumbing to make a difference. Upgrading your faucets, showerhead, and light fixtures to more efficient and aesthetically pleasing models is a straightforward change with a significant impact.
These targeted upgrades allow you to allocate your funds where they matter most, achieving a high-end feel without the associated cost.
From DIY Wins to Professional Precision
Many of the ideas presented, such as painting, updating textiles, or installing new cabinet pulls, are perfect weekend DIY projects. They offer the satisfaction of hands-on improvement and immediate results. However, it's crucial to recognise when professional expertise becomes a valuable asset rather than an expense.
For homeowners in Vancouver, Burnaby, Richmond, or North Vancouver, this is especially true. Our region's housing stock, from charming heritage homes in New Westminster to compact modern condos in Coquitlam and Port Moody, presents unique challenges. A professional can expertly navigate:
- Heritage Constraints: Ensuring that any updates in a character home honour its original integrity while meeting modern standards.
- Permitting and Bylaws: Managing the necessary paperwork and ensuring all work, particularly plumbing and electrical, is up to code.
- Complex Installations: Correctly installing fixtures, flooring, and waterproofing systems to prevent costly future issues like leaks or mould.
A seasoned contractor helps you prioritize spending, ensuring your budget is channelled into durable, quality workmanship that enhances your home's long-term value. This strategic blend of DIY and professional help is the cornerstone of a truly successful and stress-free bathroom remodel on a budget. You’re now equipped with the knowledge to make smart, impactful choices that will bring your dream bathroom to life, proving that thoughtful design always triumphs over a limitless budget.
Ready to take the next step with a team that understands the unique needs of Greater Vancouver homeowners? For projects that require a skilled hand, Domicile Construction Inc. specializes in blending timeless design with practical, budget-conscious solutions to bring your vision to life. Contact Domicile Construction Inc. today to discuss how we can execute your renovation flawlessly, on time and on budget.